Some users complain that after changing a computer or updating to Windows 10 or Windows 11, their microphone is not working even if they have plugged their microphone in. The problem may be that their microphone can’t be recognized, or that it records no sound. To figure out how to solve this problem, we need to find where the possible reasons lie in.
Contents
- Reasons of Microphone not Working:
- Solution 1: Turn on Microphone in Settings
- Solution 2: Check Microphone Settings
- Solution 3: Update Drivers
- Solution 4: Run Recording Audio Troubleshooter
- Solution 5: Fix USB Ports Problem
- Solution 6: Check the Hardware
Reasons:
First, the connection of computer and microphone is one of the factors.
Next, this problem may be caused by some wrong settings of microphone, such as its volume and format, so checking related settings can help a lot.
In addition, issues with audio driver and hardware are also one of the reasons.
According to these possible reasons for the microphone not working issue, there are six solutions provided.
Solution 1: Turn on Microphone in Settings
Maybe your microphone does not work just because you didn’t turn on microphone in Settings. In this case, you can get it available easily by following the below steps:
1. Go to Settings > Privacy > Microphone.
2. Turn on Let other apps use my microphone if it is turned off.
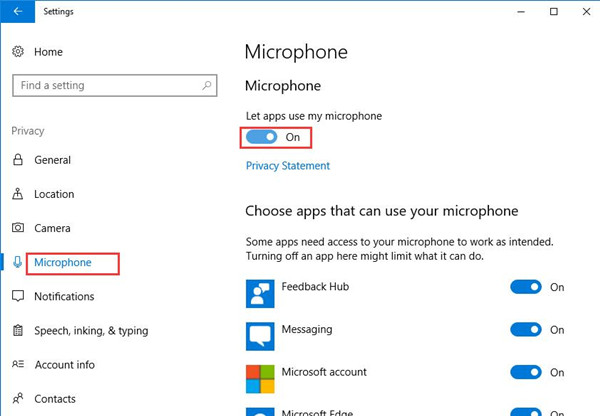
This method can solve the problem for those who had turned it off by accident. But for most cases, it is turned on and you need to use other solutions.
Solution 2: Check Microphone Settings
Many settings are related to the proper work of microphone. So there is a large possibility that microphone not working issue results from some wrong settings.
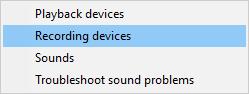
Right-click the Speaker icon in the right corner of taskbar and select Recording devices. Then you can check microphone settings as the following steps.
Step 1: Check the Connection of Microphone
Right click on any microphone device and make sure Show Disabled Device and Show Disconnected Devices are ticked.
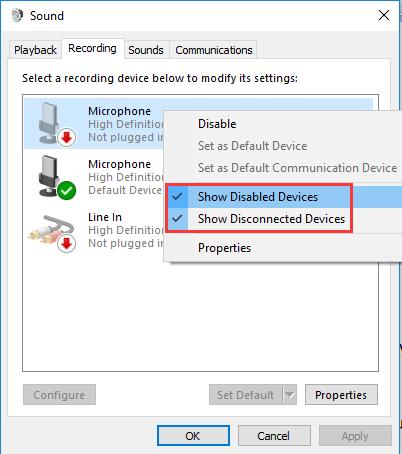
If the microphone device shows Not plugged in, you should check whether the jack connector you use is compatible with your computer and if it is plugged in the right position.
If it shows Currently unavailable, you can disconnect it, and then reconnect it to the port.
If it says Disabled, you can right-click it and Enable it.
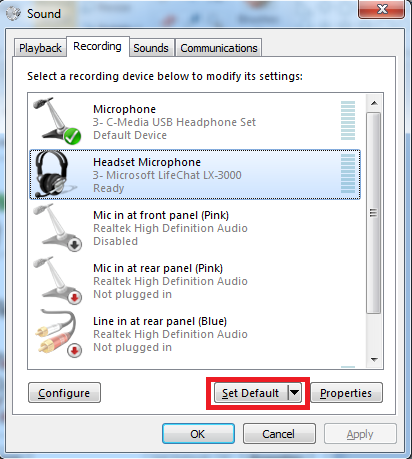
Step 2: Change the Default Microphone Device
A wrong microphone selected as the default will cause problems like the microphone not working with Skype or other Internet software. The way to change default microphone device is as the following.
Single click the microphone device you use and choose Set Default to make this device the default audio input device.
Step 3: Increase Microphone Volume
Single click the microphone device and click Properties button beside Set Default.
Choose Levels Set Microphone and Microphone Boost to the maximum level, and make sure there is no red mark on the speaker icon. Then click OK.
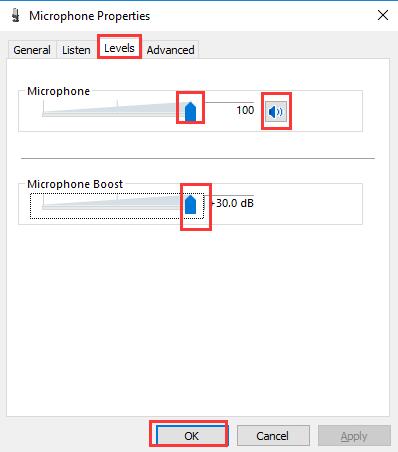
To ensure your microphone is not mute, you need to check your microphone’s sound switch as well.
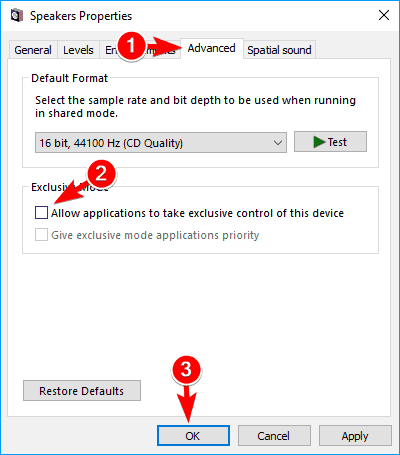
Step 4: Uncheck Allow Applications to Take Exclusive Control of this Device
If you are using more than one application at a time, you need to do this step to improve your microphone function.
Select Advanced tab in Microphone Properties window. Uncheck Allow applications to take exclusive control of this device. Then click Apply.
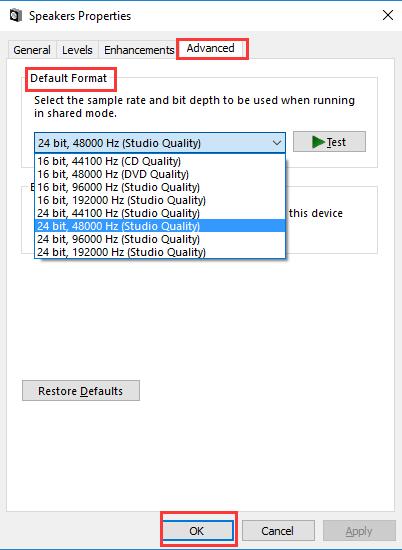
Step 5: Change Format of the Microphone
Select Advanced tab in Microphone Properties window again. In the Default Format select box, select another 16-bit option in the list. Then Apply this change.
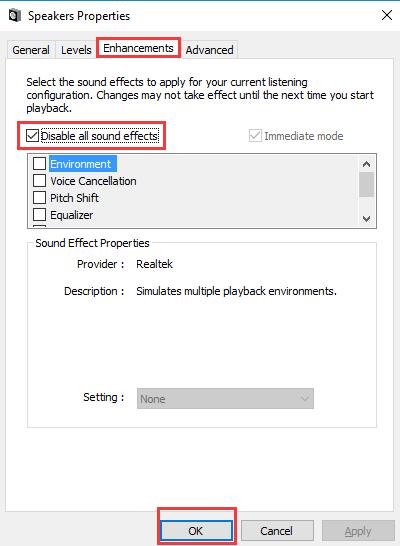
Step 6: Disable Enhancements
After select Properties of the microphone device, choose Enhancements tab. Then check the Disable all sound effects and click Apply.
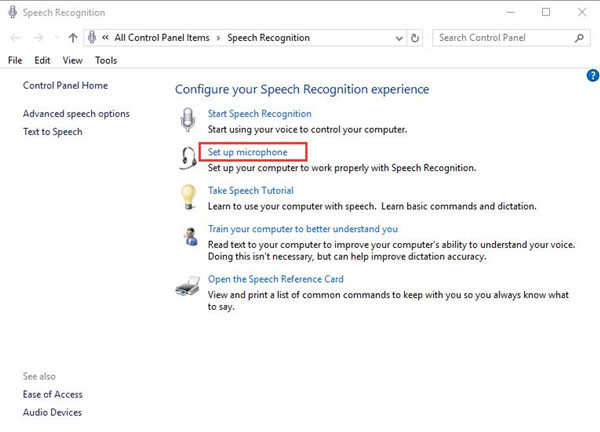
Step 7: Set up Microphone
Single click the microphone device on Sound window, and click Configure in the left bottom.
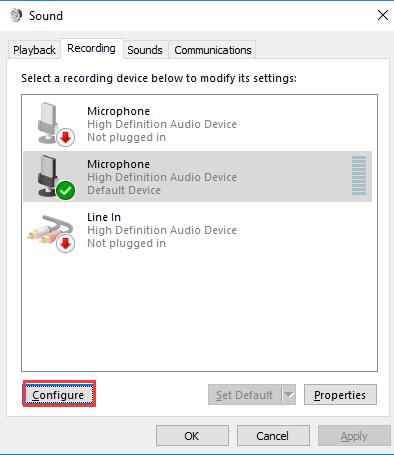
Choose Set up microphone.
Change your microphone type and click Next.
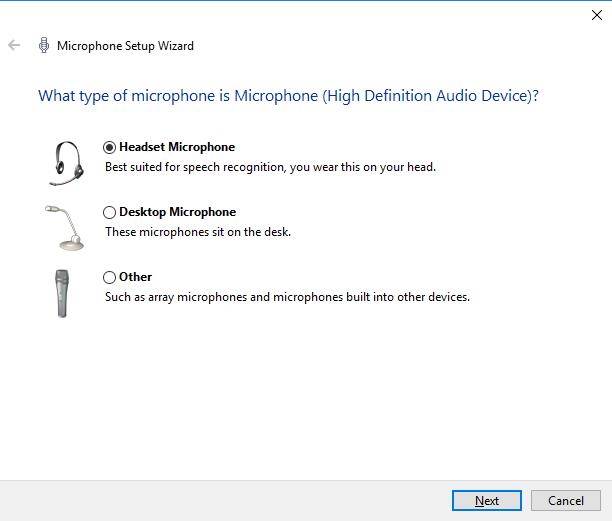
Then follow the Microphone Setup Wizard to set up your microphone.
If you find your microphone does not work when set as Headset Microphone, you can change to another type such as Desktop Microphone to try again.
Maybe you needn’t change all the settings mentioned above to fix your problem, but these all are settings that may cause the microphone not working problem. You can check them one by one to see which of them help.
Solution 3: Update Drivers
Problems in audio driver and microphone driver may cause microphone not working. Updating these drivers can help fix this error.
There are three options you can select from to update the audio driver.
Option 1: Update Audio Driver by Device Manager
1. Right click Start Menu and choose Device Manager.
2. Expand Sound, video and game controllers. Right click the audio device and select Update driver.
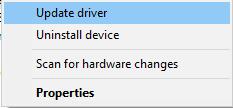
3. Choose Search automatically for updated driver.
Then it will search and install a new version audio driver for you.
Option 2: Download and Update Audio Driver Manually
Sometimes option 1 cannot detect the latest version driver for you, and you need to download and install the latest driver found on the manufacturer’s website manually.
You can search and download proper driver according to the driver information found in Device Manager. After you download it on the website, follow the installation wizard to install the driver.
Option 3: Download and Update by Driver Booster
1. Download, install and run Driver Booster in your computer.
2. Run Driver Booster and click Scan.

4. Locate your audio device in the list. Click Update below the device name.
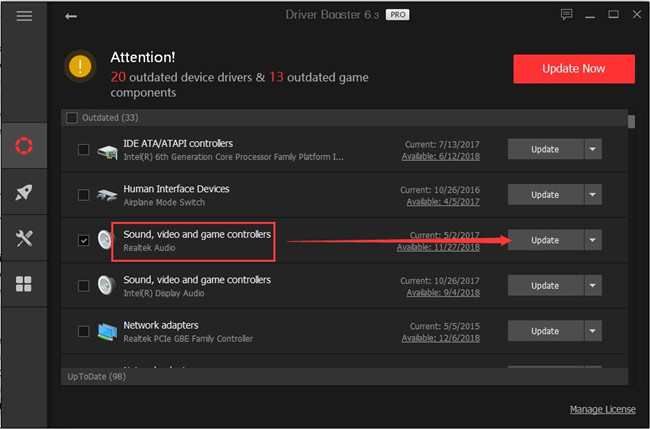
Then it will install the latest audio driver for you automatically.
As to updating microphone driver, you can also use the three methods. You will find your microphone device in Device Manager when expanding Audio inputs and outputs.
After you updated these two drivers, your problem should be gone.
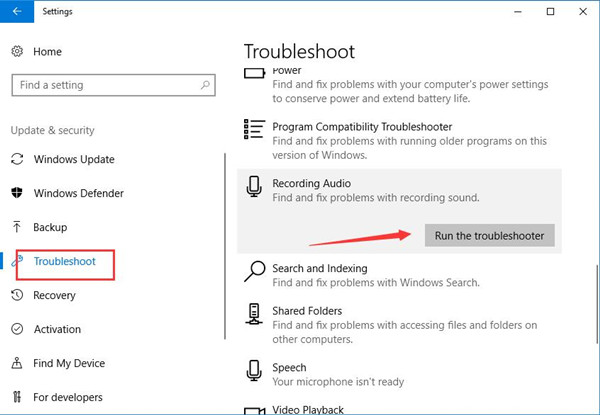
Solution 4: Run Recording Audio Troubleshooter
Recording Audio troubleshooter can help find and fix problems with recording sound. Here are steps to apply this troubleshooter.
1. Go to Settings > Update & security > Troubleshoot.
2. Select Recording Audio and click on Run the troubleshooter.
3. Then it will detect problems with recording sound.
4. Select the recording device you want to troubleshoot. Then click Next.
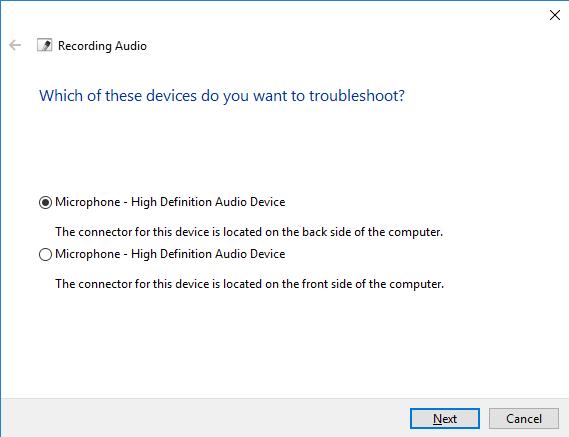
If there is any problem with recording audio, it will remind you. Then you can choose Apply this fix to fix this problem.
Solution 5: Fix USB Ports Problem
Sometimes a USB-connected microphone and headset do not work because of an error with the USB ports on the computer. To solve the problem of microphone, you have to make the USB ports work properly. You can refer to this passage to get solutions to fix a not working USB port.
Solution 6: Check the Hardware
If you still fail to make your microphone work properly after applying all these solutions above, the problem may lie in the hardware. You can connect your microphone with other computer to check if there are problems with the hardware.
Microphone Test:
After you try these solutions, you can test if your microphone works well now. Here is a method to test your microphone:
1. Type Voice Recorder in the search box. Then click it.
2. Click the microphone icon to start recording. Speak into the microphone.
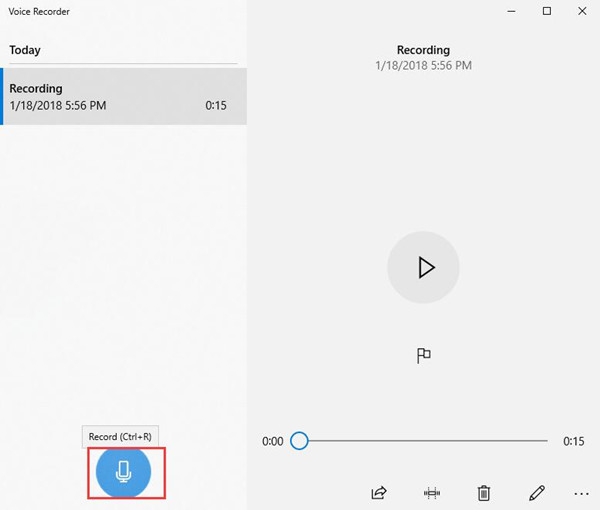
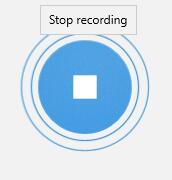
3. Click the blue button in the center to stop recording.
4. Click on the Recording on the left pane or click the Play icon, and it will start to play. You can listen to the recording and see if the microphone works well now.
These are all about how to solve microphone not working problem and how to test the microphone after you use the given solutions. Hope this passage can help you with this problem.
More Articles:
Fix Turtle Beach PX24 Headset/Microphone Not Working on Windows 11/10