Contents:
- Pen & Windows Ink Overview
- How to Customize Pen on Windows 10?
- How to Enable Windows Ink Workspace on Windows 10?
Pen & Windows Ink Overview
As a new feature brought by Windows 10, Pen and Windows Ink are the tools which are devoted to facilitating various operations on Windows 10. To better use of the pen, Microsoft provides you with an expanded pen supporting on Windows 10, namely Windows Ink Workspace.
With the Windows Ink Workspace, as long as you have a connected pen on Windows 10, you can gain the access to the different Windows Ink functionalities, such as Sticky Notes, Sketchpad, and Screen Sketch. On the other hand, your Pen on Windows 10 will work more smoothly under if you have enabled or turned the Windows Ink Workspace on.
This post is concentrated on making it clear about how to personalize or use Pen and Windows Ink on Windows 10. Of course, it is indispensable as well to teach you the way to let Windows Ink Workspace get started on Windows 10.
How to Customize Pen on Windows 10?
Usually, if you are using a Pen on Windows 10, it is inevitable that you come across numerous issues of the Pen and Windows Ink, for they are closely associated with each other. In most cases, you simply want to adjust the settings for Pen and Windows Ink in Devices.
1. Click Start Button and choose Settings.
2. Select Devices from Windows Settings.
3. Navigate to Pen & Windows Ink, change or personalize Pen settings.
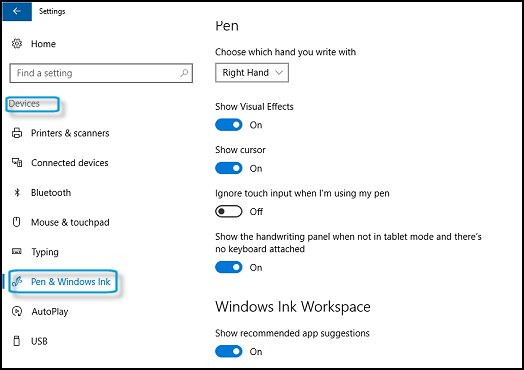
For Choose which hand you write with the Pen, you can set the Right hand or the Left Hand.
Here, for instance, if you are left-handed, it is no doubt that you should choose Left Hand.
For Visual effect, it means that you can choose whether to show the writing content or not.
For Show cursor, it is suggested that you turn it off, for the cursor will appear so long as your Pen get closer to the screen.
For Ignore the touch input when I’m using my Pen, when you are typing, you are able to avoid the palm influence by enabled this option.
For Show the handwriting panel when not in tablet mode and there’s no keyboard attached, once turned on, the handwriting panel will show in the notification area.
Here, you can also Change Windows Ink Workspace settings, such as Show recommended app suggestions.
At this point, it is certain that you can use and configure Pen and Windows Ink on Windows 10. But if you still have no idea about how to enable Windows Ink Workspace on Windows 10, the advantages that Pen and Windows Ink offer are not accessible to you as well. So go ahead to do more settings about Windows Ink Workspace.
How to Enable Windows Ink Workspace on Windows 10?
As discussed above, if you hope to use or efficiently use the connected Pen on Windows 10, it is a must for you to turn on the Windows Ink Workspace. In this way, obey the following guidance to get the Windows Ink Workspace started on Windows 10.
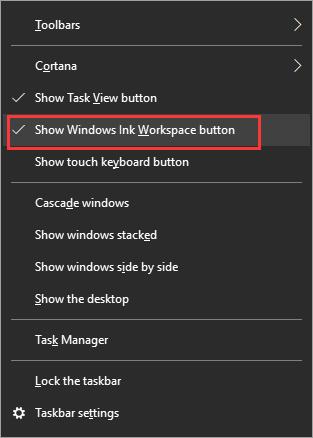
1. Right-click the taskbar and choose Show Windows Ink Workspace button. The Taskbar is usually set at the bottom of the desktop.
Then you can the Windows Ink apps come into sight, such as Sticky notes, Sketchpad and Screen sketch. And if you have opened the option that shows recommended app suggestions, you can also see the suggested apps.
As for the different apps in Windows Ink Workspace, it is suggested that you try to use them according to their features.
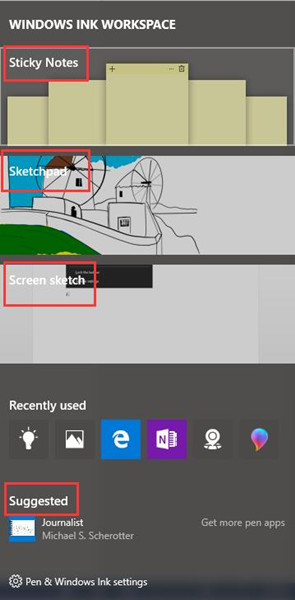
If you wish to make use of any one of them, just click it in Windows Ink Workspace.
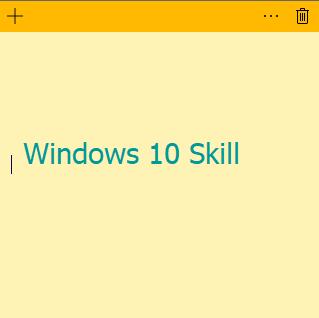
With Sticky notes, you can write a note for the purpose of reminding you of something, such as appointments or events or telephone numbers.
With Sketchpad, you are able to draw a line with the ruler or picture something you like, for there are various tools for drawing. It is no less than what you need to draw on a paper.
With Screen Sketch, the best and unique thing you can do is make a screenshot. For instance, if you want to highlight one point in a web page or in a document, it is a wise choice for you to complete it with the help of Screen Sketch in Windows Ink Workspace.

From the above analysis, it is apparent that from this tutorial, you are able to learn how to use and personalize Pen and Windows Ink settings on Windows 10. And meanwhile, you are proficient in enabling and using Windows Ink Workspace on Windows 10.
More Articles:
Photoshop Pen Pressure Not Working on Windows 10, 8, 7