HDMI is a proprietary interface used to transmit high-resolution digital video and audio from an HDMI-compliant source. In order to keep your HDMI device running in good condition and avoid problems such as no sound, intermittent pictures, blurred screens, poor resolution, etc, you need to confirm that your device has installed the latest version of the HDMI driver.
This post will show you how to download, update and install HDMI drivers for Windows 10 and 11 in three different ways.
# What is HDMI?
HDMI stands for High-Definition Multimedia Interface and is an HD signal most commonly used to transfer audio and video content from one device to another. There are different sizes of HDMI ports, including mini HDMI and micro HDMI. HDMI problems often manifest in the form of distorted video or audio output, or in worse cases, no output at all.
In fact, you don’t need drivers for the HDMI port or the HDMI cable because the HDMI port will function properly when all connected components are communicating properly. So the actual solution to this problem is to update HDMI-related drivers such as display drivers, HDMI adapter drivers, etc.
# Method 1: Update HDMI Driver via Device Manager
As mentioned earlier, an HDMI port or cable does not require proper driver software to function properly. If you have installed a corrupt or outdated graphics driver, you may experience HDMI issues in your Windows computer. Updating HDMI-related drivers such as graphics card drivers, HD device drivers, monitor drivers, etc is an effective way to resolve HDMI issues.
If you want to update such drivers, you can use the built-in Device Manager application to download and install HDMI drivers on your Windows 10, 11 laptops, or desktop PCs. Here are the steps to follow to get the latest drivers for HDMI using Windows Device Manager.
Step 1: Press Windows + X to choose Device Manager.
Step 2: Double-click Display adapters.
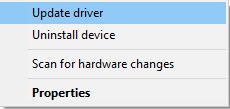
Step 3: Right-click the display driver you wish to update.
Step 4: Select Update driver.
Step 5: Click Search automatically for drivers.
If an update is available, it will be downloaded in the background.
Step 6: Once you download the setup file, double-click on it and follow the on-screen instructions to install the latest drivers.
# Method 2: Update HDMI Driver Automatically (Recommended)
Outdated drivers can prevent HDMI ports from working properly. Therefore, updating your device drivers is crucial. To update HDMI port drivers on Windows 11 and 10, we recommend you use professional software to update them. You can use Driver Booster which is an excellent driver update tool. With the help of this software, you can simply scan and update all drivers at once.
Driver Booster is a software designed to update old or outdated drivers on Windows. It regularly scans your hardware drivers and updates any old drivers as well as drivers that no longer work. Working with just one click, Driver Booster is suitable for both experienced and novice users. It consists of a database of over 3 million drivers and game components from companies such as NVIDIA, AMD, and Intel.
Apart from keeping your Windows device updated, Driver Booster also offers various tools that help improve the gaming performance of your device. You can use it to fix device problems, view complete information about your system, and create multiple restore points. Hence, updating outdated drivers with Driver Booster is more convenient and hassle-free than other driver update tools.
Step 1: Download, install and run Driver Booster on your Windows PC.
Step 2: Click Scan. Driver Booster will then scan your computer and detect any problem drivers, and after detection, you will know clearly which drivers should be updated.

Step 3: Click the Update button next to your graphics device (NVIDIA GeForce GTX 750 Ti in my case) to update the graphics driver.

Step 4: Wait for the application to download and install the newest graphics drivers.
Step 5: Restart your PC for the changes to take effect.
Tips:
You can also click Update Now in the upper right corner to automatically download and install the correct versions of any missing or outdated drivers on your PC to keep your system working optimally (this requires the Pro version).
# Method 3: Update HDMI Driver via the Manufacturer’s Website
As many users have reported, Windows’ built-in Device Manager may not be able to find the latest drivers or it may not be downloading the latest drivers at all. In this case, you must obtain the driver from the manufacturer and install it manually.
Graphics adapter manufacturers are constantly updating drivers in order to add features and fix issues from time to time. To get them, you’ll need to visit the manufacturer’s website and find the correct driver for your operating system, then download the driver manually. Here’s how to do it:
Step 1: Press Win + X and select Device Manager.
Step 2: Expand the Display Adapter section and note your graphics card model.
Step 3: Go to the support page of the official site of your graphics card device.
For Intel Drivers: If your system has Intel Graphics, you can simply download the latest ones from the Intel Support site.
For NVIDIA Drivers: For an NVIDIA GPU, you can go to NVIDIA’s driver page to download the latest compatible driver.
For AMD Drivers: If your PC has an AMD graphics device, you can specify your GPU model on the AMD support page and download the latest available drivers.
Step 4: Download the latest driver that is compatible with your Windows version (for example, Windows 10 64-bit).
Step 5: Once you’ve downloaded the correct driver for your system, double-click on the downloaded file and follow the on-screen instructions to install the driver.
Step 6: Restart your PC.
# FAQ about HDMI Driver
If you’re facing no signal error on your PC, it could be due to the monitor ignoring the graphics output from your PC. In this case, make sure that the input source on your monitor is correctly set. If not, switch it to the correct source (HDMI) and check if the monitor works again.
Your HDMI port or cable does not require drivers. The HDMI port automatically detects connected devices and communicates with them. However, you may experience HDMI issues if your graphics drivers are outdated. So, you just need to make sure your graphics card drivers are up to date.
The HDMI cable you’re using might be malfunctioning or too old to perform adequately. Try a different HDMI cable to see if it solves your issue. Alternatively, you can use the first HDMI cable to connect a different video device to check if the video device is malfunctioning.
You can enable the HDMI port on your PC by opening the Control Panel, navigating to Sound > Playback, clicking the ‘Digital Output Device (HDMI)’ option, and finally, clicking ‘Apply.’
The difference between an HDMI 2.0b and an HDMI 2.1 cable is the supported resolution and refresh rate. HDMI 2.0b supports a 4K resolution with a refresh rate of 50Hz, so images aren’t always displayed smoothly. You can watch smooth images at the highest quality because HDMI 2.1 supports an 8K resolution with 50Hz.
More Articles:
Fixed: HDMI Sound Not Working on Windows 10/11