Would you like to let different users logging up to your computer without interrupting the activities of each other? You may need to enable to disable Fast User Switching on Windows 10. This article would let you be familiar with the functionality and ways to make use of this feature on Windows 7/8/10.
What is Fast User Switching?
The Fast User Switching is a feature in Windows systems to allow users to sign in with multiple accounts with no interruption to the software or programs in the signed in account.
Once the Fast User Switching is activated, all the resources, such as video, sound, are to be shared among the users of the computer.
In this way, many of you would rather turn off this feature on Windows 10 for sake of safety.
How to Disable Fast User Switching on Windows 10?
There are two options you can choose to close the feature — Fast User Switching, namely, from the group policy and registry editor.
You are to change the settings in these two programs so as to enable or disable the quick user switching feature on Windows 10.
Solution 1: Use Group Policy to Turn off Fast User Switching
Group Policy is the system program for users to change system settings for Windows 10. Whatever your aim is, enable or disable the user quickly switching, you are able to finish it in the Group Policy.
1. Press Windows + R to wake up the Run box.
2. Input gpedit.msc in the box and hit OK to navigate to the Local Group Policy.
3. In Group Policy, find out Computer Configuration > Administrative Templates > System > Logon.
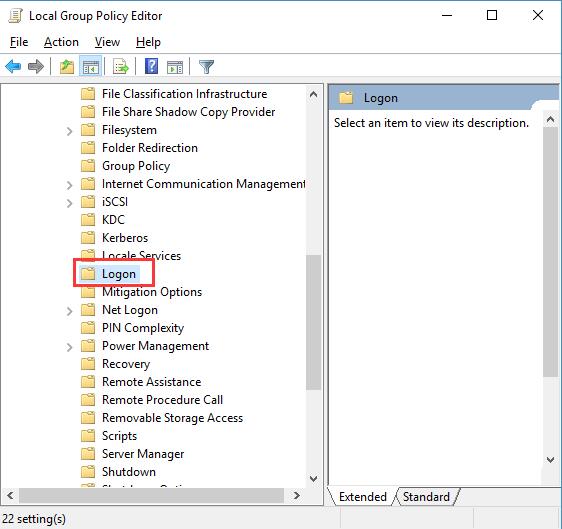
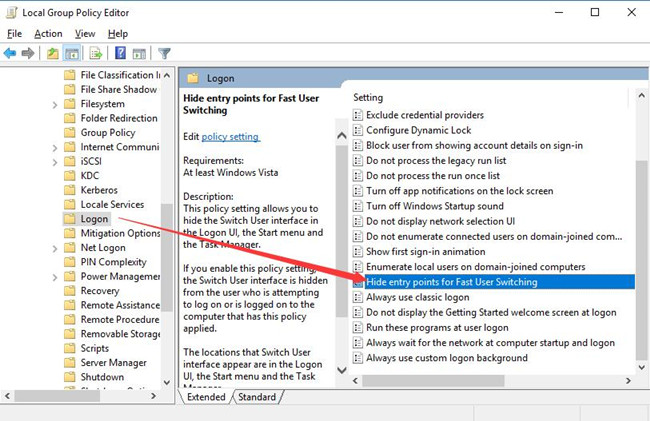
4. Choose Logon and in the right pane, locate and double click Hide entry points for Fast User Switching to edit it.
5. In Hide entry points for Fast User Switching, tick the box of Enabled to disable the Fast User Switching.
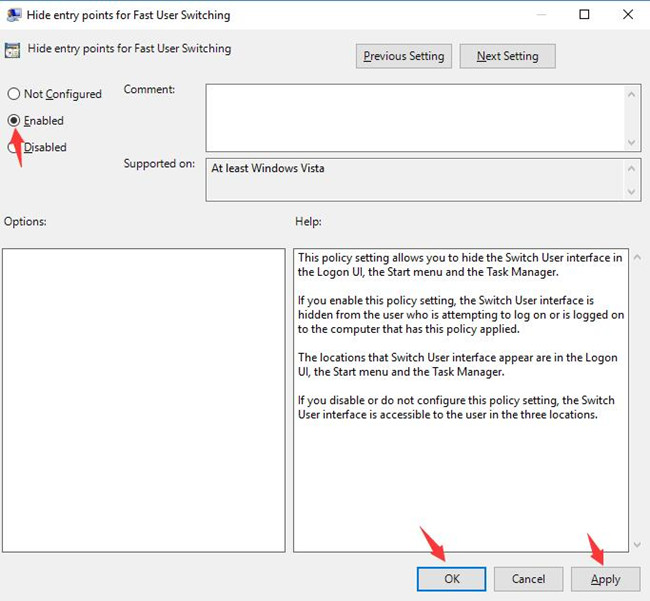
6. Then click Apply and OK to take effect.
At that time, your computer would not allow different accounts to log on to Windows 10 at the same time.
While if you would like to enable or turn on the feature on Windows 10, just set the Hide entry points for Fast User Switching as Disabled.
Solution 2: Use Registry Editor to Disable Fast User Switching
It is also feasible for you to turn on or off the Fast User Switching from the registry editor. If you are determined to do that, follow up.
1. Hit Windows + R to the Run box.
2. In the box, type in regedit and then click OK.
3. In Registry Editor, go to HKEY_LOCAL_MACHINE\SOFTWARE\Microsoft\Windows\CurrentVersion\Policies\System
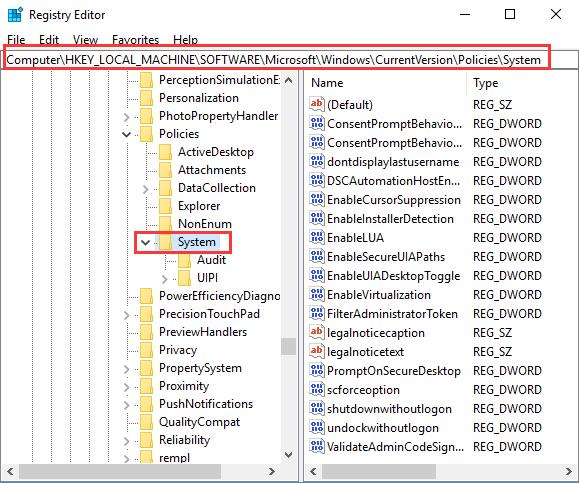
4. Pinpoint System and then on the right pane, right click the blank place to create a New DWORD (32-bit) Value.
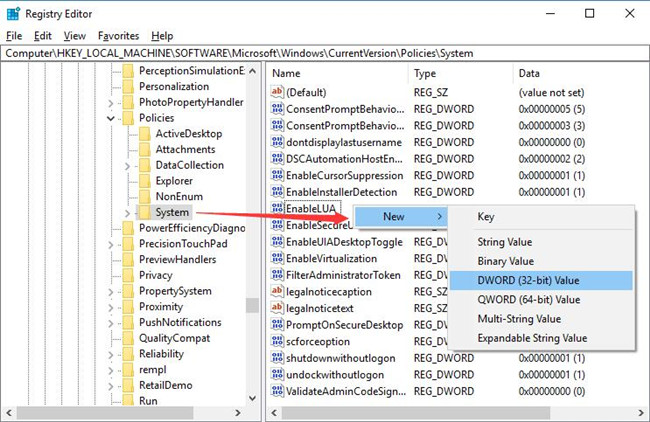
5. Name the newly created DWORD (32-bit) Value as HideFastSwitching.
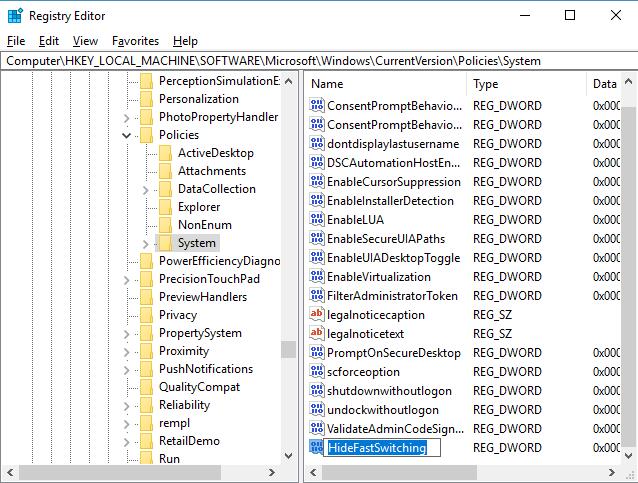
6. Double click the HideFastSwitching to modify its value.
7. Set the HideFastSwitching Value data as 1.
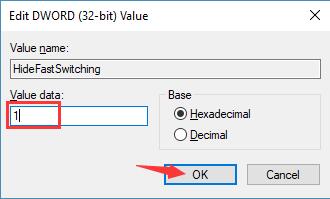
Here you can see the value data at first is 0, change it to 1 to disable the Fast User Switching.
8. Restart your PC.
When you login in again, you can see obviously that the feature Fast User Switching is no longer available on Windows 10. Other accounts would be required to log out.
In this case, if you hope to enable the disabled fast user switching choice, it is also quite foolproof, just set the value data back to 0.
In a word, from this post, it is natural that you are able to learn the skills to turn on or off the Fast User Switching feature on Windows 10. You can decide you want to complete this task in group policy or local registry editor.
Related Articles:


