The moment you get to the group policy editor, you may need to learn how to use the group policy management console to change some settings in group policy.
And it is necessary for you to know for sure what you are to do in this editor, which requires you to acquaint yourself with the configuration tabs in the Windows gpedit.
How to Use the Group Policy Editor on Windows 10?
As long as you opened this editor for local group policy, you can see the main snap-ins about the configurations. Here you are to touch the sketchy usage of the local Group Policy Editor.
The Introduction to Local Policy Editor Interface
The uses of the group policy management console are rather easy, what frustrates you may be the configuration for computer and user. Therefore, you would be prompted some detailed information about the group policy editor interface.
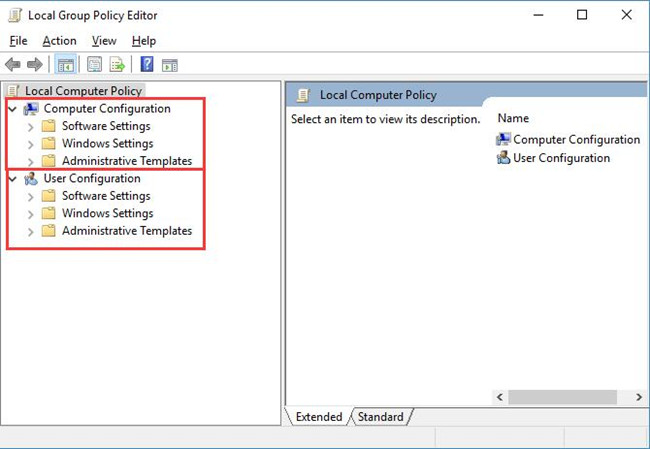
On Group Policy Editor Interface, there are two main branches in the editor. They are Computer Configuration and User Configuration.
You must make sure you have the administrative rights or privileges when you hope to configure the group policy in this Editor.
Under Computer Configuration, you are entitled to adjust the policies for Software, Windows, and Administrative Templates. Under the sub-items of each setting, it is accessible if you feel like to define the computer.
Under User Configuration, with the administrator account, you can also change the policies only for the user account on the local computers, such as redefining policies for Software Settings, Windows Settings, and Administrative Templates.
A Specific Use of the Group Policy Editor
Now for your reference, this post would show you how to use the Local Group Policy Editor on Windows 10 with the example removing games link from Start menu.
With this reference, you are able to change policies using the group policy editor easily.
1. Open the Group Policy Editor.
Here since my PC is Windows Professional, the group policy on my computer is Local Group Policy.
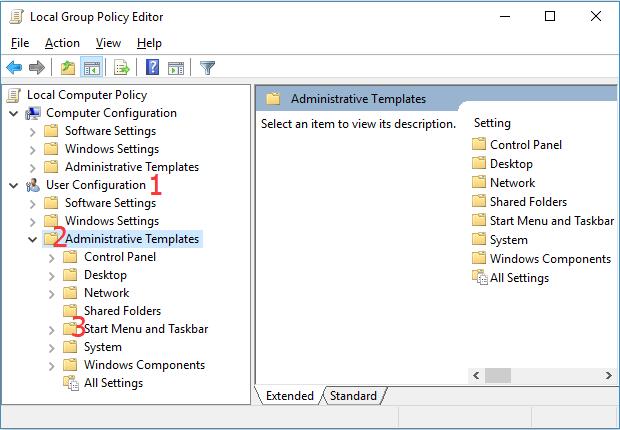
2. Under User Configuration, click to expand Administrative Templates and then choose the sub-item Start menu and Taskbar.
3. Under Start menu and Taskbar, on the right pane, double click Remove Games link from Start menu.
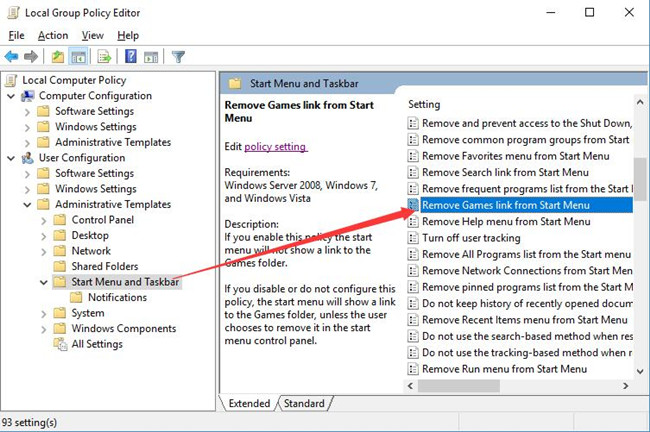
Here you could also do many things, such as Remove Help menu from Start menu and Remove pinned programs from Start menu.
4. The Remove Games link from Start menu window would come up at once, choose to set the option Remove Games link from Start menu as Enabled.
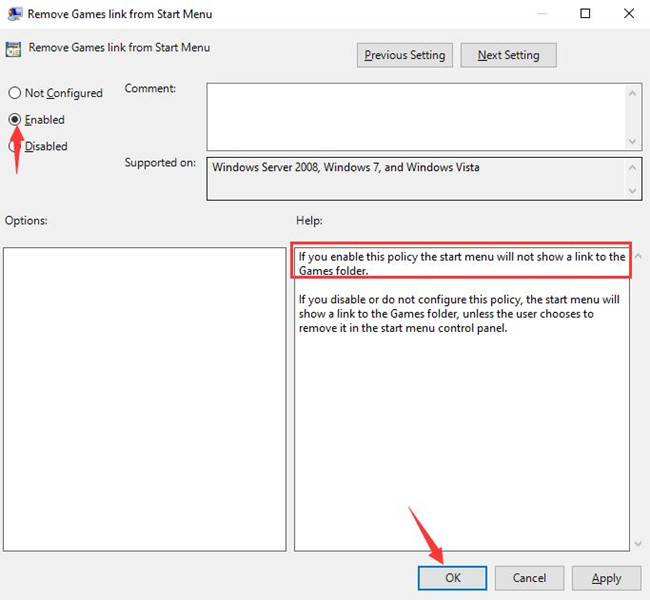
5. Then hit Apply and OK to save changes.
Here you can see the Help saying if you enable this policy the Start menu will not show a link to Games folder.
Now you will have edited the group policy for the games link on Windows 10.
But in any case, if you feel like to change the settings back to the previous, here, for example, if you want to show games link in Start menu, just choose to make Remove Games link from Start menu Disabled.
In a word, the group policy editor can be extremely useful when you would like to define something for the local computers.
From this article, you can get the basic configuration and the specific uses of the local group policy editor on Windows 10.
More Articles:
How to Enable Group Policy Editor on Windows 10 Home

