The company that developed the Conexant Audio program went out of business due to application and driver issues. When you start your PC and receive an “A Conexant Audio Device Could not be Found” error message, you may not be able to get official support. That’s why it’s important for you to know how to fix common Conexant audio driver issues on your own.
Did a lot of research and found ten solutions that have been helpful for others to overcome this issue on their PCs. Please read this article to perform some updates, uninstalls, checking, and settings changes to fix it quickly.
Solution 1: Disable Automatic Driver Updates
Automatic driver updates eliminate the need to manually update drivers. When you connect a new hardware device, Windows can automatically install the necessary drivers.
However, it is very common to encounter issues with Conexant audio drivers after Windows driver updates. This is because Conexant chipsets are an older generation and are generally not compatible with Windows 10 default drivers.
Therefore, you can prevent it from happening by disabling automatic driver updates on Windows.
That’s it:
Step 1: Click Windows icon and the select Settings.
Step 3: Navigate to System > Advanced System Settings.
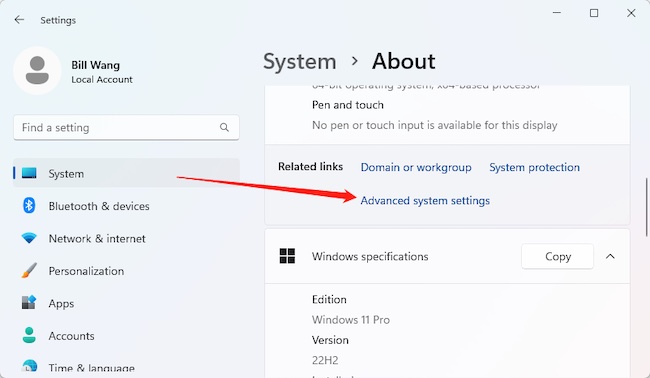
Step 4: In the System Properties window, switch to the Hardware tab and click the Device Installation Settings button.
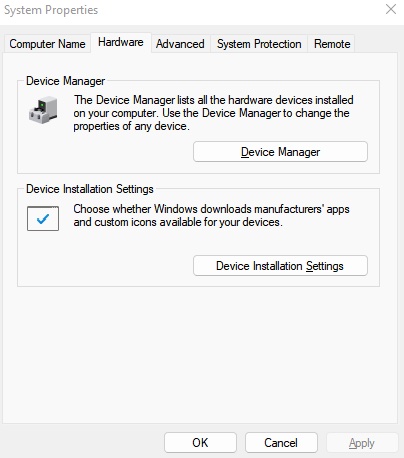
Step 5: Select No and click Save Changes.
Solution 2: Change Default Sound Format
“A Conexant Audio Device Could not be Found” issues can be caused by audio frequency and bit depth. Normally, Windows 10 sets your audio output to the standard format of 48kHz, 24-bit studio quality. Changing the speaker’s default sound format changes the audio frequency.
Therefore, you can try to change the default sound format to solve this problem:
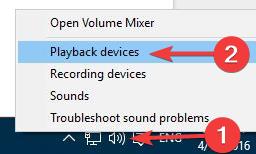
Step 1: Right-click on the Speakers icon in the taskbar and select Playback devices.
Step 2: Double-click on the default playback device to open.
Step 3: Go to the Advanced tab.
Step 4: Alter the bitrate under the Default sound format, and try to find the one that works for you.
Solution 3: Disable Audio Enhancement
Microsoft and third-party vendors have released audio enhancement packages designed to make your system’s specific hardware sound absolutely perfect. These are called Audio Enhancement in Windows 10.
But sometimes, these very “enhancements” can trigger the “A Conexant Audio Device Could not be Found” issues.
Therefore, disable audio enhancement:
Step 1: Right-click on the Speakers icon in the taskbar and open Playback devices.
Step 2: Open your default playback device by double-clicking on it.
Step 3: Go to the Enhancements tab and check Disable all enhancements.
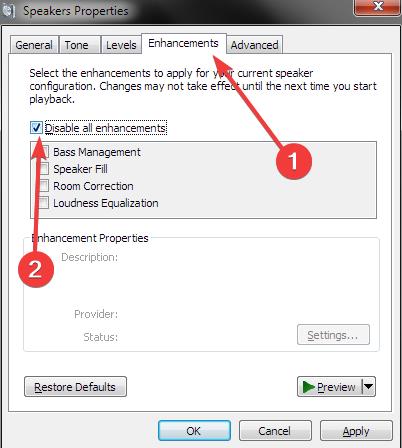
Step 4: Click OK and restart your computer.
Solution 4: Run the Audio Troubleshooter
It’s worth running the built-in audio troubleshooter before moving on to other methods. This allows Windows 10/11 to sometimes identify and fix problems on its own. These Windows troubleshooters don’t always solve the problem, but they’re worth a try before you dig in.
To run the audio troubleshooter:
Step 1: Go to the Settings option from the Start menu.
Step 2: Then select the System tab.
Step 3: Select the Troubleshoot option from the list.
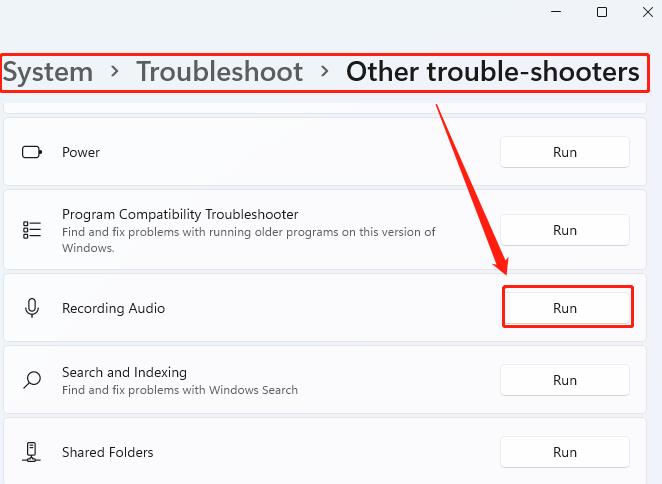
Step 4: Click the Other trouble-shooters option.
Step 5: Find the Recording Audio option.
Step 6: Click on the Run.
Solution 5: Changing Memory Settings
In some cases, your memory settings may be affecting the driver as it cannot utilize enough RAM to keep the audio working. Therefore, changing the memory settings can help you get rid of audio issues and can help fix Conexant audio-related issues.
Step 1: Hit the Windows key + R together to open a Run.
Step 2: In the search box, type MSConfig.
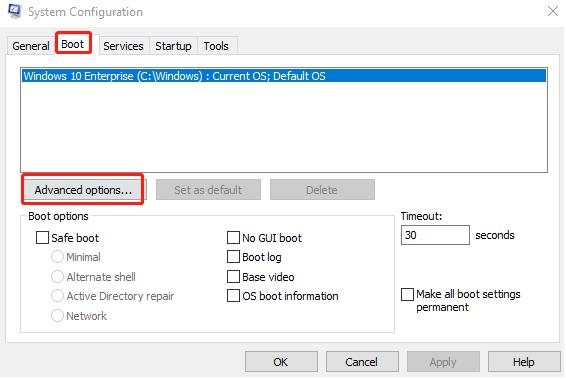
Step 3: Open the Boot tab.
Step 4: Select the Advanced option.
Step 5: Check the box beside the Maximum memory and set the value to 3072.
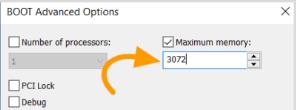
Step 6: Set it to 4096; if 3072 is not available.
Step 7: Restart your PC.
Solution 6: Update the Conexant Audio Driver
The best solution to fix the “A Conexant Audio Device Could not be Found” issue is to update the Conexant SmartAudio drivers. Because, in some cases, Conexant audio device issues can also be related to outdated drivers. You can download the latest drivers from the manufacturer’s website. But it is highly recommended to update your Conexant audio drivers with a reliable driver utility like Driver Booster.
Driver Booster automatically scans outdated drivers, downloading and installing the correct updates for you with just one click. Driver Booster has 3.5 million drivers and game components. You don’t have to look for drivers on multiple websites. If one of your devices is so old that even the official website has disabled the driver, then you have nothing to worry about. Driver Booster collects such rare drivers.
Besides, Driver Booster provides drivers that are not only up-to-date, but also safe. Driver Booster only pushes driver updates if they pass Microsoft WHQL tests. Not only WHQL, IObit also tests the drivers by itself. So the drivers you download on your PC are crossed with two quality controls. All in all, Driver Booster is the best software to update drivers automatically.
Step 1: Download, install and run Driver Booster.
Step 2: Scan for outdated drivers.

Launch Driver Booster and hit the Scan button to start the scanning process. After scanning, the program will tell you about outdated drivers and provide you with a direct download link to the latest version of the driver.
Step 3: Updating Drivers.
Find out your Conexant SmartAudio device in the outdated driver list and Click the Update icon next to it. You can also choose to update all drivers by clicking the Update Now icon at the top right.
Solution 7: Use High Audio Definition Device
High Definition Audio Device means that you are using Microsoft’s generic audio driver, not the hardware manufacturer’s driver. If the problem with your computer is the Conexant SmartAudio driver, you could try using High Definition Audio Device and see if that works. Here’s how to switch to it:
Step 1: Open Device Manager.
Step 2: Expand Sound, video and game controllers.
Step 3: Right-click on Conexant SmartAudio HD.
Step 4: Click Update Driver.
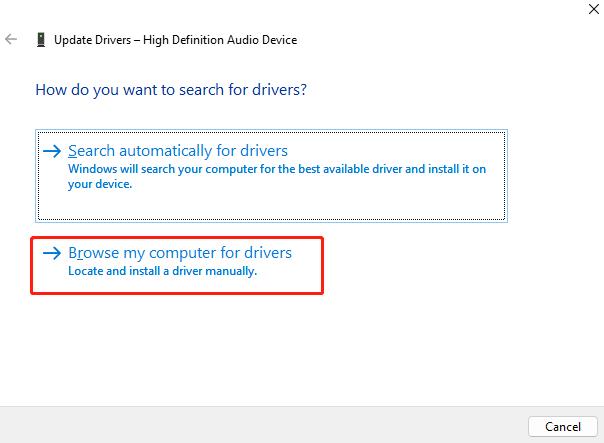
Step 5: Select Browse my computer for drivers.
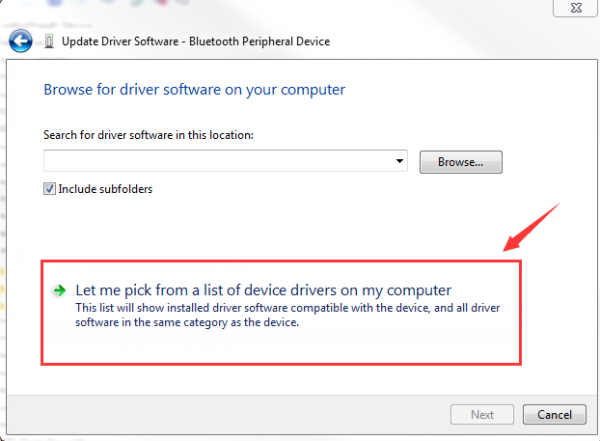
Step 6: Click Let me pick from a list of available drivers on my computer.
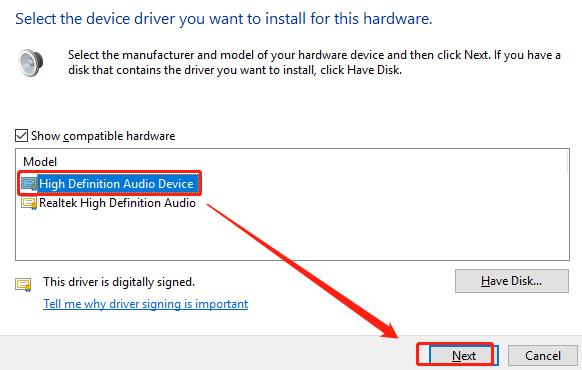
Step 7: Select High Definition Audio Device and click Next.
Solution 8: Check the Window Sound Setting
Windows can handle multiple audio inputs and outputs. It automatically detects the audio device, but sometimes it picks the wrong one. Therefore, check that the connected audio device is selected as an output device in the sound settings.
Step 1: Search for Sound Settings on the Start menu.
Step 2: It will take you to sound settings where you can select both output and input devices.
Step 3: From the dropdown menu, select your correct audio output device.
Solution 9: Uninstall and Reinstall the Audio Driver
If updating your drivers is not enough to resolve the “A Conexant Audio Device Could not be Found” issues, you may need to uninstall the Conexant Audio driver to try and resolve the issue.
Step 1: Hit the Windows key + R together to open a Run.
Step 2: Type devmgmt.msc and hit Enter to open Device Manager.
Step 3: Double-click on the Sound, video, and game controllers option.
Step 4: Select the Conexant SmartAudio HD option.
Step 5: Hit the Uninstall option and restart your PC.
Step 6: Download the latest Conexant driver package from your brand’s official support website. For example, Lenovo support, Dell support, HP support, etc.
Solution 10: Check the Hardware
If you’ve tried all of the above and still can’t get your Conexant audio device to work, it’s time to take a look at the hardware and connections.
First, check that the audio device is connected to your PC with the correct cable and port. Don’t confuse ports with cables.
Then, check for any cable damage. Twisted, frayed or damaged wires can cause problems with audio and sound settings.
Finally, if you have spare speakers, try connecting them in case there is an internal failure in the sound system.
# FAQ
Windows updates, malware and viruses, incorrect settings, outdated drivers, or malfunctions can all trigger this “A Conexant Audio Device Could not be Found“ issue.
The Conexant audio driver is part of the Conexant SmartAudio program, which sends instructions through an interface to the operating system of a computer with Conexant audio hardware.
Try updating your drivers, disabling audio enhancement, changing maximum memory, changing the default sound format, and running the Audio Troubleshooter.
Yes, this driver can be uninstalled. But you have to be aware that drivers play a special role. Once uninstalled, the hardware they control will no longer function properly.