Problems with keyboards of certain laptop brands are common. One of them is Lenovo. Users often report that the “Lenovo laptop keyboard is not working” issues. If your Lenovo laptop keyboard has stopped working, don’t worry.
Today, we’re going to cover nine different ways to get your Lenovo laptop keyboard working again. You can easily fix the Lenovo keyboard not working issue by using one of the solutions below.
Why is my Lenovo laptop keyboard not working?
Because the keyboard is built-in hardware in a laptop, there are several reasons why it might not work. The list below contains all possible causes.
- 1. Physical Damage: There is dust and debris in the keyboard, or the keyboard has been hit in some way. Therefore it is damaged and will no longer work.
- 2. Connection issues: Some connections may be broken or not seated properly or not connected properly.
- 3. Missing or outdated drivers: Drivers link hardware to software, so if your keyboard drivers aren’t up to date, it could be the source of the problem.
- 4. Incorrect settings: Sometimes, you may have activated a setting that affects the usability of your keyboard.
- 5. Outdated operating system: If the operating system is outdated, the keyboard and many other computer components may start to malfunction.
Solution 1: Restart your Laptop
Whenever you experience PC issues, restarting your computer is the first thing to try before further troubleshooting. It is quick and easy, and may fix the keyboard not working problem you’re having.
This solution will give your computer a fresh start by restarting all system services, drivers and programs and refreshing your computer RAM.
The good news is you can do this with a mouse or touchpad. So try this solution first and see if the keyboard works after a reboot.
Solution 2: Use the Keyboard Troubleshooter
If your Lenovo laptop keyboard has stopped working, you can try running the Keyboard Troubleshooter to resolve Lenovo keyboard-related issues.
Windows has a built-in troubleshooter tool that scans for and attempts to fix any problems found. This doesn’t perform very detailed diagnostics, but it can find common problems and try to fix them.
This solution works for many users who are facing laptop keyboard not working issues, it might help you too. Follow the steps below to troubleshoot specifically for your keyboard.
Step 1: Press Windows + I to open Settings on your laptop.
Step 2: Select Update & Security.
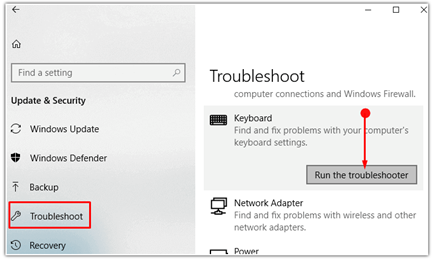
Step 3: On the left pane, click on Troubleshoot.
Step 4: Navigate down on the right pane and tap on the Keyboard option.
Step 5: Then select Run the troubleshooter.
Step 6: Wait a few minutes for the troubleshooter to run, and try using your keyboard again.
Solution 3: Turn off Windows Keyboard Shortcuts
In Windows 10/11, there is a feature called Filter keys, which aims to ignore repeated keystrokes and make binding easier. But this could be the culprit for your Lenovo laptop keyboard not working properly. If your keyboard isn’t working, you can turn it off.
Take the following steps:
Step 1: Right-click on Windows 11 Start menu and select Settings.
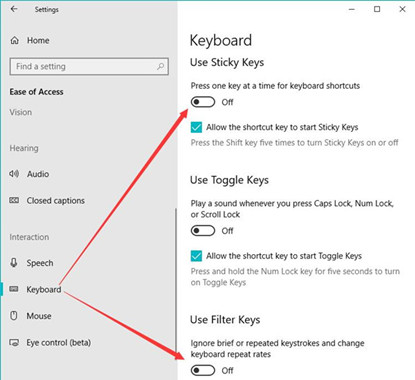
Step 2: In the Settings app, select Accessibility from the left pane.
Step 3: Now, take your cursor on the right side of the page and scroll down till you find the Keyboard tab.
Step 4: On the Keyboard page, you will find both Sticky keys and Filter keys tabs. Turn off the buttons next to these tabs to disable both of these features.
Solution 4: Reset the Keyboard
From time to time, you may have some software that changes the way your keyboard works. Or maybe you added some custom keyboard shortcuts or hotkeys.
If your Lenovo laptop keyboard isn’t working the way it should, it might be time to reset the keyboard keys to their default settings. That way you don’t have to spend money on new ones.
Step 1: Turn off your laptop and unplug it from the power.
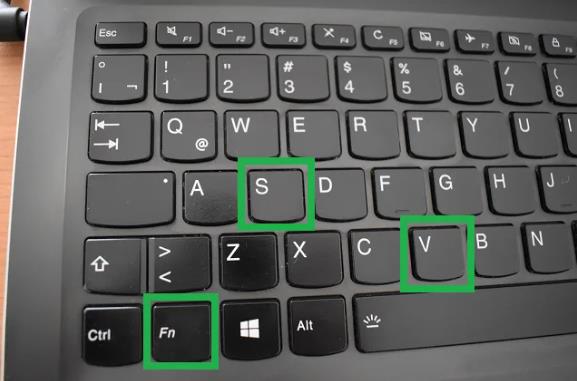
Step 2: Hold down the Fn + S + V keys for a few seconds. Then release them.
Tips: On some Lenovo models, please press the AltGr + S + V keys for 15 seconds.
Step 3: Press the power button for 1 minute. This will reset the keyboard to its default settings.
Step 4: Reconnect your laptop to power and turn it on.
Try the keyboard. This should already work correctly.
Solution 5: Update your Windows Keyboard Drivers
If the problem of your Lenovo laptop keyboard not working has not been resolved, then the method of updating Lenovo keyboard driver will definitely work for you. As we all know, the process of manually updating Lenovo keyboard drivers is tedious and requires a lot of patience and time. To save time and frustration, using a reliable driver update utility is highly recommended.
Driver Booster can detect corrupt, mismatched or outdated drivers and deal with them. It has a large online database of over 4.5 million device drivers. It is safe because the drivers in its database pass the complex tests of Microsoft WHQL and IObit review. IObit Driver Booster is also the best PC optimizer that uses its built-in tools to fix problems like sound, network, etc. to improve system performance.
Driver Booster’s processing function updates all drivers at once. It helps in bulk updates, saving you time, effort and effort, but what matters is getting the job done and ensuring optimal hardware performance. Therefore, if you want to update your keyboard driver in the fastest and most convenient way, it is strongly recommended that you use Driver Booster.
Step 1: Download, install and run Driver Booster.
Step 2: Scan for outdated drivers.

Launching the Driver Booster, you will see a big Scan button in the middle of the interface. Click the Scan button.
After the scan is complete, you can see the total number of outdated device drivers and outdated game components at the top of the scan results screen.
Step 3: Updating Drivers.
If you want to update all drivers at once, just click the “Update Now” button that appears at the top right of the window. To update your keyboard driver only, click the “Update” button that appears next to it.
Solution 6: Use Windows System Restore
If your keyboard stops working after updating Windows or installing certain software, performing a system restore can fix the issue. System Restore is a feature that allows you to restore the state of your computer to a previous point in time.
In the event of an installation failure or data corruption, System Restore can help you return your system to a working state without reinstalling the operating system. Following the post below to perform Windows System Restore.
Solution 7: Clean your Keyboard
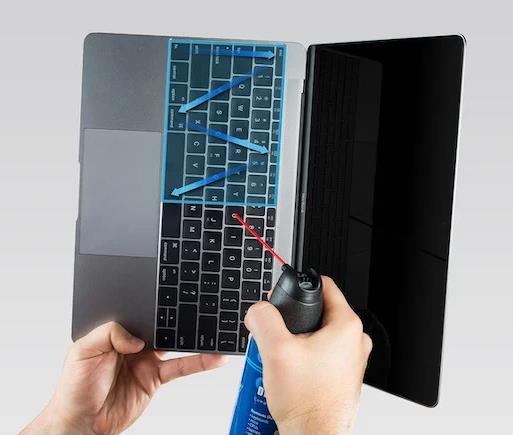
Keyboard functionality can sometimes be affected by dust, hair, and other debris. They may have accumulated for a while, and then they started preventing the keys on the keyboard from working properly. That’s why you can’t use the Lenovo keyboard on your laptop normally.
The next thing to do is grab a cotton swab or toothpick and try to remove these particles from the keyboard. Also, take a soft cloth and wipe up spills, etc. Depending on how dirty the keyboard is, it may require specialized tools for deep cleaning.
Solution 8: Check for Windows Updates
If you haven’t installed Windows 10 system updates for a long time now, you may be experiencing issues like the Lenovo laptop keyboard not working properly. Windows Update can resolve hardware and software-related errors.
To check for Windows updates, follow the steps below.
Step 1: Right-click the Start button and click the Settings icon.
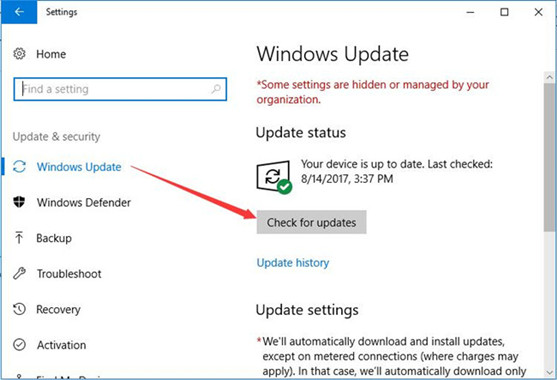
Step 2: Click Windows Update.
Step 3: Click Check for updates and then wait while Windows looks for the latest updates for your Lenovo laptop.
Solution 9: Uninstall and Reinstall Keyboard Drivers
Drivers are responsible for establishing the connection between the computer and its hardware. If your hardware component doesn’t have a driver, it won’t work. So if your keyboard isn’t working on your Lenovo laptop, there may be a problem with the keyboard driver.
To fix this, you need to uninstall and reinstall the keyboard driver. Follow the steps below to implement this:
Step 1: Search for and select Device Manager.
Step 2: Expand the keyboards section and find the keyboard driver.
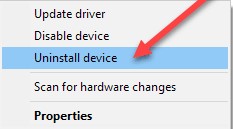
Step 3: Right-click the driver.
Step 4: Select Uninstall device.
Step 5: Navigate to the Lenovo support site to download the latest keyboard driver for your laptop.
Note:
If you encounter keyboard not working on Ubotie, please read Ubotie Keyboard Not Working on Windows 11, 10, 7 to get related information.
Conclusion:
That’s all for nine ways to fix the Lenovo laptop keyboard not working issue in Windows 10/11. If nothing works after trying all the ways, it could mean that it is damaged internally. You will have to take it to Lenovo’s official center or find a specialist to repair it for you.