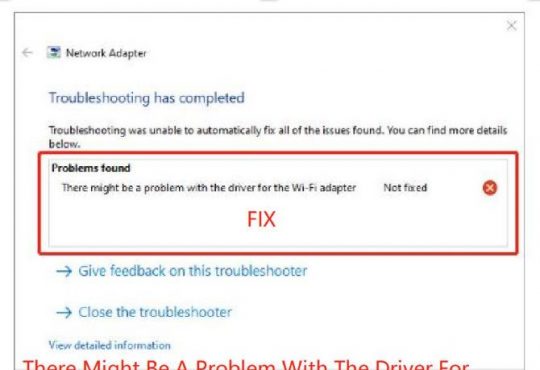
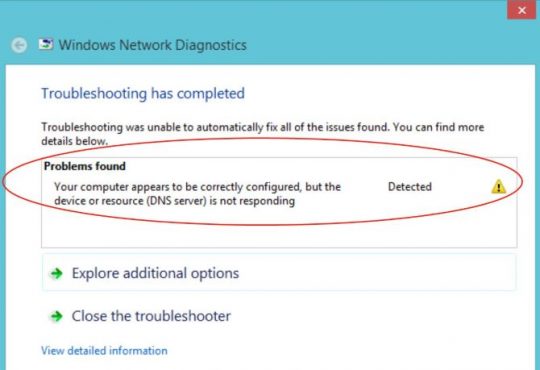
DNS_PROBE_FINISHED_BAD_CONFIG router or WIFI error will probably make you unable to search in Google Chrome or any other browser. This webpage is not available is the common error message you may receive.
The DNS error is mainly caused by two parts, namely, the DNS server problem and the network connection on your PC.
So, once you find you stumble upon this webpage is not available, DNS _PROBE_FINISHED_BAD-CONFIG, you are supposed to take effective measures to deal with this DNS related error on Windows 10.
How to Fix DNS_PROBE_FINISHED_BAD_CONFIG Windows 10?
As this DNS error can mostly come up when DNS server is not responding or the WIFI is not working on Windows 10, you might as well decide to solve DNS_PROBE_FINISHED_BAD_CONFIG Windows 7, 8, or 10 from the perspective of internet fixing or DNS recovering.
Solutions:
1: Uninstall Third-party Anti-virus Software
2: Release and Renew Internet IP Address
4: Protect the Selected DNS Settings
4: Adjust the DNS Server Settings
Solution 1: Uninstall Third-party Anti-virus Software
It is said that sometimes some anti-virus application, like AVG, AVAST, would to some extent hinder your access to the internet, thus contributing to Windows 10 DNS_PROBE_FINISHED_BAD_CONFIG error.
In this sense, you would better choose to disable or uninstall these programs to check if it can result in the DNS related error.
1. Open Control Panel.
2. Under Programs, click Uninstall a program.
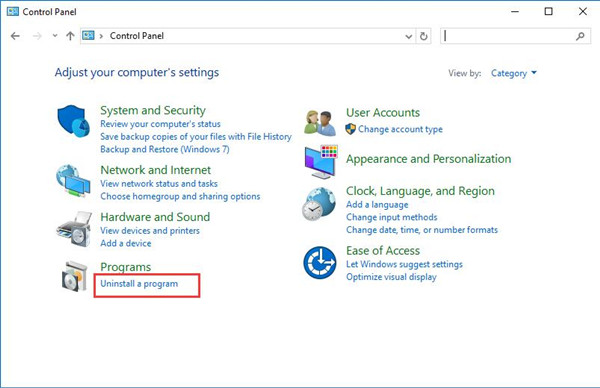
If you are unable to locate it, try to View by Category.
3. Then in Programs and Features window, find out the application you need to remove and then right click it to Uninstall it.
4. Restart your PC to take effect.
Without the prevention from the third-party software, you are qualified to access the webpage smoothly and the DNS_PROBE_FINISHED_BAD_CONFIG on Google Chrome has also disappeared as well.
Solution 2: Release and Renew Internet IP Address
Before this step, you can attempt to restart the router by pressing the power button.
But if that failed to resolve the DNS address error, you may have to move on to release or renew the IP address for Windows 10.
1. Type in Command Prompt in the search box and then right click the best-matched result to Run as administrator.
2. In Command Prompt, input ipconfig /release and then hit Enter to release your IP address.
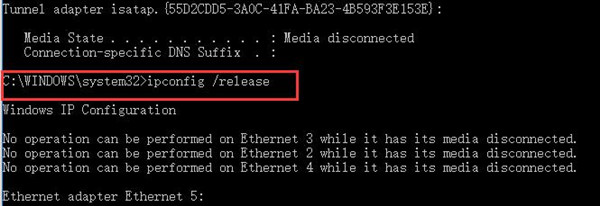
3. Then enter ipconfig /renew in the Command Prompt.

That will renew the IP address on Windows 10.
Since one of the reasons that lead to this DNS server issue consists in the IP address, maybe your DNS server error is removed.
Solution 3: Flush DNS Cache
Apart from renewing the IP address, to fix DNS_PROBE_FINISHED_BAD_CONFIG WIFI problem, you can also turn to set flush cache for DNS.
Now it is high time that you managed to flush DNS cache for Windows 10.
To complete this goal, just run ipconfig /flushdns to flush cache for DNS server.
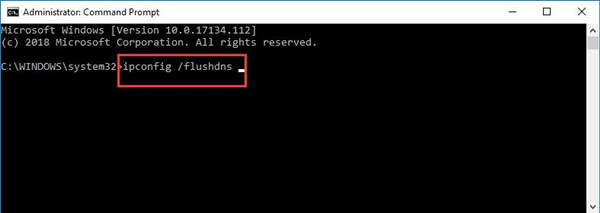
Then reboot your PC to take effect.
Under this circumstance, the DNS cache would be flushed and the DNS server related error will no longer come up to you.
Solution 4: Protect the Selected DNS Settings
Now that your DNS is improperly configured, it is time to choose a more suitable one and then utilize Advanced SystemCare to protect the selected DNS on Windows 10. In much sense, dns_probe_finished_bad_config error on Windows 10 will get fixed with Advanced SystemCare DNS Protector.
1. Download, install and run Advanced SystemCare on your PC.
2. Then locate Toolbox and click DNS Protector to install it quickly.
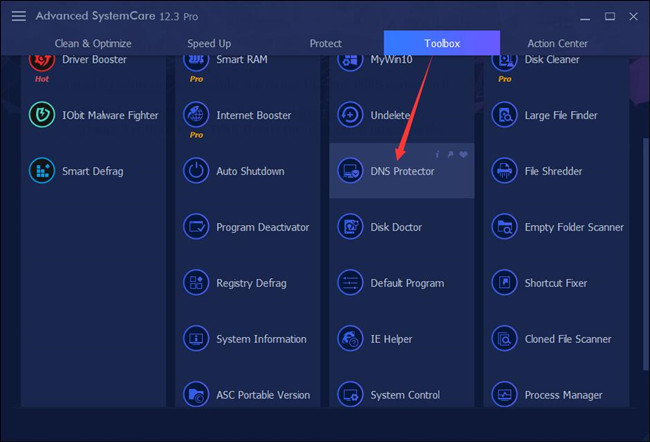
3. Turn on DNS Protector then choose a DNS address to keep this DNS setting protected.
Here for most of you, since you are plagued by Chrome dns_probe_finished_bad_config on Windows 10, you may as well choose to use Google Public DNS Server.
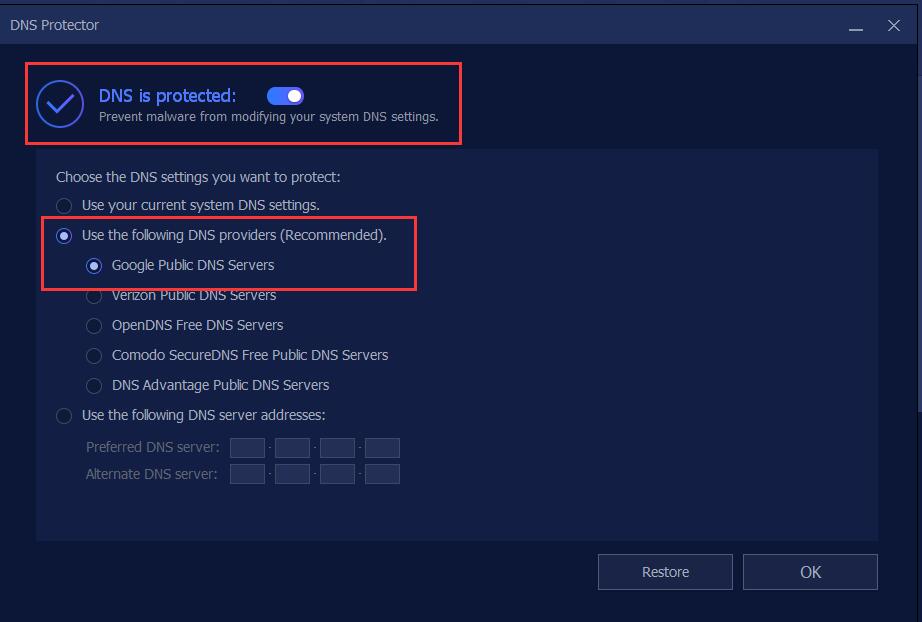
Nevertheless, if you would rather set a DNS server manually, you can also Use the following DNS Server address. Of course, it is feasible to configure it on Windows 10 network settings.
Solution 5: Adjust the DNS Server Settings
Another potential cause lies in the DNS server error. Therefore, it is feasible and advisable that you spare no efforts to make adjustments to the DNS server settings, such as the Internet protocol 4.
On that occasion, you need to alter to another DNS server to see if it can help fix DNS_PROBE_FINISHED_BAD_CONFIG VPN or internet issue on Windows 10.
1. Right click the Network icon in the right corner of the Desktop to Open Network & Internet settings.
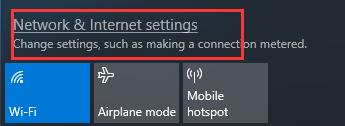
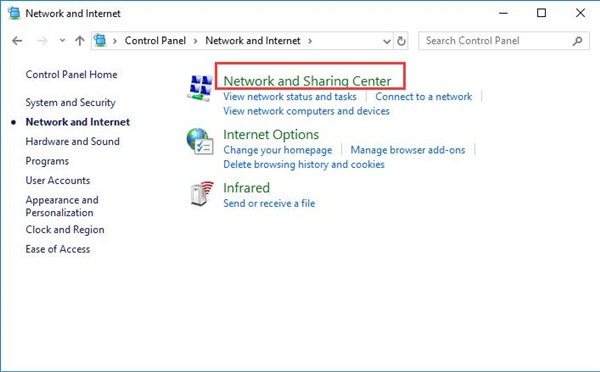
2. Then scroll down to locate the Network and Sharing Center.
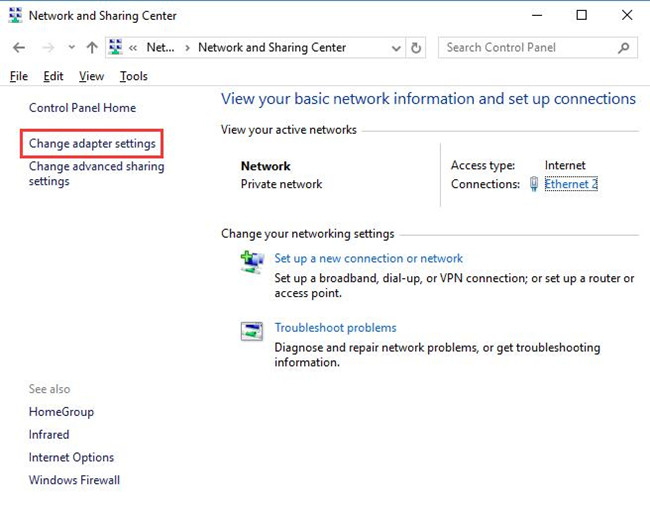
3. In the following window, find out and choose Change adapter settings.
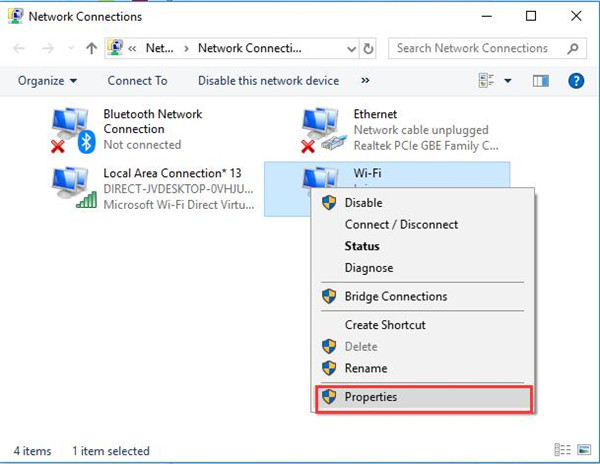
4. Then right click the network you are using to navigate to its Properties.
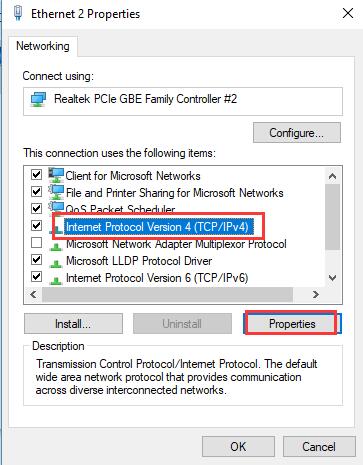
5. In WIFI Properties, double click Internet protocol version 4 (TCP/IPv4) to change settings for it.
6. In Using the following DNS server addresses, set the Preferred DNS server as 8,8,8,8 and the Alternative DNS server as 4,4,4,4.
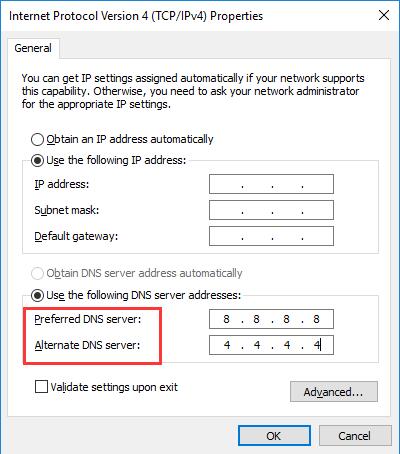
All set, hit OK to save the changes you have made.
If you find the preferred DNS and alternative DNS server above cannot fix your DNS_PROBE_FINISHED_BAD_CONFIG in Chrome, you may as well change it to other DNS server available until your DNS related error is solved.
In short, Windows 10 DNS_PROBE_FINISHED_BAD_CONFIG Chrome can be traced to two main reasons. So you are to resolve the DNS server error from these two parts.
Related Articles:
Fixed: Windows Could Not Automatically Detect This Network’s Proxy Settings
Solved: Ethernet Doesn’t Have a Valid IP Configuration
The Teredo Tunneling Pseudo-Interface Driver Not Working on Windows 10

