For some of you, there are some old, corrupted, and damaged drivers on your PC, thus causing system crashes like blue screen of death, computer freezing, etc. In most cases, you need to uninstall the NVIDIA display driver from Windows 10.
Now you can try different ways to completely remove old NVIDIA drivers for better PC performance. If you can’t uninstall NVIDIA drivers, it is wise to try another method or more.
How to Uninstall NVIDIA Drivers from Windows 10?
Normally, driver installation, uninstallation, and updates can be accomplished via Device Manager. But according to the reports of some users, it is found that Device Manager can’t completely uninstall NVIDIA drivers from Windows 10.
In this case, you need to turn to the Control Panel to uninstall a program like the NVIDIA graphics driver. Or you can try a third-party driver tool to help you remove NVIDIA drivers and the remaining data automatically.
Methods:
- 1: Uninstall NVIDIA Drivers and Driver Data Automatically
- 2: Remove NVIDIA Display Driver Manually
- 3: Uninstall NVIDIA Drivers With DDU
Method 1: Uninstall NVIDIA Drivers and Driver Data Automatically
For people who are unable to delete NVIDIA display drivers from Windows 10, if you are not an expert at computers, it can be a good choice to uninstall NVIDIA drivers using Driver Booster. It will scan for the outdated, missing, and corrupted device drivers. Then it is up to you to uninstall the old NVIDIA driver in Driver Booster, which will get rid of the driver data as well.
1. Download, install and run Driver Booster.
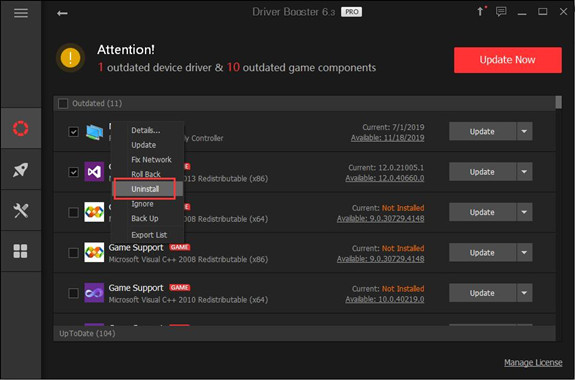
2. Click Scan. Driver Booster will start to scan for your PC for any problematic device drivers.

3. In the search results, find out and right click Display adapters to Uninstall it.
In Driver Booster, apart from uninstalling NVIDIA drivers, you are also enabled to clear all the device data automatically.
4. In Driver Booster, on the left side, click Tools and then choose to Clean unplugged devices’ data on your computer.
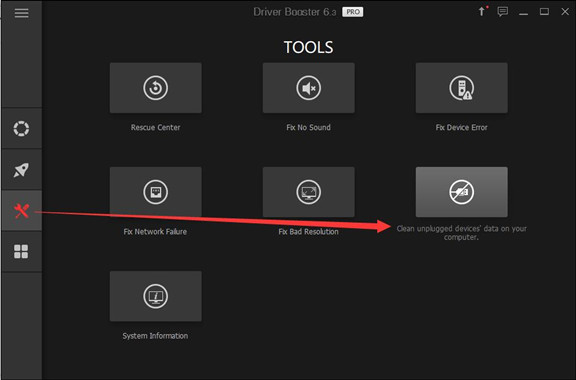
5. Hit Clean.
In so doing, both the NVIDIA display driver and the data will be deleted completely from Windows 10 with the help of Driver Booster.
Related: 4 Ways to Update NVIDIA Drivers
Method 2: Remove NVIDIA Display Driver Manually
It is said above that users can uninstall NVIDIA drivers in Device Manager, so you may as well get rid of the old driver in this management tool.
Part 1: Uninstall NVIDIA Drivers in Device Manager
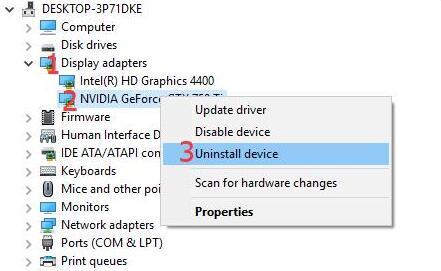
1. Open Device Manager.
2. Expand Display adapters and then right click the NVIDIA display driver to Uninstall device.
3. In Confirm Device Uninstall window, tick the box of Delete the driver software for the device.
4. Click OK.
It works for some people to remove the unnecessary NVIDIA graphics driver, but it is also common that some of you can’t uninstall NVIDIA drivers here. On this condition, you may as well try more to completely get rid of other NVIDIA drivers in Control Panel.
Part 2: Uninstall NVIDIA Software Completely in Control Panel
Control Panel is able to let you permanently uninstall a program from Windows 10. So if method 1 and method 2 failed to help you delete NVIDIA drivers, it is worth a shot to accomplish that in Control Panel.
1. Go to Control Panel.
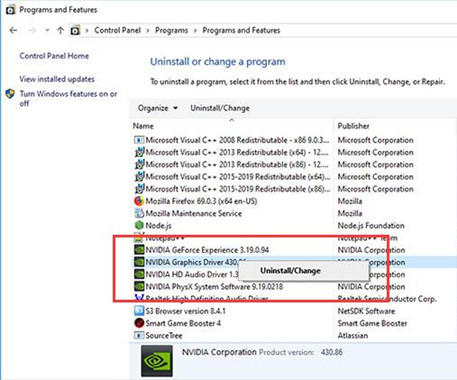
2. Choose to View by Categories and then locate Programs > Uninstall a program.
3. In Programs and Features, right click NVIDIA Graphics driver to Uninstall it. Then you should uninstall all the NVIDIA sofware one by one.
5. Reboot Windows 10 to take effect.
Method 3: Uninstall NVIDIA Drivers with Display Driver Uninstaller
DDU stand for Display Driver Uninstaller, which is a free and professional graphic card driver uninstalling tool. So if you want to uninstall NVIDIA, AMD and Intel graphic card drivers, you can use this software to do that easily and fast.
1. Download, install and run DDU on your computer.
2. In the interface, select Safe Mode (Recommended) and then click the button Reboot to Safe Mode.
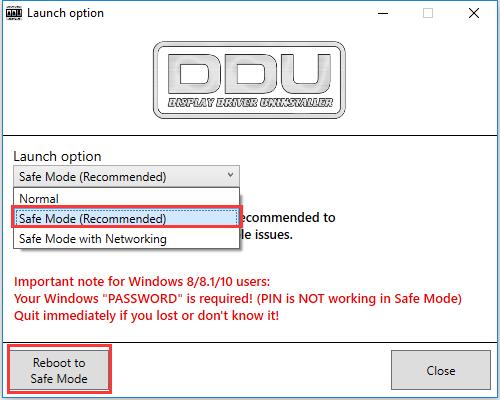
After that, your computer will be restarted and enter safe mode.
3. In the safe mode, reopen DDU.
4. When the DDU is opened, it will detect your graphic automatically, and the result will show in the right side.
5. Click the button Clean and Restart (Highly recommended). Then below this button, you will see the log window showing the uninstalling process.
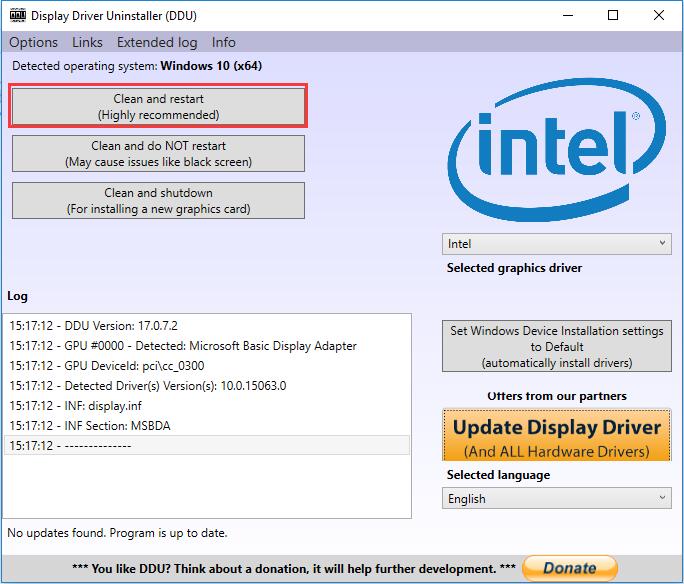
After the uninstalling process is finished, your computer will restart automatically.
In a word, you can select a way to remove NVIDIA drivers from Windows 10 completely by following procedures above step by step. In this sense, the old NVIDIA graphics driver won’t cause system errors like the blue screen of death.
More Articles:
How to Uninstall Driver Tonic (Including Won’t Uninstall Solution)
How to Completely Uninstall Graphic Driver on Windows 10, 8, 7
How to Uninstall and Reinstall Windows Media Player on Windows 10