[12 Ways] NVIDIA Control Panel Crashing/Not Working (2023 Update)
It is common to see many Windows users complaining about NVIDIA Control Panel Crashing. This can become quite annoying for users who frequently use the control panel to manage graphic drivers settings and part game-specific preferences.
If you are looking for solutions to fix the error of NVIDIA Control Panel crashing or not opening, check out the following post and learn how to easily but completely fix the error with 12 methods.
Why Does the NVIDIA Control Panel Keep Closing
We often see many Windows users complaining about NVIDIA Control Panel Crashing. And the reasons for this problem are bizarre. But the main cause of this problem seems to be corrupt or outdated drivers, so in some cases, updating the driver seems to fix the problem. But sometimes this method doesn’t work for everyone.
Here are a few reasons why the NVIDIA Control Panel closes on its own.
- Outdated NVIDIA Control Panel
- Conflicting application/driver
- Corrupted NVIDIA Control Panel application file
- Outdated Windows system
- Limited output dynamic range, disturbing the integrity of the graphics card power configuration, etc.
Method 1: Uninstall and Reinstall NVIDIA Control Panel
The most direct and efficient way to solve this problem is to uninstall the NVIDIA Control Panel and reinstall it. This issue can happen when the entire NVIDIA Control Panel application file is corrupted or missing, or when it encounters an installation interruption or some malware application.
Step 1: Press the Windows + I key to open Settings.
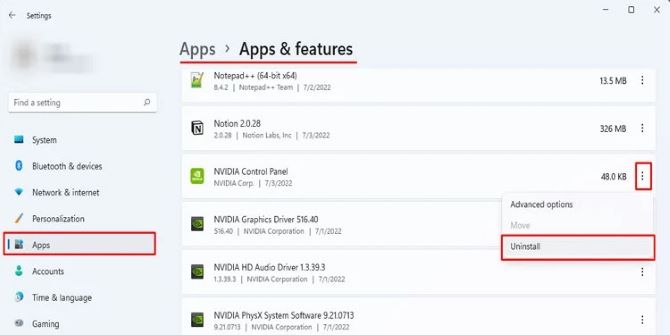
Step 2: Go to Apps > Apps and Features.
Step 3: Click on three vertical dots on NVIDIA Control Panel and select Uninstall.
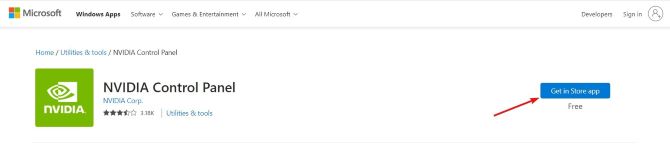
Step 4: After uninstalling, go to Microsoft Store to download the NVIDIA Control Panel again.
Method 2: Run NVIDIA Control Panel as Administrator
Sometimes, it might just be a permissions issue. To test if it works for you, you can try running the NVIDIA Control Panel as administrator. When you run the NVIDIA control panel as administrator, the OS sets its process to high priority and prioritizes all system resources for it.
The caveat is that you must launch the NVIDIA Control Panel from the installation folder, not from a desktop shortcut. Follow the necessary steps.
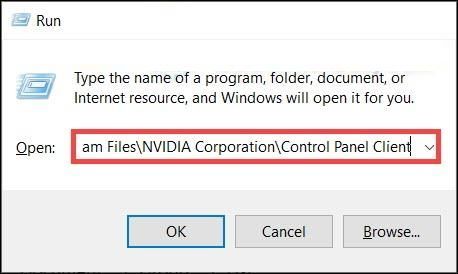
Step 1: Press Win+R to open the Run panel.
Step 2: Type C:\Program Files\NVIDIA Corporation\Control Panel Client into the box and then press Enter.
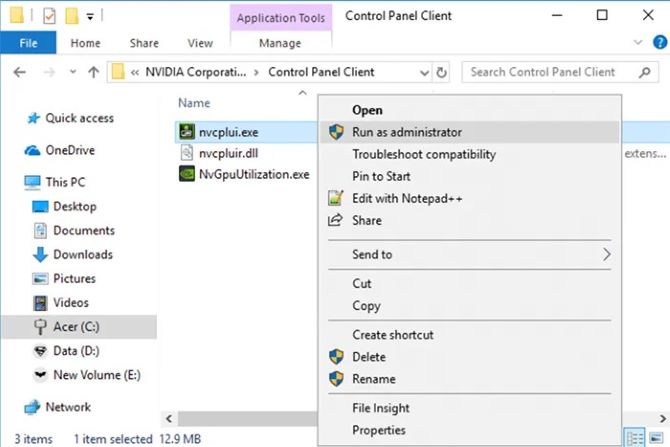
Step 3: Right-click the nvcplui.exe folder and select Run as administrator.
Method 3: Update Your Windows System
Another reason for NVIDIA Control Panel crashing can also be due to an outdated version of Windows system. If your system is missing some important updates, Windows may not be able to communicate with its drivers more efficiently, causing the device itself to malfunction. To fix this problem, you need to update your Windows system.
Step 1: Open Settings by right-clicking the Start icon.
Step 2: Click on Update & Security > Windows Update > Check for updates.
Method 4: Remove Conflicting Programs
According to some users, programs that use the same resources as the NVIDIA Control Panel may cause the NVIDIA Control Panel to crash.
Conflicting programs include applications such as Opera Browser, OCAT, or graphics card companion applications such as EVGA Precision X1 and ASUS GPU Tweak III. You can start by checking your computer for recent changes, or perform a clean boot to identify the culprit.
Step 1: On your keyboard, press Win+R simultaneously to open the Run box.
Step 2: Type msconfig in the box and click OK.
Step 3: In the pop-up window, go to the Services tab and check the box next to Hide all Microsoft services.
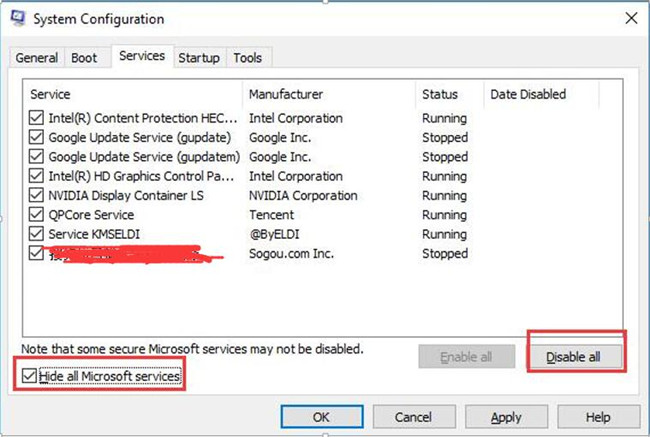
Step 4: Uncheck all the services EXCEPT those that belong to your hardware manufacturers, such as Realtek, AMD, NVIDIA, Logitech, and Intel. Then click OK to apply the changes.
Step 5: On your keyboard, press Ctrl+Shift+Esc simultaneously to open Task Manager, then go to the Startup tab.
Step 6: Select each program you believe is interfering one at a time, then click Disable.
Step 7: Restart your computer.
Method 5: Delete Nvdrsdb0 and Nvdrsdb1 Binary Files to Solve NVIDIA Control Panel Not Working
Constant NVIDIA Control Panel crashes can be caused by corrupted files. Deleting these files should remove any damage. Once you re-open the application, the PC will automatically restore these files.
However, deleting these files will remove all settings changes you made to the NVIDIA Control Panel. If this is the case, you can rebuild critical components using the steps below:
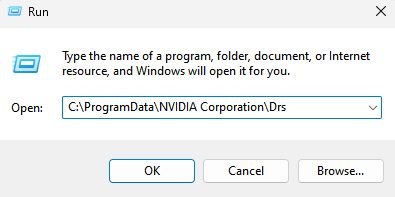
Step 1: Open the Run box by pressing Windows + R key.
Step 2: Now, paste C:\ProgramData\NVIDIA Corporation\Drs in the box and click OK.
Step 3: Delete nvdrsdb0.bin and nvdrsdb1.bin files.
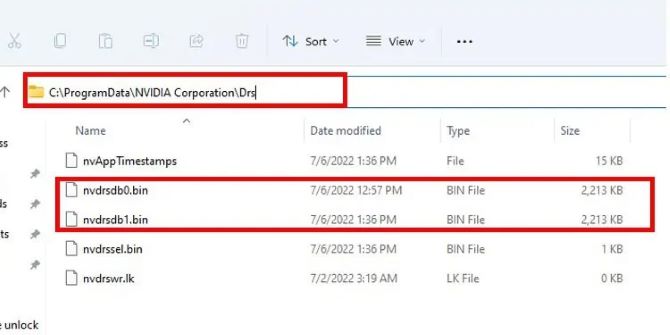
Step 4: Reboot your PC.
Method 6: Turn Off GPU Virtualization
GPU virtualization refers to technology that allows the use of GPUs to accelerate graphics or GPGPU applications running on virtual machines. GPU Virtualization is a mode in VirtuMVP that can cause issues with the NVIDIA Control Panel constantly closing, so use the steps below to disable it. By disabling it, the problem you are having can be solved.
Step 1: Open the VirtuMVP control panel. You can find it right beside the clock on your Task Bar.
Step 2: Go to the Main tab, there should be a GPU Virtualization option. Just turn it off.
Step 3: Save your settings, reboot your PC, and check if it has fixed your NVIDIA Control Panel issues.
Method 7: Change the Output Dynamic Range
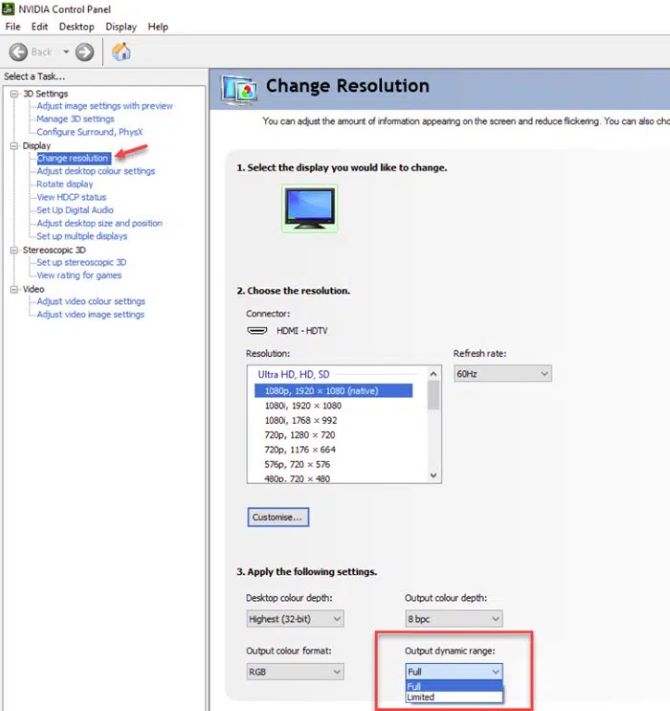
Dynamic range refers to the difference in the color values of the output video on the screen. If the settings are incorrect, you may end up seeing the NVIDIA Control Panel crashing on your PC. Some users say that switching the Output Dynamic Range setting to Full instead of limited can effectively solve this problem. Here’s how to do it:
Step 1: Open the NVIDIA Control panel.
Step 2: Go to the following path: Display > Change resolution.
Step 3: On the right panel, scroll down and click on the Output Dynamic Range option.
Step 4: Select Full and apply the changes.
Method 8: Restart NVIDIA Display Container Service
NVIDIA Display Container, also known as nvcontainer.exe, is a necessary process for the controller and is mainly used to store other NVIDIA processes or other tasks. You may notice that when multiple NVIDIA processes and services are running on your PC, NVIDIA containers are taking a high CPU load in the Task Manager.
So it also causes this error of NVIDIA Control Panel crashing. So if this is the case, you have to restart the NVIDIA Display Container service.
Step 1: Open Run dialogue by hitting Windows and R keys.
Step 2: Now, type services.msc in the box and click OK.
Step 3: Find out NVIDIA Display Container LS and NVIDIA LocalSystem Container service on the left panel.
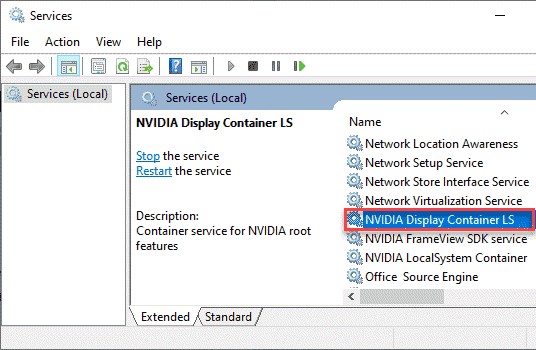
Step 4: Right-click and choose restart for both services.
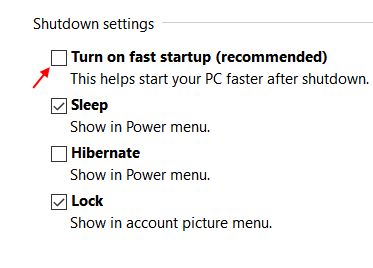
Method 9: Turn Off Fast Startup to Avoid NVIDIA Control Panel Crashing
Fast Startup allows your system to boot faster than previous versions. It does not allow your system to shut down completely, thus speeding up the restart process. But this often leads to issues like NVIDIA Control Panel not opening on your PC. Turning off this feature may solve your problem.
Step 1: Press the Windows key + R to open the Run dialogue.
Step 2: Input powercfg.cpl into the box and click OK.
Step 3: On the Power Options page, select Choose what the power buttons do from the left panel.

Step 4: Click on Change settings that are currently unavailable.
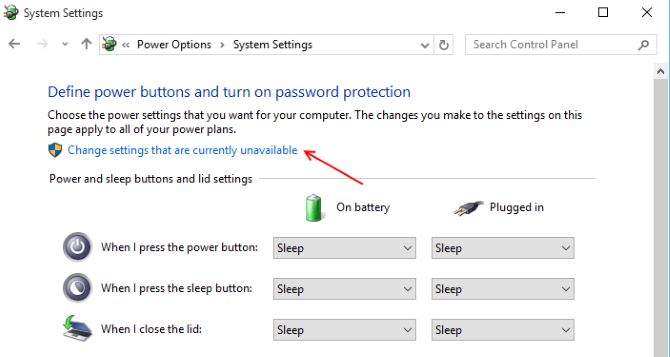
Step 5: Uncheck the box beside Turn on fast Startup and then click Save Changes.
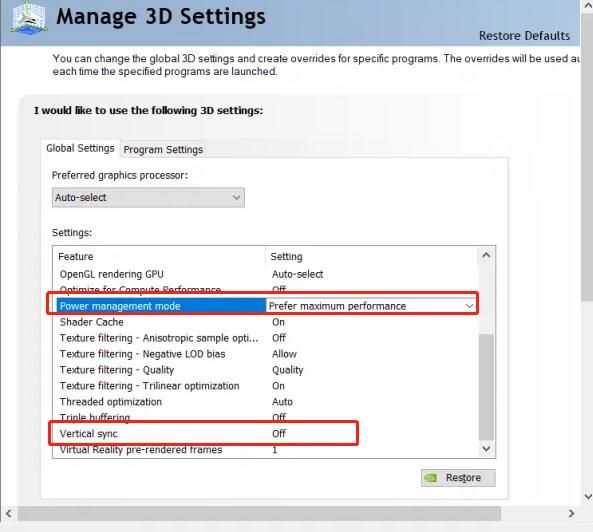
Method 10: Change the Power Management Settings and Vertical Sync Settings
Sometimes, some settings on the NVIDIA Control Panel cause the NVIDIA drivers to be incompatible with your Windows, causing the NVIDIA Control Panel to keep crashing on your device.
In this section, we recommend that you change Power Management and turn off Vertical Sync. Adjusting these settings should help you get better device performance.
Step 1: Open the NVIDIA Control Panel.
Step 2: Go to the following path: 3D Settings > Manage 3D Settings.
Step 3: On the right panel, set the Power Management to Prefer Maximum Performance. And for Vertical Sync, set it to be Off.
Method 11: Update NVIDIA Driver
Although the NVIDIA graphic driver package no longer includes the NVIDIA Control Panel, it may still be one of the reasons for various problems with the control panel. Therefore, if the above solutions do not work, you can try to update the NVIDIA driver or uninstall and reinstall the graphics driver.
Method 12: Contact NVIDIA Support
Unfortunately, if all the above methods fail, you can only try to contact NVIDIA Support through their website, which is your last resort for this issue. They might suggest reinstalling the drivers and other simple methods already mentioned before, and if that fails, they’ll say you should contact the manufacturer for warranty service.
FAQ about NVIDIA Control Panel Crashing:
Step 1: Open Control Panel by pressing the Windows key + R and typing in control panel in the search box.
Step 2: Once the Control Panel opens, go to the upper-right corner and change View to Large icons. Alternatively, you can choose Small icons.
Step 3: Double-click the NVIDIA Control Panel.
Step 4: Select the Desktop option from the top menu and then tick both Add Desktop Context Menu and Show Notification Tray Icon.
If this driver is outdated, the NVIDIA Control Panel may experience communication issues with the graphics driver, causing it to crash every time the Control Panel is launched.
Right-click on the Start menu bar to launch the context menu and select NVIDIA Control Panel. You can also manually open it from the Start menu via Control Panel.
Yes. As third-party proprietary software, you can of course uninstall the NVIDIA Control Panel because it’s mostly used for custom gaming, recording, etc, not a real display driver. However, using the NVIDIA Control Panel, you can access various settings that are not normally accessible through Windows Settings. When you uninstall the NVIDIA Control Panel, you will not be able to use these settings.
Right-click on your desktop and select NVIDIA Control Panel. Click Manage 3D Settings. In the upper-right corner, click Restore Defaults.
More Articles:
Solved: NVIDIA Control Panel Missing on Windows 10/11