Do you want to know how to record the screen on a Lenovo laptop? When you want to create tutorials, record gameplay, or capture important moments on your Lenovo laptop, a Lenovo laptop screen recorder can be particularly helpful.
In this guide, we will show you 5 easy ways to screen record on all Lenovo laptop models (ThinkPad, Yoga, Legion, Ideapad, etc). Screen recording on a Lenovo laptop can be surprisingly easy when you get a decent recording tool.
We will introduce how to use the screen recorder that comes with your Lenovo laptop as well as other useful recording software to record your screen and describe them in detailed steps.
Way 1: Screen Record on Lenovo Laptop with Game Bar (Built-in)
For Lenovo laptops running Windows 10 / 11 operating system, Game Bar is a recommended screen recording utility. And it is an ideal choice if you don’t wish to download or install a third-party recording tool.
Game Bar is a straightforward screen recording tool for Lenovo Windows laptops with several capabilities for capturing high-quality videos, especially gameplay.
Pay attention to that Game Bar is unable to capture the whole desktop screen of your Lenovo laptop and cannot work with File Manager. Moreover, the maximum video capture length is four hours.
If you want to record screen activity on a Lenovo laptop with no region or time limit, see Way 2 directly.
How to screen record on Lenovo laptop with Game Bar
1. Press Windows + G keys to open the Xbox Game Bar on a Lenovo laptop. You will see many widgets with different functions.
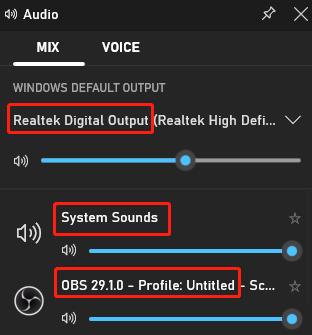
2. Adjust the audio settings from the Audio widget.
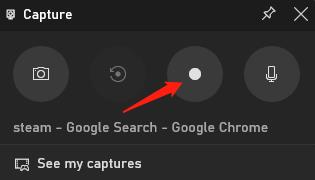
3. Once you get ready, click the Start Recording button from the Capture widget or press the Windows + Alt + R shortcuts to begin the recording process.
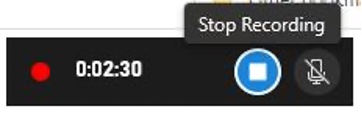
4. To end the recording, click the Stop Recording button on the recording bar or press Windows + Alt + R again.
5. Click on the pop-up Game clip recorded to preview the recording.

Way 2: Screen Record on Lenovo Laptop with iTop Screen Recorder (Recommended)
If you need more advanced features or want to customize your screen recording, try using a professional screen recorder like iTop Screen Recorder, which can help you capture various online and offline activities on your Lenovo laptop screen.
iTop Screen Recorder offers wide-ranging features including the ability to capture system sounds, microphone audio, and webcam. It is an unlimited screen recorder that allows you to record the screen on Lenovo laptop for as long as you want.
With powerful recording and editing tools, you can quickly and easily record, edit, and export stunning videos on your Lenovo laptop. And once you’re done, exporting your video into one of several supported file formats couldn’t be simpler.
Benefits of iTop Screen Recorder
- Record any part of your Lenovo laptop screen with audio and webcam
- Record 4K/1080p videos with no lagging and no FPS drops
- Create Lenovo recording task on schedule with unlimited duration
- Create stunning videos on Lenovo laptop with the built-in editor
- Save the recordings to various formats and share in one click
Take a look at how you can record the screen on Lenovo laptop with the step-by-step guide below.
How to screen record on Lenovo Laptop with iTop Screen Recorder
1. Download and install iTop Screen Recorder on your Lenovo laptop, then run it.
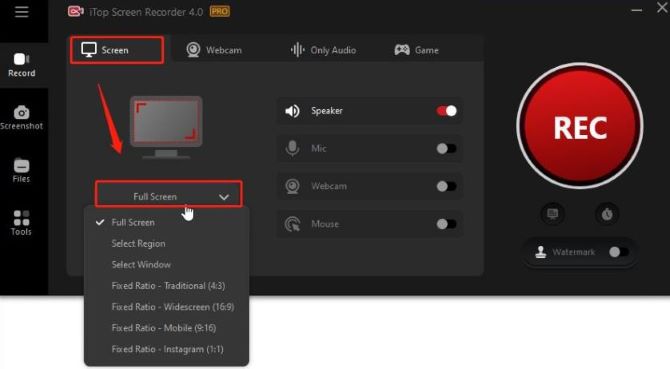
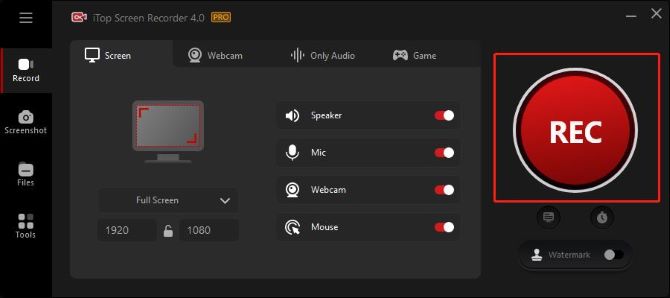
2. Set up the recording area. Select either full, half, or a specific area of the window for recording on a Lenovo laptop.
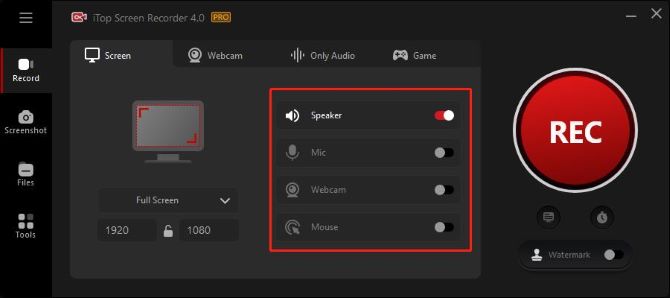
3. Turn on your Speaker to screen record on Lenovo laptop with sound. Turn off Mic, Mouse, and Webcam.
4. Adjust the record settings. Click the three lines on the top left. Scroll down to Format, set the Size as 4096 × 2160 (4k), Quality as High, and select the format, frame rate, and bitrate of the recording.
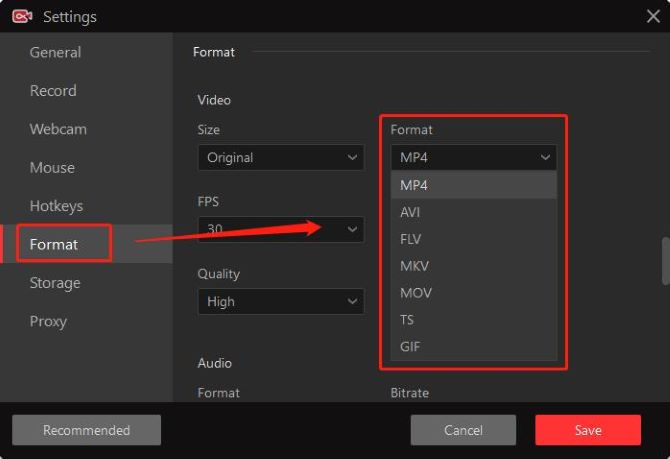
Tips: You can also adjust settings like storage location, audio settings, and hotkeys from here.
5. Start the recording. Hit the REC button to start screen recording on Lenovo laptop.
6. Stop the recording. On the floating toolbar, click the red pause button to end the recording. Click the pause button to stop recording temporarily.

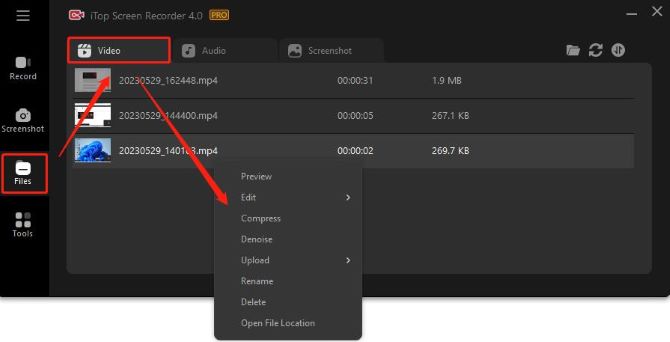
All your recorded videos will be saved under Files > Video. You can then preview, edit, denoise, or view it in the local file by right-clicking the selected video.
Way 3: Record your Lenovo Laptop Screen via Lenovo Nerve Center (Legion Series)
If you have a Legion series Lenovo laptop, luckily, your computer comes with a free screen recorder which is built in Lenovo Nerve Center (Sense).
Technically speaking, Lenovo Nerve Center is a tool for gaming as it provides a basic overview of your system’s resources with a bunch of features: network priority, audio enhancer, screen recording, etc.
Screen recording from Lenovo Nerve Center is for you to record and share your gameplay activities. You may make a screen recording below steps.
How to record on a Lenovo laptop with Lenovo Nerve Center
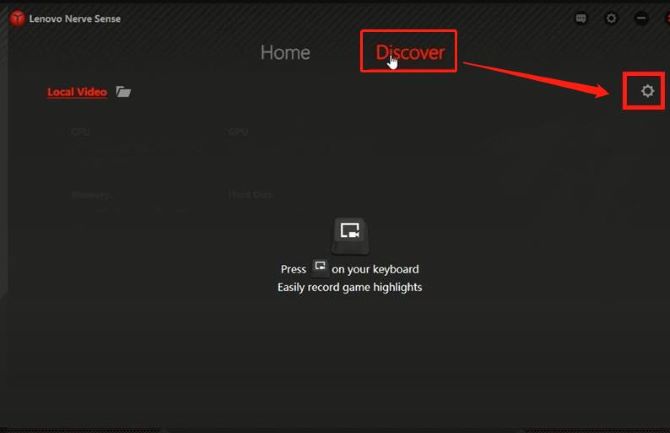
1. Open Lenovo Nerve Sense. Click on the Discover tab.
2. Click the Settings icon to set up the video quality, FPS, resolution, sound source, and more for the recording.
3. Press the recording button showing on the interface and start the recording.
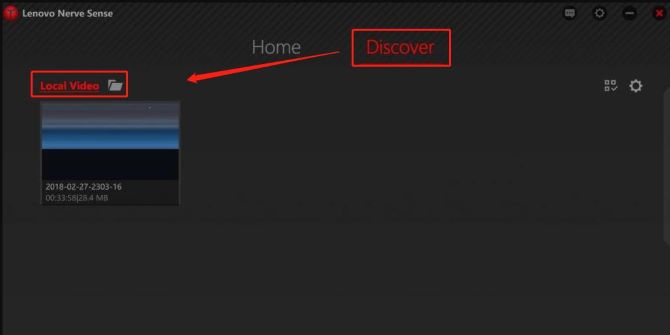
4. After you finish your recording on Lenovo laptop, your clips will be displayed right on the Discover interface.
Way 4: Record your Lenovo Laptop Screen via OBS (Free)
You can also record your screen activities on a Lenovo laptop using OBS Studio, a free and open-source software application for video recording and live streaming.
With OBS, you can edit and mix your audio and capture multiple sources on your Lenovo laptop simultaneously. It has been widely adopted by content creators, players, and broadcasters to produce high-quality video content for various platforms.
However, the user interface of OBS is so specialized that it is not very friendly to novices. And it lacks professional editing features, so you can’t rely on it to improve what you’ve recorded on the Lenovo laptop.
How to record on a Lenovo laptop with OBS
1. Download and install OBS on your Lenovo laptop, and run it.
2. Add capture sources.
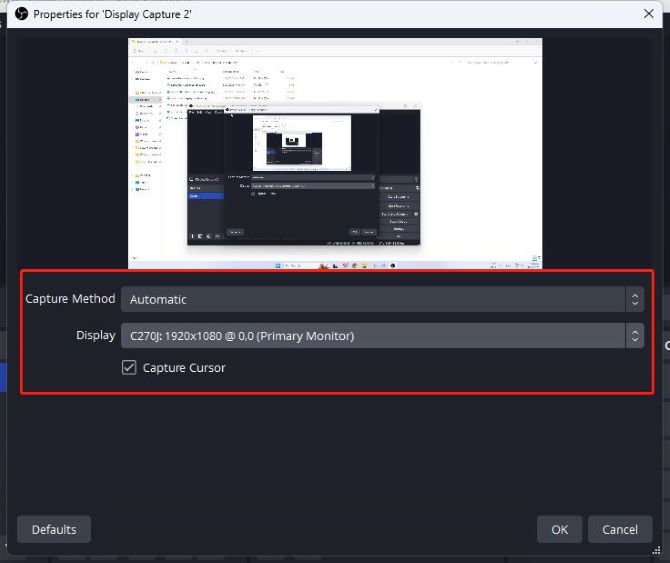
- In the Sources panel, click the “+” sign. Then select Display Capture. In the new open window, click OK.

- Select the Capture Method and Display from the drop-down menu, then click OK.
3. Adjust the sound settings. In the Audio Mixer panel, turn the volume up or down according to your needs.
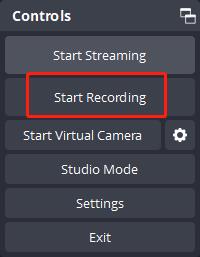
4. Start recording. Click the Start Recording button in the Controls panel to start recording your Lenovo laptop screen.
5. Stop recording. Once the recording is finished, click the Stop Recording button.
6. You can check the recorded video by clicking Show Recordings from File in the upper left corner.
Way 5: Record Screen on Lenovo Laptop via ShareX
ShareX is another good option for individuals seeking a free and simple Lenovo laptop screen recorder. Like OBS Studio, ShareX is also an open-source screen capture application.
There are no hassles while using this lightweight screen recording tool to capture the screen. When using it, you may select whether to include the cursor in the photo, set a timeframe, and even utilize the OCR tool to detect the text on the image.
Note that you cannot record your Lenovo laptop screen together with a webcam using ShareX.
How to screen record on Lenovo laptop with ShareX
1. Download, install, and launch ShareX on your Lenovo laptop.
2. Set up your microphone and recording area. Click Task Settings > Capture > Screen Recorder > Screen Recording Options.
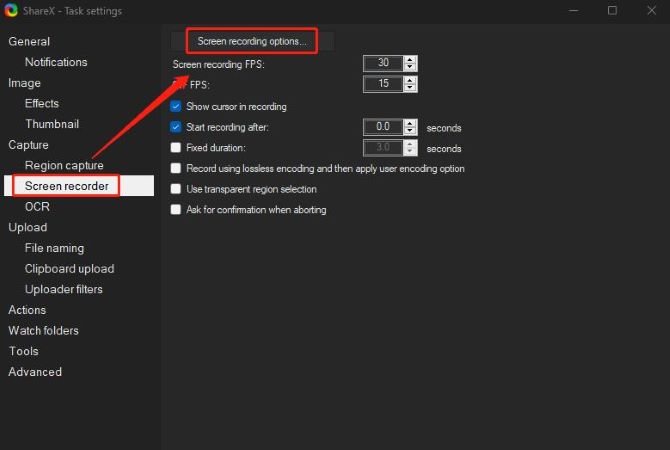
3. Navigate to Capture > Screen recording.
4. Select the area of the screen you want to record to start recording.
5. Click the Stop button in the recording progress bar to end the recording.
You can now easily get a hook on how to screen record on Lenovo laptop. Choose the method that works best for you and start recording!
FAQs About Screen Record on A Lenovo Laptop
A: Yes, you can record your screen on a Lenovo laptop using built-in software or third-party recording applications.
A: Xbox Game Bar can help you record your Lenovo laptop screen on Windows 10. Just hit the Windows icon + G to open this free screen recorder, then press Win + Alt + R to start your recording. Once you are done recording, click the Stop button.
A: You can turn on the microphone option in the Capture widget while recording with the Game Bar. Or you can use professional recording software to record the internal and external sound of your Lenovo laptop and adjust the volume level. You can even enable the noise reduction function to record clearer audio.
A: Yes, you can record your screen and webcam at the same time on Lenovo laptop using third-party applications such as OBS Studio and iTop Screen Recorder.
A: Using the built-in Game Bar, you can record your Lenovo laptop screen for up to 4 hours. However, if you want to record without a time limit, a third-party screen recorder will help you complete the task.
More Articles:
How to Screen Record on Dell Laptop