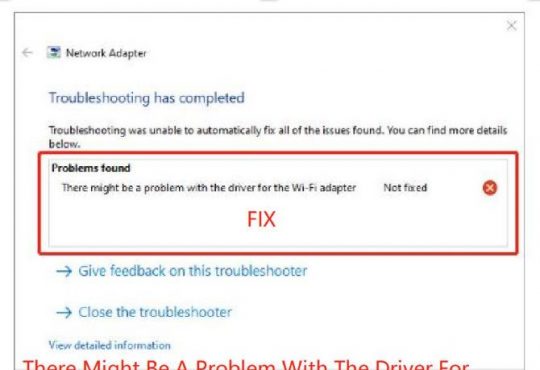
On some occasions, when you feel like access the internet in browsers, like Google Chrome, Microsoft Edge, it failed.
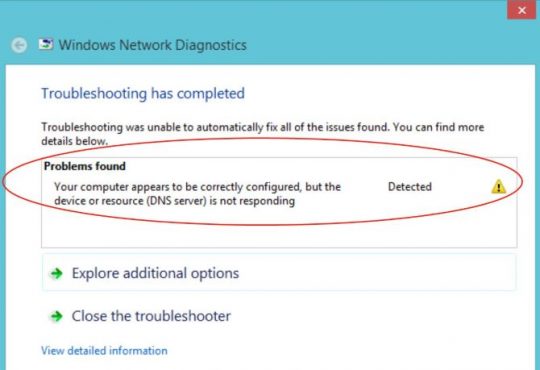
After you troubleshoot this network error, just to be told that the DNS server isn’t responding on Windows 10/11. Alternatively, some of you may encounter your computer appears to be correctly configured, but the device or resource (DNS server) is not responding.
As you all know, DNS refers to Domain Name System, which is used to transfer the browser website addresses to IP addresses, thus making sure you can connect to on Windows 10. Now it is evident that DNS proves to be rather essential for you to gain admission to the network.
And various causes can be attributable to the DNS server does not work on Windows 10, what you need to do is to troubleshoot this issue comprehensively from different perspectives.
How to Fix DNS Server Is Not Responding on Windows 10/11?
Ranging from DNS server addresses to network driver on Windows 10, you are able to remove the DNS server error for Windows 10/11.
It is about time to try to use diversified measures to deal with the irresponsible DNS server.
Solutions:
- 1: Auto Select and Protect the DNS Server
- 2: Change the DNS Server Address on Windows 10/11
- 3: Update the Network Driver for Windows 10
- 4: Reset IP Addresses
- 5: Restart the Modem on Windows 10
Solution 1: Auto Select and Protect the DNS Server
First off, if your DNS server isn’t responding on Windows 10, you need to choose another available DNS server and protect it with the tool – Advanced SystemCare.
In terms of those who have no idea what DNS address you should set for Windows 10, there is much need and high feasibility that you let Advanced SystemCare select the DNS server and protect it automatically.
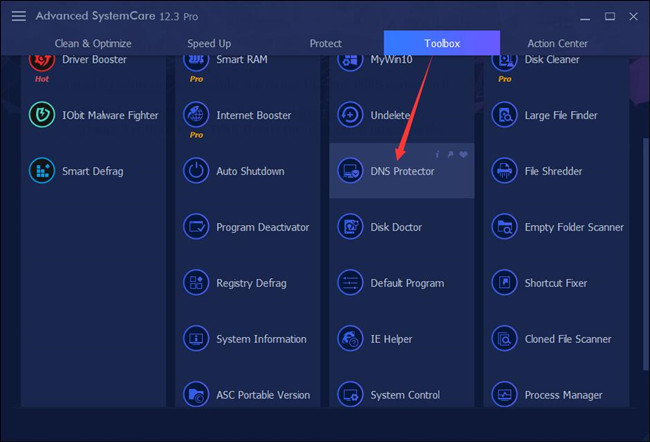
1. Download, install and run Advanced SystemCare.
2. Then under Toolbox, locate and hit DNS Protector to install this toolbar.
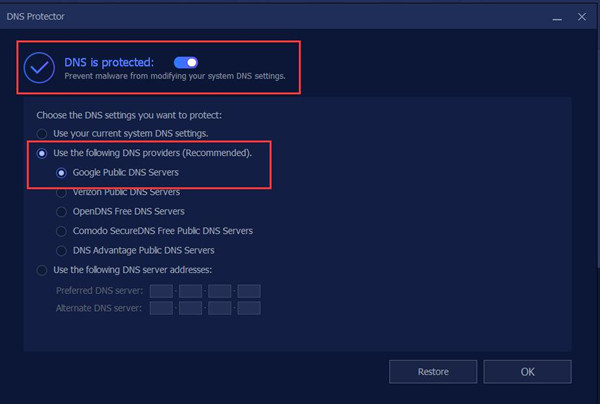
3. Make sure DNS is protected and then choose a proper DNS server.
You can either choose to use Google Public DNS Servers or Use the following DNS server addresses to manually configure a DNS server for Windows 10.
After that, your DNS will work fine on Google Chrome and there will be no more DNS server not responding error when browsing online.
Solution 2: Change the DNS Server Address on Windows 10
In the first place, now that it is your DNS server is not working on Windows 10, you need to make an adjustment to the DNS address for your PC until the DNS server works normally.
1. Go to the Control Panel.
2. In Control Panel, select Network & Internet.
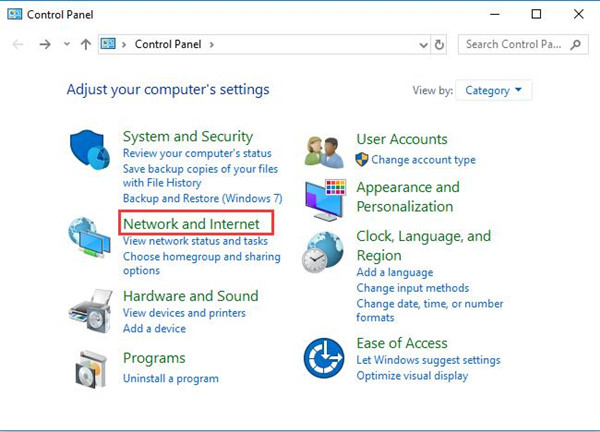
Here if you cannot find it here, try to View by Category.
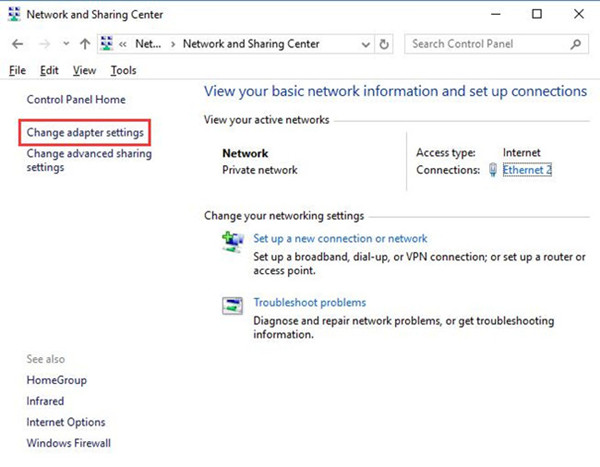
3. Then choose to Change adapter settings.
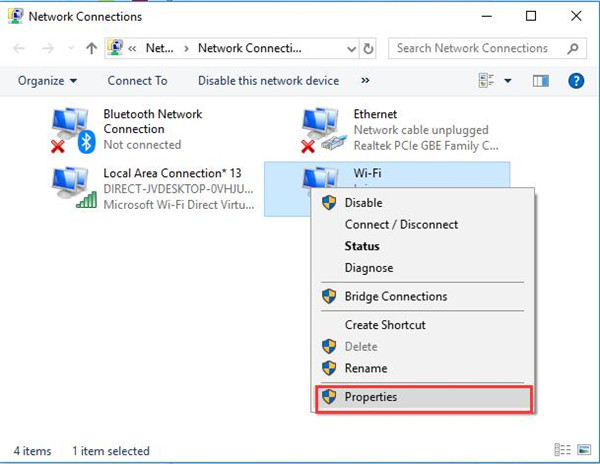
4. Then locate the network you are connecting to and then right click it to open its Properties.
5. In network Properties window, choose Internet Protocol Version 4(TCP\IPv4) and then hit OK to move on.
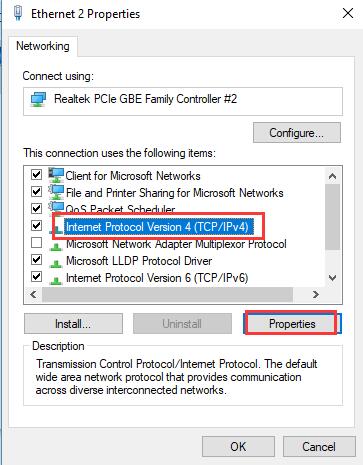
6. In Internet Protocol Version 4(TCP/IPv4) Properties, tick the choices of Obtain DNS server address automatically and OK to take effect.
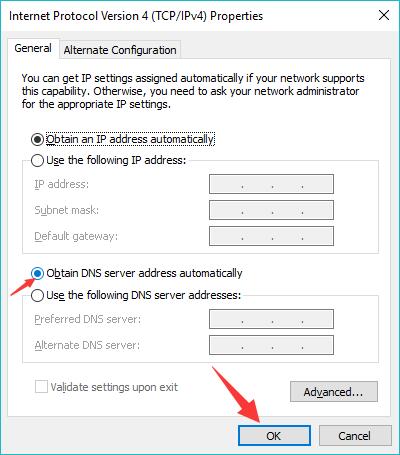
Or if you found that automatic DNS server address is useless for your DNS server issue on Windows 10, you would better manage to choose to Use the following DNS server addresses, such as 8.8.8.8.
Chances are that Windows 10 DNS server isn’t responsive on your PC is fixed successfully.
Solution 3: Update the Network Driver for Windows 10
Another option available for you to is to make sure that the driver for your network device is up-to-date and won’t give birth to any unnecessary issues, for instance, DNS server does not work on Windows 10.
Accordingly, there is much need for you to update all the network drivers, therefore, the DNS server not working will disappear as well.
1. Navigate to Device Manager.
2. In Device Manager, expand Network adapters and then right-click the network adapter to Update driver.
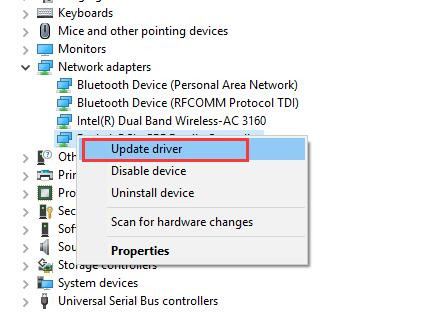
3. Then decide to Search automatically for updated driver software.
Possibly, the DNS server will go back to work and you are able to search online on Google Chrome or any other browsers on Windows 10.
Solution 4: Reset IP Addresses
To some extent, you can come into the DNS not responding on Windows 10 due to the problematic IP address. Consequently, if the previous solutions are of no avail, you might as well determine to reset your IP addresses for Windows 10.
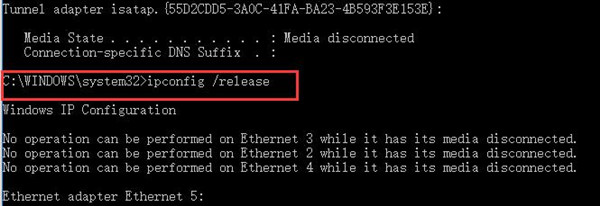
1. Type in Command Prompt and then right click the result to Run as administrator.
2. Then in Command Prompt, enter the commands below and then press Enter key to release and then reset the IP address.
ipconfig /release
ipconfig /renew
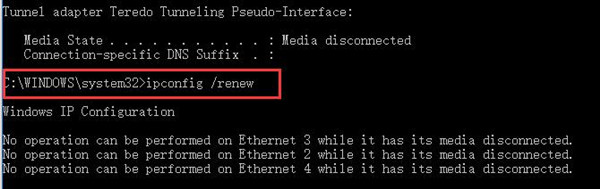
If lucky enough, you can observe that the Windows 10 DNS server won’t work has been resolved as the IP address is reset on Windows 10.
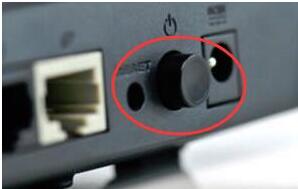
Solution 5: Restart the Modem on Windows 10
Besides the DNS server and network driver fixing, you can also make minds to turn off the modem on your PC.
To do that, manage to power off the switch of the Modem back in the computer. After several minutes, power it on again for Windows 10 and check if you can access the internet on browsers, such as Internet Explorer and Google Chrome.
Upon you try these methods on your PC with the DNS server doesn’t work on Windows 10, for most people, it is predictable that your internet comes to normality and the DNS server isn’t responding disappeared from Windows 10.
More Articles:
Solved: DNS_Probe_Finished_No_Internet on Windows 11, 10, 8, 7