Wondering how to record shows and movies on Peacock? If a new episode of your favorite Peacock show is available today, and you want to record it to watch offline or capture precious moments of the show, how can do it?
If you have the same questions, no worries. In this guide, you will learn how to record on Peacock in 3 efficient ways on your Windows, Mac, iPhone, and Android device, and learn how you can get this done with minimal effort in a few simple steps.
Can you record on Peacock?
Yes.
It is possible to screen record shows and movies on Peacock by using third-party recording software.
However, be aware that since there is no cloud DVR storage in Peacock, you won’t find a default method to record Peacock shows and watch them later.
As an on-demand streaming platform, Peacock allows you to watch TV episodes, sports, and movies online. Nevertheless, Peacock doesn’t allow you to record the content streamed via its platform to your local disc.
The one and only way to record the Peacock shows is to record the screen of it using any third-party recording tool. With the help of a screen recorder, you will enjoy a wide range of recording features and record on Peacock without any hassle.
Now, let’s see how to record on Peacock on Windows, Mac, Android, and iOS step-by-step with the guide below.
How to screen record on Peacock on Windows (without limitations)
For Windows users, you might think of using the built-in Xbox Game Bar to screen record on Peacock for free. However, Game Bar has a maximum recording time of 4 hours, and Windows 7 and Windows 8 don’t come with this recording tool.
To record on Peacock on Windows PC, we recommend using professional screen recording software like iTop Screen Recorder.
With iTop Screen Recorder, you don’t have to get a premium plus plan of Peacock and can record on Windows 10 / 7 / 8 / 11 freely without any permission. It helps you record on Peacock without a time limit and with no compromise in quality.
If you want to create a highlights video of your preferred Peacock movies or shows, the iTop screen recorder also offers free editing tools so that you can add subtitles, BGM, transitions, filters, images, and intro/outro to your recorded Peacock video.
Benefits of iTop Screen Recorder
- Capture screen on Peacock flexibly with no watermark and time limit
- Record HD / 4k Peacock video with advanced hardware acceleration
- Save recorded Peacock video to different output formats and share in a click
- Create stunning Peacock videos with the built-in video editor
Now, follow the below-mentioned steps to know if can you record on Peacock with this recording tool.
Steps to screen record on Peacock on Windows:
1. Download and install iTop Screen Recorder on your PC, then run it.
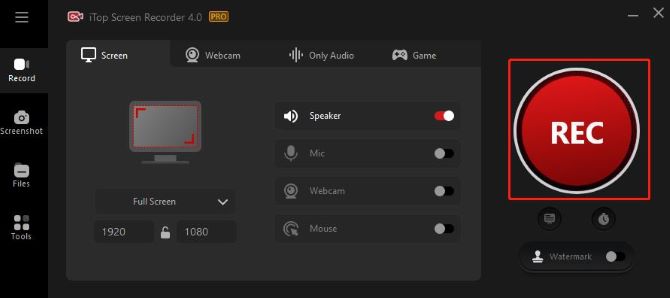
2. Select the recorded screen. Click the drop-down arrow behind Full Screen to record full screen or other sizes.

3. Choose to open Speaker, Mic, Mouse, or Webcam if you need them.

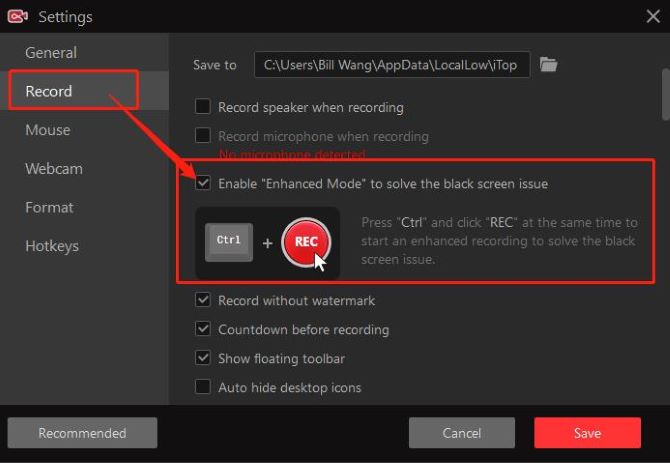
4. Set your preference for recording. Click on the three lines on the top left, and select Settings.
- Scroll down to Record, and select enable “enhanced mode” to record on Peacock without a black screen.
- Scroll down to Format, set your video size as 4k (4096✖2160), and video quality as Original.

5. Play the video you want to record on Peacock.
6. Hit the red REC button to start recording with your customized settings.
Tips: You can also adjust settings like video export format, frame rate, bitrate, audio settings, and hotkey from the Settings section.
7. Stop recording on Peacock. From the toolbar on your screen. Click Stop (the red square icon) to finish recording. Click the Pause icon to temporarily stop recording.

Note: The recording on Peacock will finish immediately when you click on the stop icon.
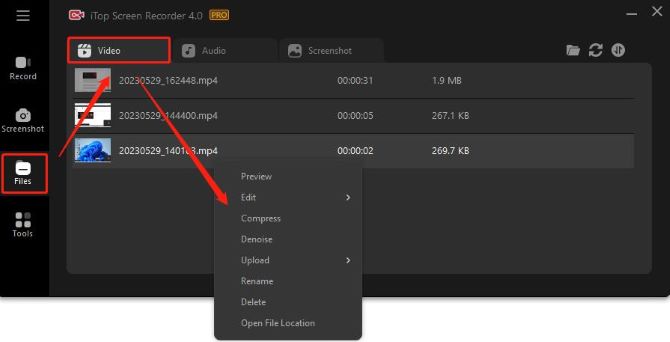
8. Go to Files > Video, from the video list, right-click the selected video name to play, edit, denoise, and view where it is stored on your PC.
The process of recording on Peacock using iTop Screen Recorder is simple and requires no advanced PC techniques. You’ll be able to take full control over the capturing preferences and the videos.
Tips:
Give iTop online screen recorder a try if you want to simplify the screen recording tasks on Peacock and do not want to download third-party software.
How to capture screen on Peacock on Mac
If you are using a Mac and want to record Peacock TV shows, the easiest way is to use the built-in recording tool QuickTime Player. You do not need to download any external tool for recording in this way.
However, the only video export format available on QuickTime is .mov. If you want to upload your Peacock video elsewhere in other formats, you’ll need to convert the video format, which can sometimes degrade the quality of the video.
Follow the below-mentioned steps to know how can you record Peacock on Mac.
Steps to screen record Peacock on Mac
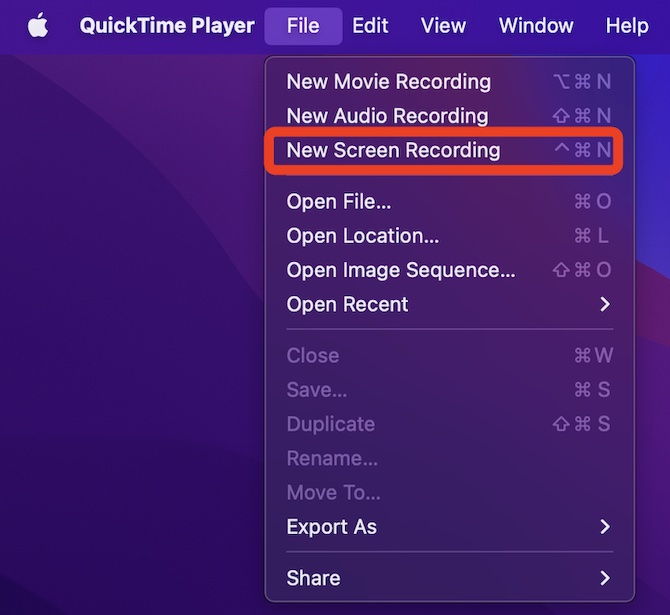
1. Launch QuickTime Player on your Mac, and navigate to File > New Screen Recording.
2. From the control bar, choose whether you want to record entire screen or record selected portion. Drag over the section you want to record a customized part of your screen.

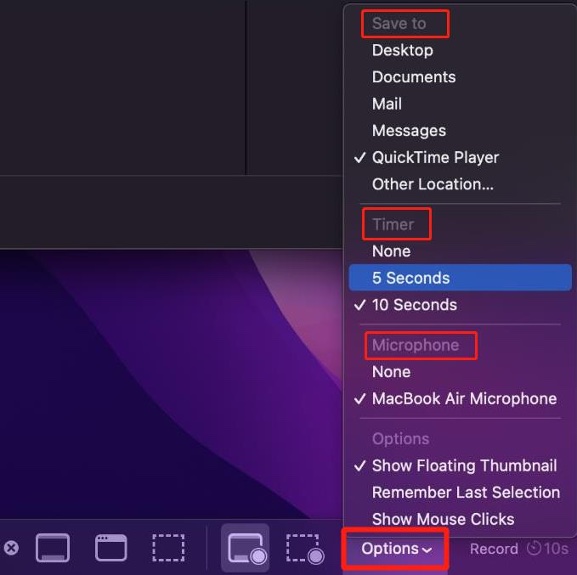
3. Set your recording preference. Click on Options from the control bar.
- Choose the built-in microphone to record with audio.
- Select the timer as 5 seconds or 10 seconds to have a delay for recording.
- Choose the saving location of the recorded video.
4. Click on the Record button to start recording on Peacock. The record will start in 5 or 10 seconds.

5. Go to Peacock and play the video you want to record.
6. Stop recording on Peacock. Click the stop icon at the top right corner. Once the recording is finished, the video will pop up, just click on it to play the recorded video.

How to record shows on Peacock on iPhone and Android
iPhone and Android both have inserted screen recording features to enable your need to record Peacock movies and TV on your phone.
However, the video quality may be unsatisfactory, and you are likely to experience a black screen when using the pre-installed recording feature.
In addition to using the built-in screen recorder on your iPhone and Android, you can also choose the efficient PlayOn Cloud app to easily capture the screen on Peacock.
With the PlayOn Cloud, you can easily find shows and movies from Peacock and other popular streaming platforms. The PlayOn Cloud app will record your selections in the cloud and then save them to your device. The recordings will never expire.
But be aware that PlayOn Cloud only provides free storage for seven days, and it will require credits for each recording after that.
Read this step-by-step guide to learn how to record on Peacock on your smartphone with PlayOn Cloud.
Steps to record on Peacock on iPhone and Android
1. Download PlayOn Cloud app on your iPhone or Android Phone, then open it.
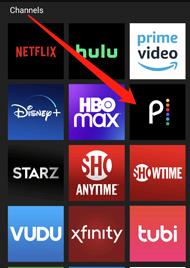
2. From the Channels tab, tap on the Peacock channel — you’ll be asked to sign in to your Peacock account.
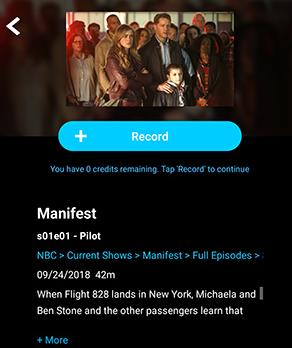
3. Then, select the movies or shows on Peacock that you want to record from the list. You can click the video title to see the details.
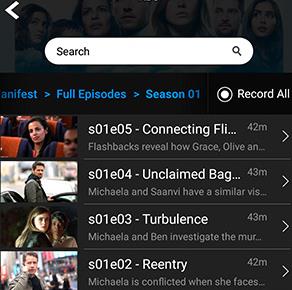
4. If you’re recording a series, select the episode(s) you want and hit the Record button, or click Record All to record an entire season. Otherwise, just select the title and hit Record.
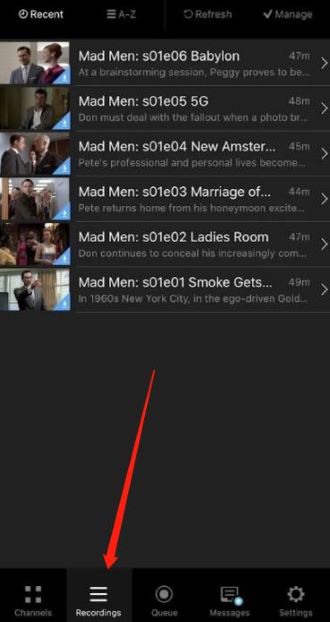
5. When your recordings are complete, you can find them in the Recordings tab. Your Peacock recordings will be there, for you to watch anytime offline.
As Peacock does not give any default method or feature to record shows, using a screen recording tool is an ideal method.
Find out the different ways to screen record on Peacock with this guide, and decide how you want to capture the screen on Peacock shows and movies on your device.
We hope our complete guide is helpful and answers all your queries on how to record on Peacock.
FAQs about screen record on Peacock
A: As with many media service platforms, Peacock owns and protects its available content. Using DRM (digital rights management), it prevents you from recording the screen on its application. But, it is possible to record shows on Peacock with a third-party screen recorder.
A: It depends.
If you are recording on Peacock for personal use such as saving the video to watch it offline, it is legal. However, if you’d like to share and distribute the recorded content from Peacock for commercial purposes, it will be illegal.
A: Since there is no default method to record shows or videos on Peacock, the best way to screen record on it is to use a third-party screen recorder, which helps you record your favorite shows on Peacock with ease. You shall choose the best and most effective screen recorder in the market such as iTop Screen Recorder.
A: Video streaming content from Peacock cannot be recorded from any kind of smart TV. But you can record Peacock shows with the PlayOn Cloud app on your smartphone, and cast the recordings on Peacock on your smart TV to watch it whenever you want, the recordings will never expire.
A: No. Since Peacock is an on-demand streaming platform, it doesn’t have cloud DVR storage capabilities. So you won’t have the option to record its live TV streams to rewatch later in the Peacock app.