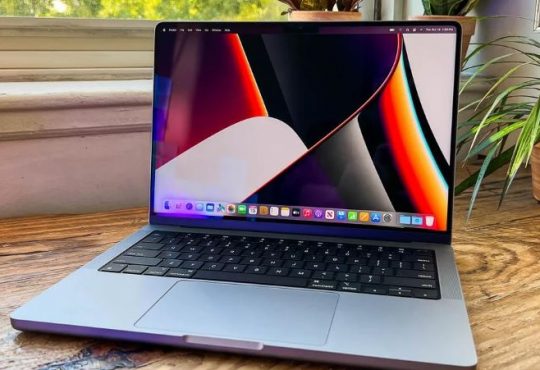
It is common need to capture the screen or window or part of the window in case of future use. For instance, when you want to capture a screenshot on a Facebook post so that you can share it with others through your MacBook, you can come here for quick steps. After capturing Mac screen, this article will also show you where to locate the captured pictures.
In most cases, you can quickly get the screenshot or screen recording on your Mac like MacBook Air and Pro with Mac screenshot shortcuts. You can take a screenshot on your PC after reading this short post.
- Part 1: Capture the Full Mac Screen
- Part 2: Screenshot a Part of Mac Window
- Part 3: Take a Screenshot of a Menu or Window
- Part 4: Take Mac Screenshots with Mac Screenshot app
- Part 5: Capture the Touch Bar
- Part 6: locate the Screenshots
Part 1: Capture the Full Mac Screen
To screenshot the whole window on Mac, use the Mac screenshot shortcut to capture the screen. Here it is worth noting that there is a PrintScreen key on Mac, but you can make full use of the combination key to screenshot Mac.
- In the window or screen, press the combination key Shift + Command + 3.
As you can see on MacBook like MacBook Air, the shift key is actually the Up arrow key, ↑.
- In the right corner of the desktop, you can see a thumbnail about the captured screenshot.
Here you can also choose to click the thumbnail to choose to Save to Desktop or Documents or Clipboard or Open in Mail, Preview, and Photos, or Show in Finder, or Delete, or Markup the screenshot.
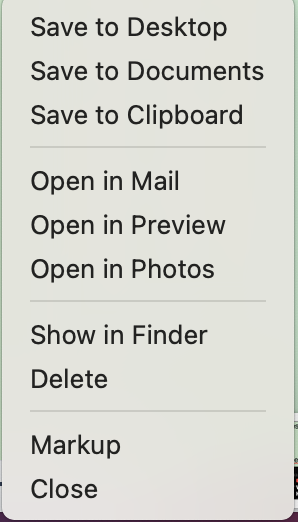
3. If you do not take any action to save or open the screenshot, the screenshot will be automatically stored on Mac desktop, and you can find the screenshot and double click it to edit it.
In this part, you will screenshot the whole Mac screen. These steps suit users’ need to take a screenshot for the whole window without special need to capture a part or portion of a large window to emphasize something.
Part 2: Screenshot a Part of Mac Window
However, sometimes, you do need to capture a proportion of a screen instead of the whole screen. For instance, you want to screen shot on Mac to make the main points of an online review stand out, you may as well screen capture the Mac.
1. In the window or screen, hit the combination key Shift + Command + 4 to screenshot a part of the screen.
2. The mouse indicator will turn to a crosshair, and you can press and hold the crosshair to select the area to be captured.
3. After selecting the area, release the mouse.

4. At the right corner of the desktop, you can see a thumbnail.
5. You can do as Part 1 to save or open it.
Part 3: Take a Screenshot of a Menu or Window
You can also just screenshot a menu or window if needed on Mac. That can be much smaller than the whole screen.
1. In the window, press the combination key Shift + Command + 4 + Space bar.
2. The mouse indicator will turn to a camera-like icon, and you can use it to capture a menu.
3. At the right corner of the desktop, save of open the screenshot on Mac.
Part 4: Take Mac Screenshots with Mac Screenshot app
Normally, there is also an embedded screen-capturing app on macOS. On this app, you can capture a full screen, a proportion or menu at one stop.
1. In the screen, press the combination key Shift + command + 5.
2. You can capture full screen, a window, or a proportion by hitting the option on the Mac screen-capturing program.

3. You can record the Mac screen if needed and click Options to choose the location to place the screenshots. It is also available for you to set a timer or use the microphone when capturing the screen on Mac.
Part 5: Capture the Touch Bar
Many users may even do not know that you can take a screenshot of the Mac touch bar, namely, the top menu on the desktop with icons like Siri, Battery, and Window icon.
However, you need to know that only 16-inch MacBook Pro is equipped with this feature of screenshot. Just press Shift + Command + 6 to capture the touch bar and then do as above to save or open the screenshot of the touch bar.

Part 6: locate the Screenshots
As for where you can find the captured screenshots, by default, they will be placed on your desktop. While you can also save it to documents or other locations by changing it when it is displayed in the thumbnail.
For instance, if you choose to Save to Documents, you can then locate the Mac screenshots in the documents simply.
Summary:
In this article, you will learn to take screenshots on Mac, including a full screen, a window, or a proportion. After that, you can also learn to save or open or edit the captured screen by referring to different parts. These combination keys will bring convenience to your life and work when you mastered them to screenshot Mac.