Do you want to record online lectures and courses on Mac? Are you wondering how to find a reliable recording tool for Mac and record lectures with it? If you’re a student or a teacher facing these dilemmas, this post offers you the solutions.
In this tutorial, we’re going to introduce 3 efficient ways to record lectures on Mac with a clear step-by-step guide for each way. And you’ll find the best way to record your lectures on Mac.
Whether you need to record online classroom lectures and make them available for review after the class, or you want to record lectures with yourself for educational purposes, we’ll get you covered.
Without further ado, let’s get started!
Way 1: Record Lectures on Mac with QuickTime Player (No Download)
The Mac built-in tool QuickTime Player allows you to record online lectures easily. It’s a convenient and time-saving way to record lectures directly on Mac without downloading or installing other software.
However, the biggest drawback of QuickTime Player is that you can’t record both our Mac screen and webcam together. And it will capture microphone audio as well as unwanted background noise while recording, which harms the audio quality.
If you want to record lectures on Mac with your computer screen as well as yourself, and enjoy advanced recording functions, see Way 2 directly.
How to record lectures on Mac with QuickTime Player
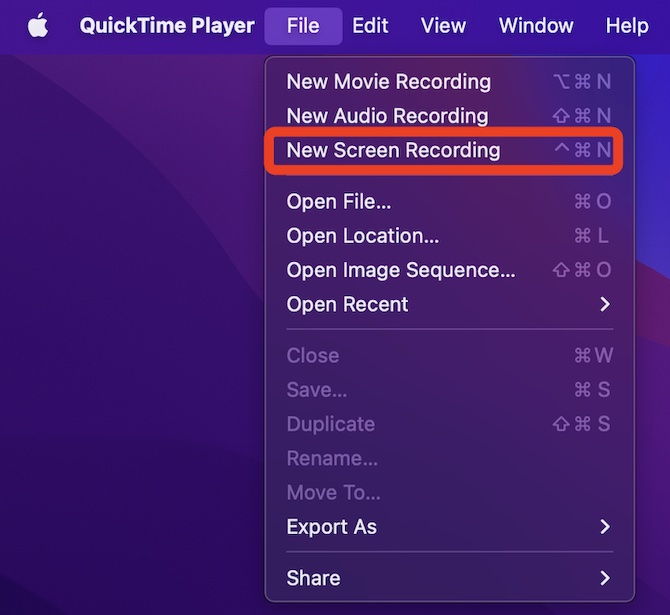
1. Select and launch QuickTime Player on your Mac from Finder > Applications.
2. At the top left corner, click on File > New Screen Recording. A toolbar will appear and your mouse arrow will be replaced with a picture of a camera.
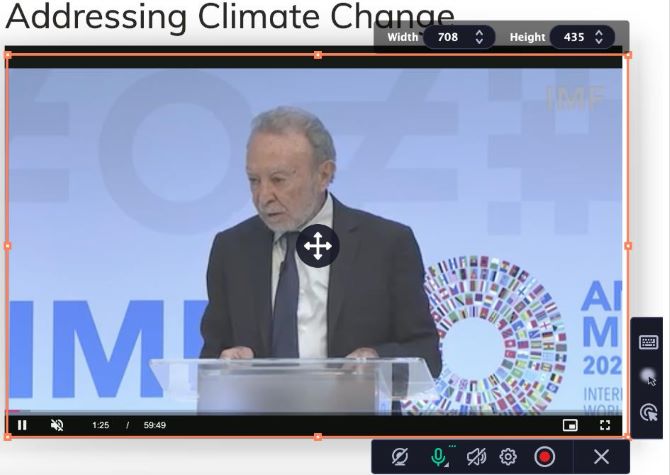
3. Select the recording region. On the toolbar, click on the Record entire screen icon to record the full screen, click on the Record selected portion icon, and drag over the section you want to record only a part of your screen.

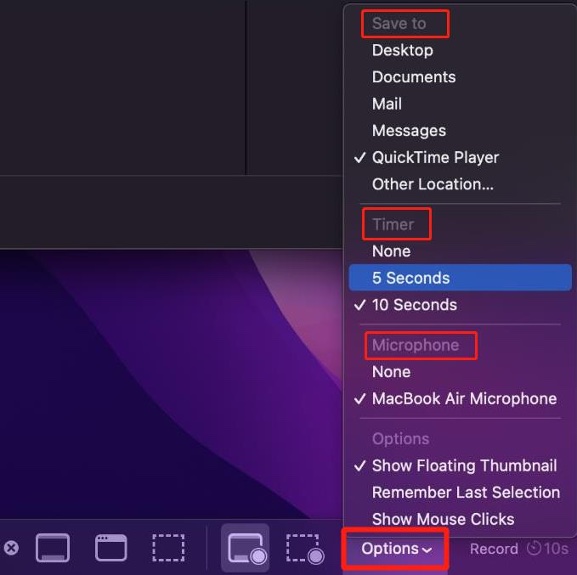
4. Set up the recording preferences. On the toolbar, click on Options. You can then choose the built-in microphone to record lectures with audio, select a 5 or 10 seconds timer to have a delay for recording, and choose where to save the recordings.
5. Now click on Record to start recording, and navigate to the lecture that you want to record.

Tips: Since you’ve set a timer or recorded the lecture, you’ll have time to hide any playback controls or any other window you don’t want to capture.
6. To stop recording the lecture, click on the stop icon at the top right corner. The recorded video will pop up on your screen, simply click on it to view and play.

Way 2: Record Lectures on Mac with Movavi Screen Recorder (Best Way)
The best way to record lectures on Mac with your Mac screen and yourself simultaneously is to try on a professional third-party screen recorder like Movavi Screen Recorder.
Movavi Screen Recorder for Mac is an expert and intuitive lecture recorder for Mac OS X 10.10 or higher. You can enjoy customized recording features like schedule recording, taking notes while recording, and highlighting cursor with this recording tool.
Besides, this Mac screen recorder is a great helper for lecture recording, presentation recording, video tutorials, and more. It is the best recording tool that will help teachers make attractive video lectures and help students record online lectures with high quality for after-class learning.
Benefits of using Movavi Screen Recorder
- Concise and user-friendly interface
- Record lectures on Mac in high-quality 4k / HD
- Capture both internal and external audio with noise reduction
- Support schedule recording and taking screenshots
- Provide advanced editing tools for trimming and joining clips
Follow along to see how you can record online lectures as well as record lectures with yourself using this powerful screen recorder.
How to record online lectures
1. Download and install Movavi Screen Recorder for Mac, then launch it.
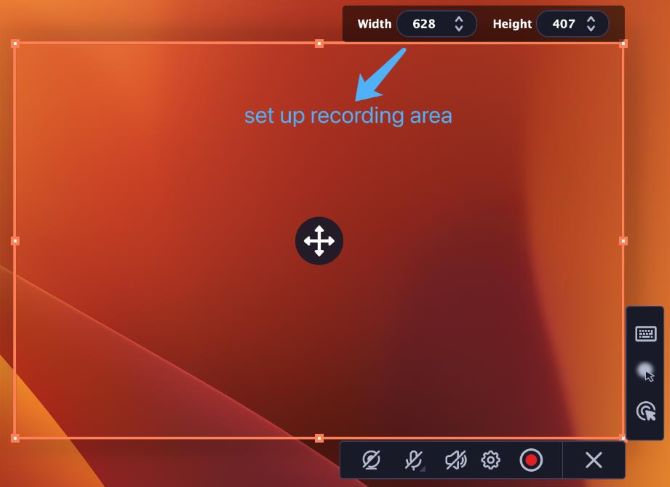
2. Choose the recording area. Click the camera button on the right control panel. Select the part of the screen that you want to record.
3. Hover your mouse pointer over it and click once a frame appears around it to record a selected window. Click on any part of your screen to record the full screen.
4. Adjust the sound settings. Click on the microphone icon to record online lectures with audio. Keep your system sound and webcam off.

Tips: You can click the settings button and toggle on the noise reduction option to reduce unwanted background noise.
5. Start recording on lectures Mac by clicking on the red start recording button.

Tips: If you want to take notes or mark important parts while recording, click the pencil icon, select the tool and line color, then draw or add shapes using your mouse cursor.
6. Stop recording. Click the square stop button on the recording panel when you’re finished.
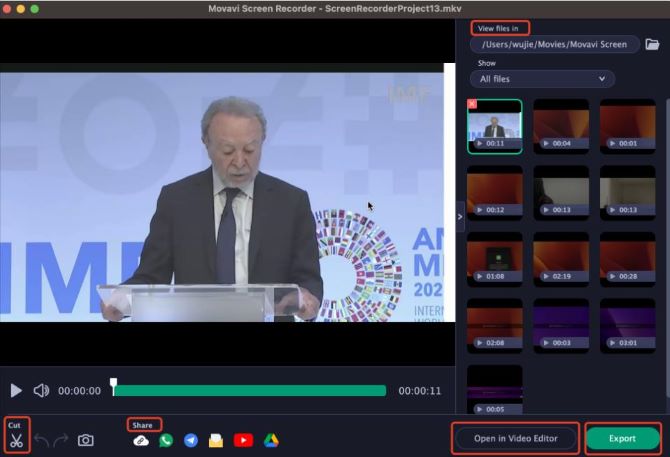
A new capture editing window will open. Your video is ready and saved in MKV format, you can then trim and edit, navigate files, change output format, and share it in a click.
If you want to record lectures with a webcam capturing yourself, here’s how to do it:
How to record lectures with yourself
1. Running Movavi Screen Recorder on your Mac.
2. Choose the recording area. Click the camera button on the control panel. The area selection tool will start. To record the full screen, press Space or click on any part of your screen.
3. Turn on your webcam and microphone. Click on the webcam, system sound, and microphone icons to enable them. You can now record lectures with a webcam overlay on top of the main video.

4. Start recording lectures with yourself on Mac. When you’re ready to begin, click the red start recording button.
5. Stop recording. When you’re finished, click the square stop button on the recording panel.
A new window will open, and your video is ready and saved in MKV format. You can now play the recorded video, trim videos from the beginning or the end, cut out unwanted fragments, or send them to your friends and colleagues.
Way 3: Record Lectures on A Mac via OBS Studio (Free)
OBS Studio is another popular tool to record lectures on Mac. It is a powerful open-source screen recorder enjoyed by lots of people. It is a great helper to record any lecture video online or record a lecture video of yourself.
However, it’s a little difficult for novices to record lectures with OBS Studio. It has a relatively complex user interface with many advanced options. If you are a first-time user, you may don’t know where to start and waste a lot of unnecessary time on it.
How to record lectures on Mac with OBS Studio
1. Download and install OBS Studio for Mac, then run it.
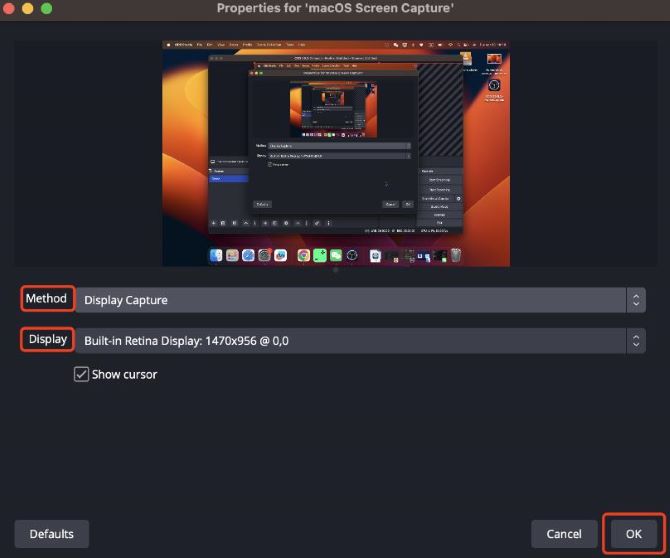
2. Click the “+” at the bottom of the panel labelled Sources, and then select macOS Screen Capture. This opens the Create a new window. Click OK.

3. Capture your Mac screen. Select Display Capture from the Method drop-down menu. Toggle on Show cursor to catch the mouse display. Then click OK.
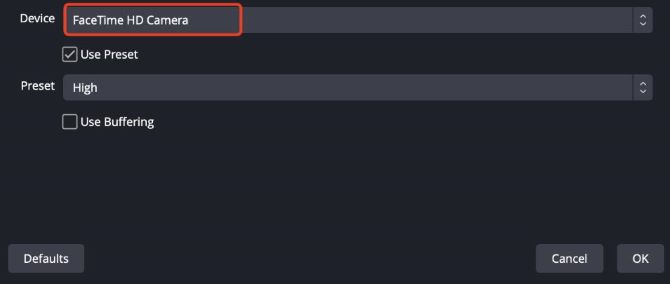
4. Capture yourself with a webcam. Click “+” under Sources > select Video Capture Device > click OK. From the new pop-up window, select FaceTime HD Camera under Device, then click OK.
5. You will see a preview of your webcam in full size. Drag over the side frame to adjust the webcam’s size and location. You can now record lectures with a webcam overlay.
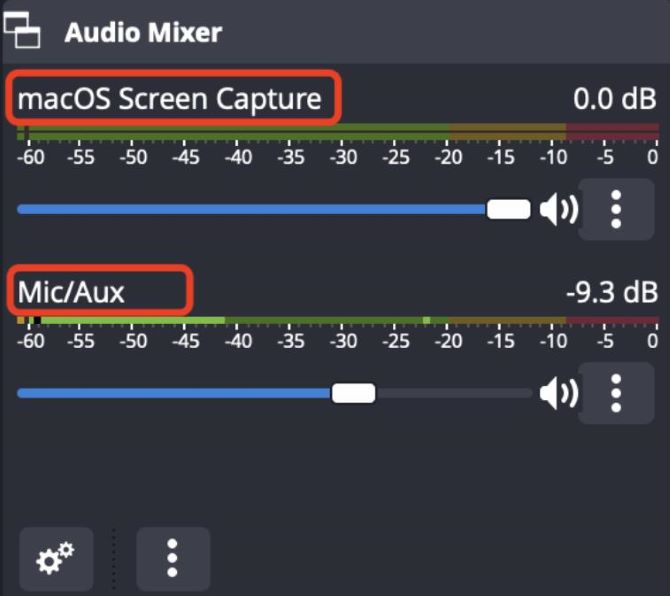
6. Set up the audio settings. You’ll see two sliders in Audio Mixer. Since you’re using a mic to speak over your lecture recording, make sure the Mic/Aux slider is up. If you don’t want to record sounds coming from your Mac during the recording, move the macOS Screen Capture slider all the way to the left.
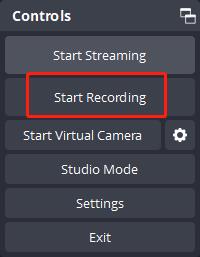
7. Start Recording. Click Start Recording under Controls on the left.
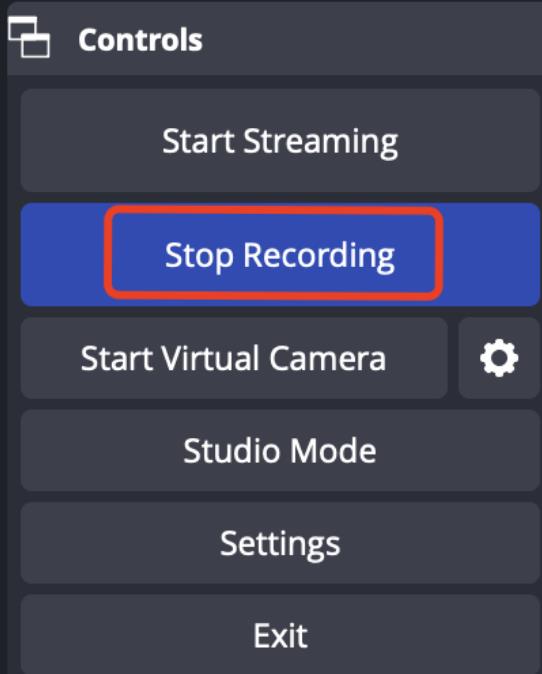
8. Stop recording lectures on your Mac. Similarly, click Stop Recording under Controls.
FAQs About Record Lectures on Mac
A: Since Mac’s built-in recording tools don’t allow you to record the computer screen and yourself at the same time, the best way to record a lecture on your PC is with the help of a professional third-party screen recorder like Movavi Screen Recorder.
A: You’ll need to choose a third-party screen recorder with advanced recording features. You can use the Scheduler of Movavi Screen Recorder under Settings > Preferences to start recording a lecture at a set time, and make use of the settings to activate mic capture.
A: Make sure your Internet connection is fast enough to stream the lecture at high quality; turn off any unnecessary applications before the lecture recording starts; use a reliable Mac screen recorder that works well with your Mac.
A: If you use the built-in QuickTime Player to record lectures, be aware that the microphone is off by default. From the toolbar, click Options, and select the desired Microphone to record the lecture video with audio.
A: The common causes that recording a lecture is not working on Mac include: screen recording permission not enabled, outdated software, insufficient storage space, too many running apps in the background that freeze your Mac computer, etc.
More Articles: