Are you looking for a guide on how to get started using Streamlabs to record your favorite content? If so, you are on the right page. This article will guide you step by step on how to record a video with Streamlabs on PC and Mac with ease.
Streamlabs is a reliable and full-featured software that helps streamers to broadcast their live events and keep their viewers engaged. Streamlabs offers a customized version of OBS (Open Broadcasting Software) – Streamlabs OBS with added features.
In addition to its live-streaming capabilities, Streamlabs also provides robust recording functionality. You can record your computer screen, capture games, record live streams on YouTube, Twitch, and other platforms using this powerful tool.
In the following, we will discuss how to record a video on Streamlabs in detailed steps and show you the useful recording settings for Streamlabs. So, if you’re ready to start recording with Streamlabs, keep reading!
Can You Record With Streamlabs?
Yes. The recording is an important feature of the Streamlabs software.
You can record your screen, including games, videos, and other content easily with Streamlabs. It also provides various features and settings to customize your recording experience.
Now let’s take a look at the detailed process of recording a video on Streamlabs.
How To Record A Video On Streamlabs
This section guides you on how to record on Streamlabs for PC and Mac. It will detail how to set up Streamlabs and how to stream and record using Streamlabs.
1. Download, install, and run Streamlabs Desktop on your computer.
If you are a Mac user, you’ll be asked for permission for Streamlabs Desktop to use your microphone and camera. You’ll need to grant permission for the app to work.
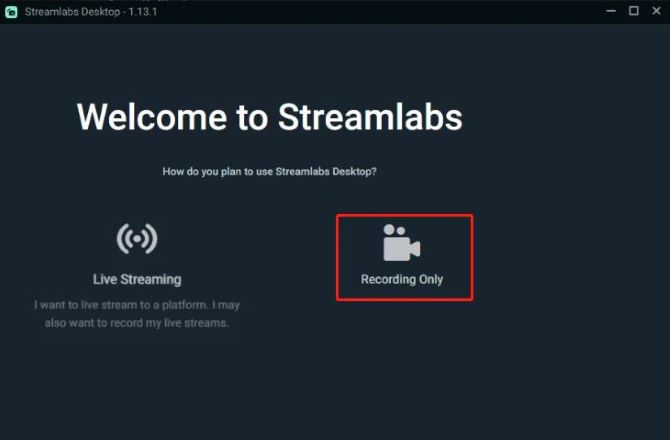
2. Select Recording Only from the options. If you also intend to stream, choose Live Streaming instead, don’t worry, you can record video as well.
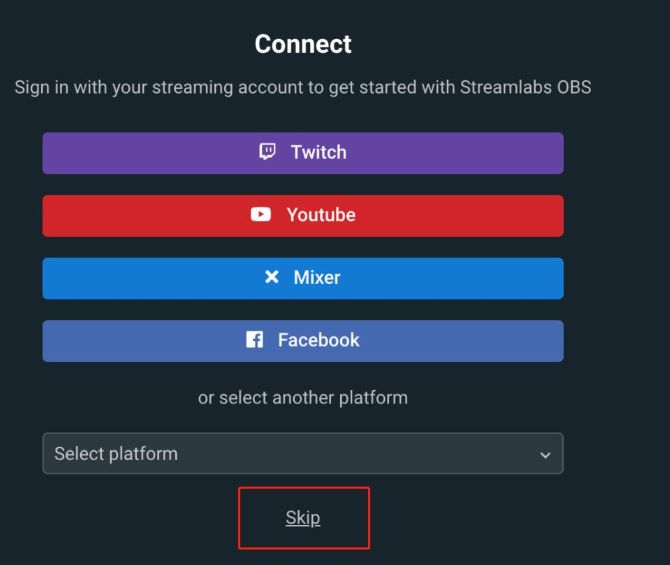
3. Choose to connect your streaming account to Streamlabs. It makes it easy for you to go live on your chosen platform like Twitch, YouTube, Facebook, etc. If you’re not ready to connect your account yet, click the Skip button.
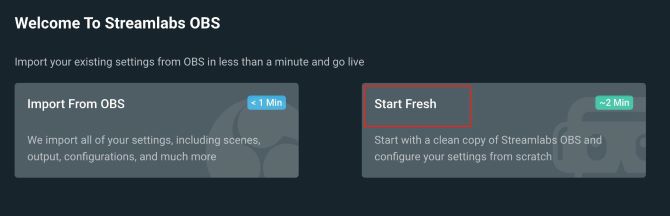
4. If you have used Streamlabs before, you can import all your settings with one click. If you’ve never used Streamlabs, click Start Fresh.
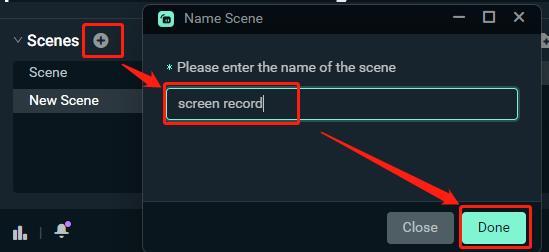
5. Click the plus sign next to Scene, enter a name, and click Done to create a new scene.
6. Click on the plus sign next to Sources, and choose the source to add it to your Scene to record. There are different types of sources that you can choose from.
- To record your entire computer screen, select Display Capture.
- To record a specific window from your computer, select Window Capture.
- To capture the games you are playing, select Game Capture.
- To capture your webcam device, select Video Capture Device.

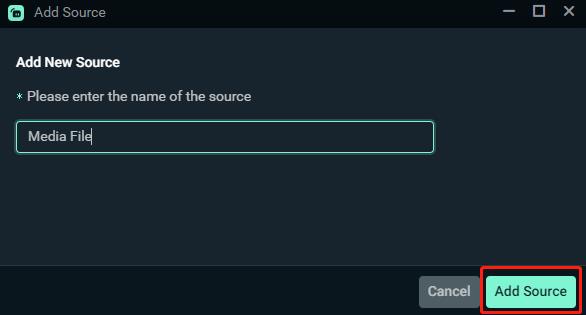
7. Click Add Source, set a name for the source, and click add source again. Select the Capture Method and Display, then click Done.
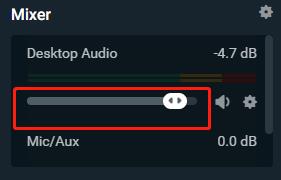
8. Adjust your audio under the Mixer tab. If the bars are moving, you are outputting audio.
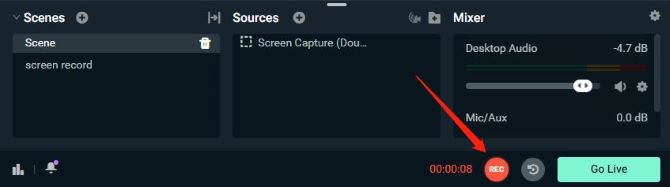
9. Click on the red REC button at the bottom right corner to start your recording.

10. Click on the REC button again to stop your recording.
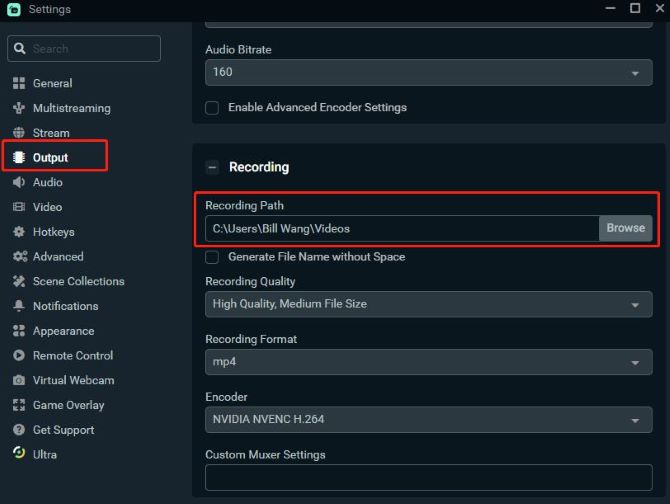
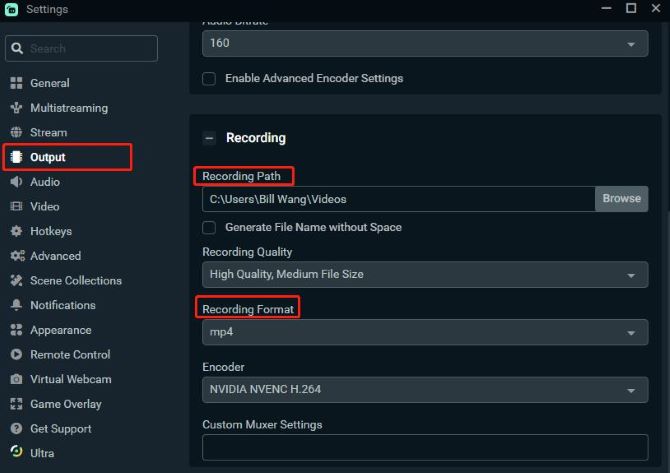
If you want to find your Streamlabs recordings, click Settings in the bottom left corner, select Output from the left menu, and click Browse under Recording > Recording Path. This will tell you where Streamlabs saves your recordings.
Streamlabs Recording Settings
To record with the Streamlabs OBS, it is necessary to be familiar with the Streamlabs settings. It is also important to understand the differences between the various options and how to optimize the performance of your recording.
Here are some of the best recording settings for Streamlabs that you should know.
- Recording Path and Format
To select the recording path and output format for your recording, click on Settings in the lower left-hand corner, and click on Output from the left menu.
From Recording Path, pick where you’d like to save the recording. From Recording Format, choose the file format. In most cases, we recommend recording in the MP4 format. You can also set the Recording Quality and Encoder from here.
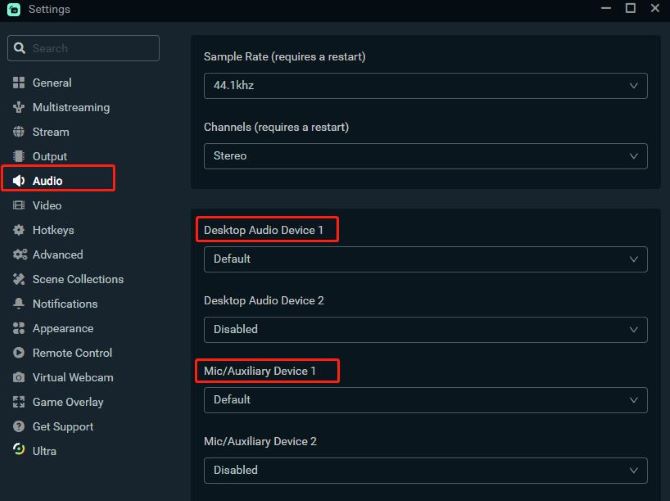
- Audio Settings
It is important to make sure you are capturing the right audio while recording. If you have a microphone connected to your computer, Streamlabs should automatically detect it and show it on Mixer. You can adjust the microphone volume from here.
To change which microphone is being captured, click on Settings > Audio, and pick a different microphone device.
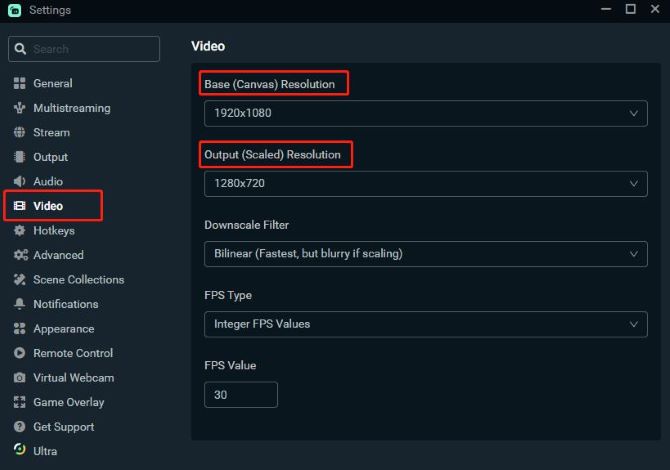
- Change Quality and Resolution
The output of your video resolution can have a significant impact on the quality of your recordings. To adjust your resolution, select Settings > Video.
Leave the Base (Canvas) Resolution as your computer’s native resolution. Select the Output (Scaled) Resolution according to your preferences. We recommend setting it to 1280×720 for a good balance between performance and quality.
- Selective Recording
Selective Recording is a fantastic feature that allows you to remove specific sources from appearing in a recorded video. Here’s how to do it:
1. Navigate to the Sources window and click on the Selective Recording icon. Once enabled, new icons will appear next to your sources in the list.
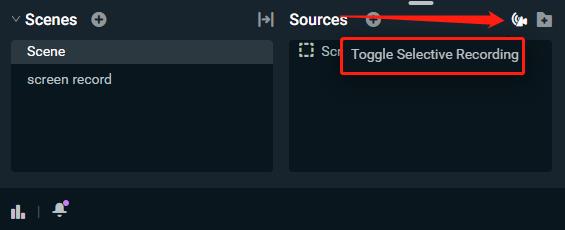
2. These icons indicate which output that source is being displayed on. They default to appear on both the live stream and the recording. Simply click this icon to change the source’s destination.
- Use Streamlabs in Discord
Streamlabs has integration with Discord allowing you to add a Streamlabs bot to a Discord server. You can live stream Switch to Discord, stream YouTube to Discord, and more.
The process is simple:
1. Click on Settings. Click on Virtual Webcam, install it, and click Start.
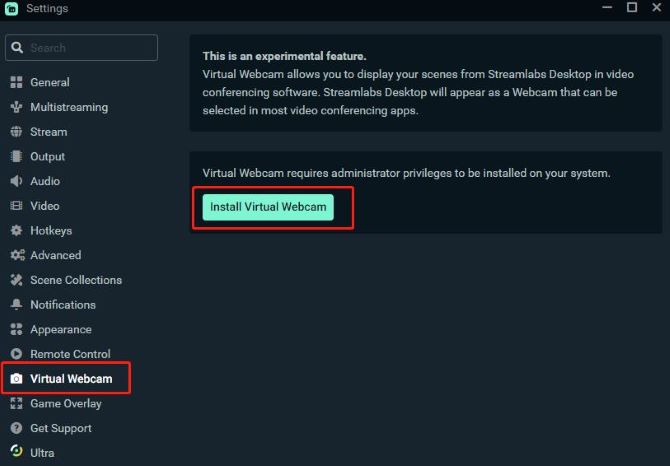
2. Now go to Discord. In your group chat or call, click the webcam and choose Streamlabs Virtual Camera.
Can Streamlabs Record Without Streaming?
Yes, you can record on Streamlabs without going live. If you follow the recording process that has been discussed above, you’ll start a recording with Streamlab without needing to stream.
Of course, you can stream and record at the same time too. You can do this by clicking on the Go Live button first and clicking on Start Recording. Just make sure you are following the right order.
Streamlabs OBS VS OBS Studio: Which One Is Better
For those who are looking for open-source live streaming and recording software, both OBS Studio and Streamlabs OBS are among the best choices. Therefore, many people ask this question: Streamlabs OBS vs. OBS Studio, which is the best?
OBS Studio and Streamlabs both have their advantages and disadvantages, and every user has their preference, so it can not be summed up in one simple statement.
However, when it comes to performance, Streamlabs is the better one, and OBS Studio is just a basic version of Streamlabs. Streamlabs is based on OBS Studio and outperforms it in some aspects, and it is also more resource-intensive than OBS.
- CPU Usage: Overall, Streamlabs is a more customizable and powerful tool. However, if you have an older computer, OBS Studio might be your choice.
- Pricing: OBS Studio is free. Streamlabs is free to use, but you can’t get all the features without a paid subscription, which is $149/year.
- Features and Tools: Streamlabs has a few more customized features than OBS Studio, and OBS lacks some features that many video creators appreciate.
Best Streamlabs Alternatives for Windows
If you are still not satisfied with your recording experience with Streamlabs, or if you want to enjoy customized recording features and record your videos in a professional way, a third-party software designed for screen recording might be a better choice.
iTop Screen Recorder is the best Streamlabs alternative for Windows users to record videos. It is an expert screen recorder to record shows, live streams, games, etc. With it, you can record HD/4K videos without compromising image quality.
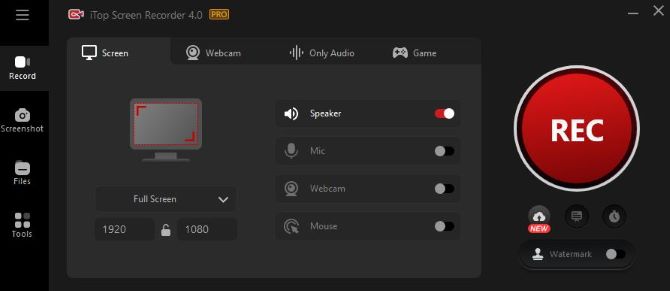
Thanks to hardware acceleration, iTop Screen Recorder can provide a smooth video recording experience, with no lagging, shuttering, or fps dropping. In addition, it builds in a video editor that can help you cut unwanted parts, add subtitles and do more editing.
Besides, it has more advantages:
- Offer you a flexible screen capture to record a selected screen.
- Record audio, and capture screen and webcam simultaneously.
- Offers an audio recording mode to only record soundtracks from videos.
- Support more than 15 outputs or converts multiple formats.
- Concise interface that are friendly for all kinds of users, especially for beginners.
FAQs About Recording Videos on Streamlabs
A: If you have a functional audio source, ensure it is not muted in the Mixer tab on Streamlab. You can also click Settings > Audio to select the right speaker and microphone device to record audio.
A: Yes. Streamlabs is a highly-rated software for content creators that offers a user-friendly interface and robust features for live streaming and recording. However, if you want to use software designed for screen recording, give iTop Screen Recorder a try.
A: Yes, you can just record with Streamlabs. To do this, simply select Recording Only when you set up Streamlabs. After that, you can add a source you want to record and click the start recording button to begin recording.
A: Here are some possible reasons: a recording path that your user account is allowed to write in; an issue with the output settings; your computer’s resources are used up; problems with audio drivers or graphic drivers; issues with Streamlabs itself.
A: By default, Streamlabs will save your recorded videos and stream archives to the Videos folder in your computer’s user directory. However, you can change the location by clicking Settings > Output > Recording Path.