Lenovo, the laptop brand known for its affordability, has serious flaws despite its reputation for durability and compatibility with various software. Some users have experienced their Lenovo laptop screen turning black.
Have you ever turned on your laptop only to see a black screen? Seems like a disaster, right? But don’t worry. This problem is usually not difficult to solve. In this guide, we will discuss the reasons why your Lenovo laptop starts up with a black screen and 8 ways to fix this issue.
# Causes for a Lenovo Black Screen
The black screen of your Lenovo laptop can be caused by many possible reasons and sometimes it is difficult to find the real reason. Here are some of the main factors that lead to such problems as summarized in this article:
1. Hardware errors: If hardware components or peripherals (such as keyboard, mouse, and cables) are worn out, it may cause the screen to not display.
2. Battery failure: The power supply of your Lenovo laptop is one of the most critical parts to keep everything running smoothly. The most common symptom of a bad battery is a glitchy display that suddenly goes black. Check if your Lenovo battery is not charging when inserted.
3. Software glitches: Whether it’s due to hard drive or memory issues, or corrupted files and programs, these corrupted files can have a negative impact on your laptop.
4. Overheating: If your Lenovo laptop becomes hot from running memory-intensive programs or software, or if you have cooling issues, your laptop may start heating up rapidly, causing some functions to shut down. Long-term overheating can sometimes adversely affect a laptop’s display.
Understanding the main cause of the problem can resolve a Lenovo Black Screen. Here are 8 effective ways you can fix the problem.
# Solution 1: Reset the display mode
Sometimes, a black screen is just a glitch when the Windows operating system loses connection to the on-screen display.
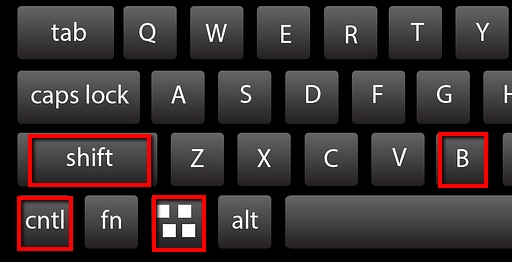
So whenever this happens, the first thing you can try is to press the Windows logo key, Ctrl key, Shift key, and B at the same time. This will reset the connection, refresh your display connection, and possibly get your display working again.
Once done, check to see if your Lenovo laptop returns to its normal display. If you still get a black screen, continue to solution 2 below.
# Solution 2: Hard reset your Lenovo laptop
Peripherals connected to your Lenovo laptop can be the cause of the black screen issue. Internal programming errors in some software can also cause various problems.
If this is the case for you, you may notice the dots spinning during startup. Therefore, you should perform a hard reset on your Lenovo laptop to fix this issue.
In this case, a hard reset is similar to a power cycle. Here’s how to do it:
Step 1: Turn off the Lenovo laptop.
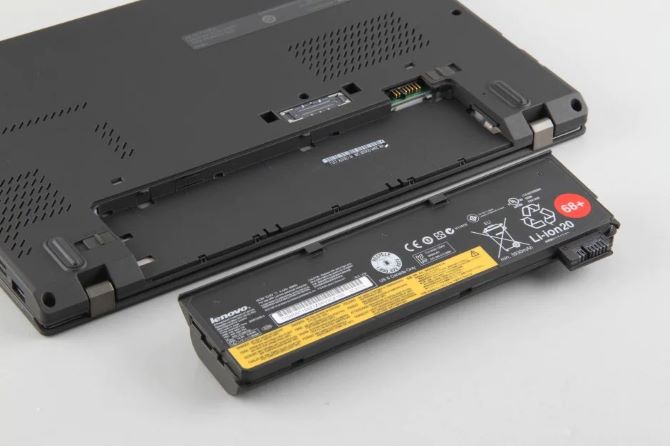
Step 2: Unplug the power cord, remove the battery and disconnect any externally connected peripherals from the laptop.
Tips: This includes any wired or wireless mice, keyboards, USB hubs, cables, etc. Corrupted software or drivers for one of these peripherals may prevent your monitor from functioning properly.
Step 3: Turn off the laptop for 30 seconds to 1 minute.
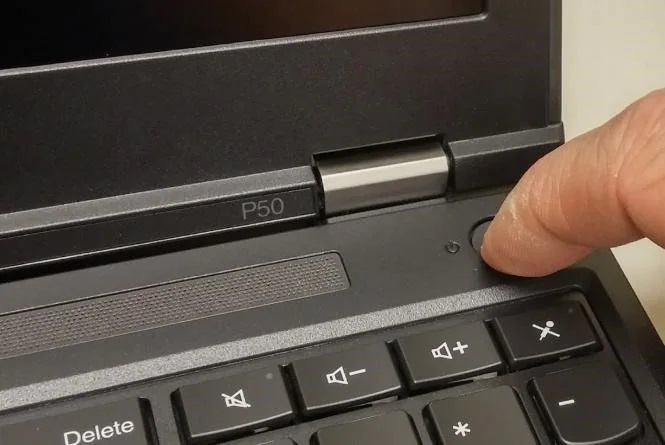
Step 4: Press and hold the power button for about 60 seconds.
Step 5: Put the battery back into the laptop and connect the power cord.
Step 6: Turn on your computer and see if it boots normally and the monitor comes back on.
# Solution 3: Connecting External Monitor to Test the Display
If previous methods of hard resetting the laptop didn’t work, there may be a display issue. To test your laptop screen for faults, you’ll need a monitor and HDMI DVI or VGA cable that are compatible with your laptop. Check the display by following the instructions below:
Step 1: Connect the monitor and your Lenovo laptop using an HDMI cable.
Step 2: Turn on your external monitor and the laptop. Wait for some time till it boots.
Step 3: Now, click on the ‘Fn’ key and ‘CRT/LCD’ tab (either F5 or F8). Keep on clicking on it until the content of your laptop is displayed on the external monitor.
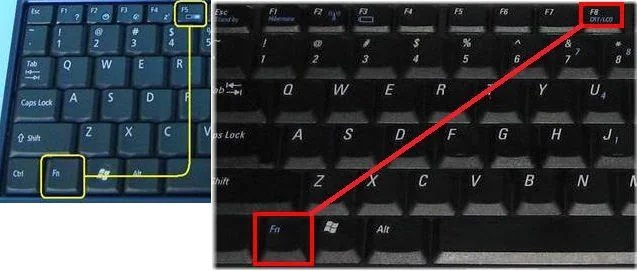
If the computer displays on the external monitor, the LCD or the internal LCD cable may be faulty. Replace LCD cable. If that doesn’t work, the LCD screen needs to be replaced, and you should probably go to a repair shop.
# Solution 4: Update your graphics driver
If your graphics driver is corrupted or outdated, it may prevent the display from functioning properly. Try updating your graphics drivers and restarting the computer to see if the monitor turns on. There are many ways to update the driver, and the easiest and most trouble-free one is to use a tool that automatically updates the outdated and missing drivers on your PC.
Driver Booster is a program designed to update any outdated audio, video, USB or other device drivers on your PC that may adversely affect your computer’s performance or cause system errors. Driver Booster can quickly check, download and install device drivers for you in the most convenient way. A quick fix brought by Driver Booster will make your PC system and external devices work fine again.
Even without internet, Driver Booster can install graphics card drivers or any missing drivers for you offline. This application will also protect your computer from hardware failures, conflicts and system crashes. It’s very easy to use and works automatically, making it an excellent solution to help keep your system up and running. Therefore, Driver Booster should be your best choice when you need a driver update tool.
Step 1: Download, install and run Driver Booster on Windows 11 or Windows 10.
Step 2: Click Scan.

Then Driver Booster will start to detect all the drivers, and give an outdated driver list for you.
Step 3: Find out your graphics card and click the icon Update next to it.
Step 4: Wait for the updating to be completed.
Tips:
If you want to update all outdated, missing, and faulty drivers on your PC, you can simply click the option Update Now at the top right, and then Driver Booster will download and install the latest drivers for these devices.
# Solution 5: Restart the explorer.exe process
Explorer.exe manages several basic processes on your computer, including your desktop, toolbars, and many other things. If your system Explorer.exe is closed, it will disappear from your taskbar and desktop. This can cause black screen issues on Lenovo laptops. So, try restarting the explorer.exe process to see if it fixes the problem:
Step 1: On your keyboard, press the Ctrl, Shift and Esc keys at the same time to open Task Manager.
Step 2: Click the Details tab, then locate explorer.exe and click End task.

Step 3:Restart your laptop.
Now you can see if the black screen issue has been eliminated. If it’s still no joy, please move on to solution 6.
# Solution 6: Disable fast startup
Fast Startup is a new feature in Windows 10 that allows your system to start up faster by saving the operating system state to a hibernation file. However, this doesn’t always work, and it sometimes messes up the boot process and causes the screen to go black.
So, if it is enabled on your laptop, this could be the cause of black screen issue on your Lenovo laptop. The following steps will help you disable fast startup to avoid such incidents.
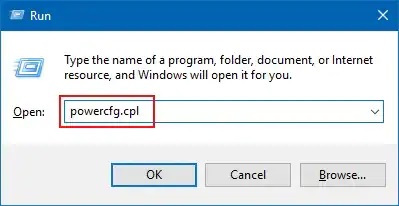
Step 1: Tap on Windows + R at the same time to open the Run dialogue box.
Step 2: Input powercfg.cpl and click on Enter. It will open the Power Option tab.
Step 3: Now, click on Choose what the power buttons do on the left side of the screen.

Step 4: Select Change settings that are currently unavailable.
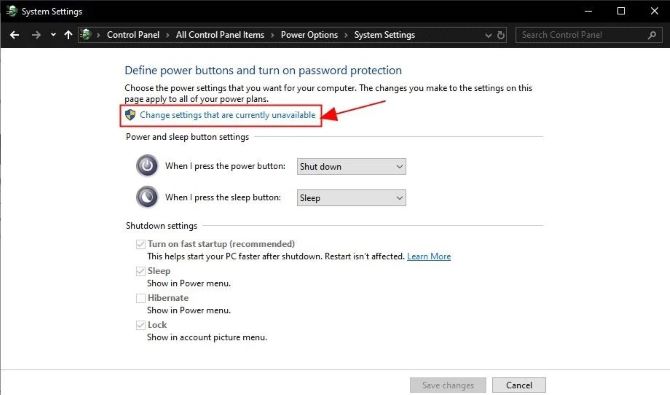
Step 5: Now, uncheck the box Turn on fast start-up.
Step 6: Click on Save Changes and close Windows.
# Solution 7: Perform a system restore
If your Lenovo black screen problem occurred recently when you made some changes to your computer, it may have occurred due to some new installation or upgrade. These types of system failures do happen when a new program is not compatible with your operating system.
Therefore, you should perform a system restore to restore your laptop to the state it was in before these changes. Follow the steps below to learn how to do it:
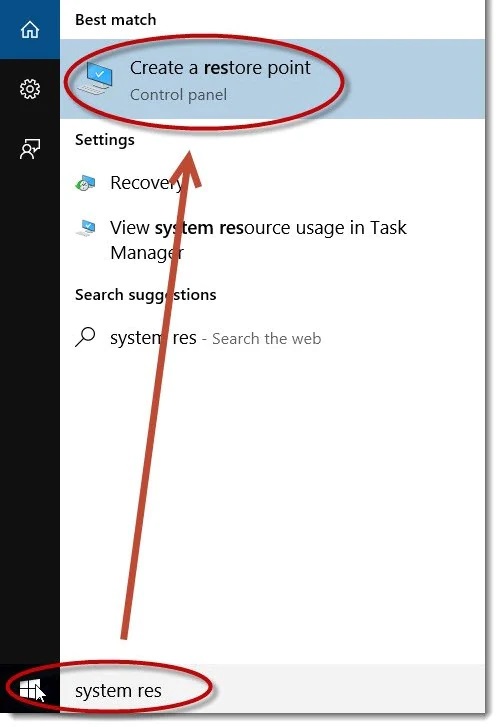
Step 1: Press the Windows key and write System Restore.
Step 2: Click on Create a restore point.
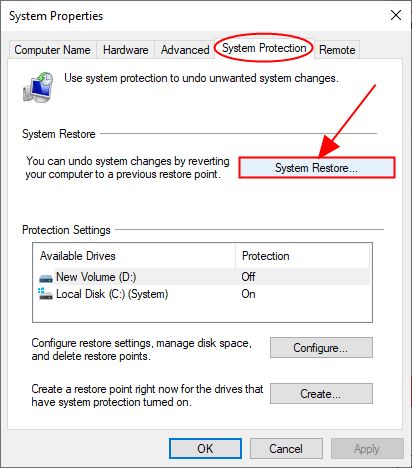
Step 3: A window will open up. Click on System Protection -> System Restore.
Step 4: Read the instructions and tap on Next.
Step 5: Now, check the box Show more restore points, select the restore point that you want your system to, and click Next.
Step 6: Follow the on-screen instructions to complete the system restore process.
Step 7: Now, restart your computer to see if the issue has been resolved.
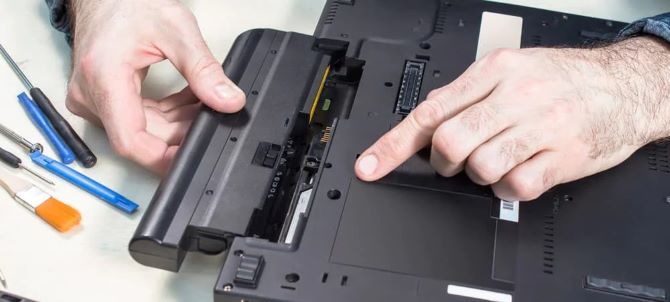
# Solution 8: Reinstall the Memory Modules
If the memory module is loose, it will usually cause the laptop to not display the image. Therefore, reinstalling the memory modules may resolve black screen issues on your laptop.
Step 1: Turn off your Lenovo laptop, disconnect power cables and remove the battery from the laptop.
Step 2: Remove the screws from the back of the computer and pull out the service door.
Step 3: Once you see a memory slot that is held by two arms, pull both these arms simultaneously to release the memory module from the spring tension position.
Step 4: Use a clipper to take out the memory module from the hatch gently.
Step 5: Use a clean cloth to brush the memory slot. Note that do not touch it directly with your hands.
Step 6: Line up the notch in the memory module and try to insert it properly into the slot.
Step 7: Slowly push the memory module down until it latches correctly.
Step 8: Tighten the service door and attach the battery to its position.
Conclusion:
That’s all content about Lenovo laptop’s black screen issue. Hope the eight solutions provided above can effectively help you solve the problem. If you have tried all of the above, but the screen of your Lenovo laptop still does not work, you are left to call a professional or contact Lenovo officials.
More Articles:
Lenovo Vantage: What It is and Should I Uninstall It?