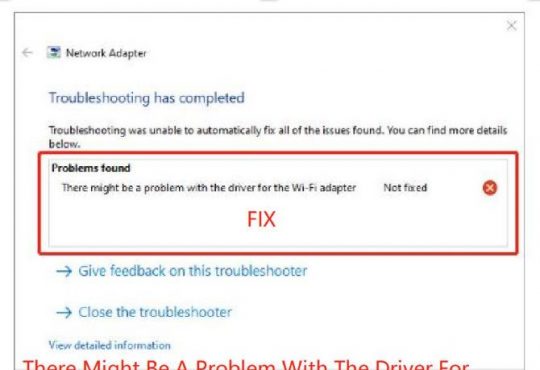
Some users recently reported, “my WIFI is not showing up under wireless networks”. When you try to connect your device to the network but you have not found the WIFI network in the WIFI list. This network issue occurs in different cases.
For instance, you can see your home’s WIFI in the network list but you fail to see the Wi-Fi when you use the device in another location like a café. After upgrading the Windows system from Windows 10 or 7 to Windows 11, you may sometimes observe some names of the Wi-Fi network in the neighborhood, but you cannot see some for unknown reasons.
When you check it in Device Manager, you can find the WIFI in Network adapters. The Windows device is connected to a WIFI network even though it doesn’t appear in the Wi-Fi list. Don’t worry. You can get the Wi-Fi network back to the network list with the following solutions.
Why Is WIFI Network Not Showing up on the WIFI List?
The outdated or missing or even damaged network driver is most to blame for the missing WIFI in the network list. After upgrading to Windows 11, you may also need to update all the device drivers to ensure the drivers support the hardware to run on the new system.
Besides, the network hardware issue may also give rise to the “WIFI not available” error in Device Manager. Although your device is connected to the network, the error “WIFI icon missing from the taskbar”, and “WIFI unavailable in the Wi-Fi list” shows that the Windows network runs into problems.
How to Fix Wi-Fi Network Not Showing up in the WIFI List?
You need to troubleshoot this “WIFI not appearing in the WIFI list” error from the network driver to the Wi-Fi modem and services. One of the solutions below will be helpful for you.
Solutions:
- 1: Update the Network Driver
- 2: Restart the Modem and Router
- 3: Change Wlan AutoConfig Service Settings
- 4: Change the Router Channel
Solution 1: Update the Network Driver
Most people come across this Wi-Fi network after a Windows upgrade or update, so you need first try to update the WIFI driver to ensure it is compatible with the Windows system. If you have just upgraded the system from Windows 7 or 10 to Windows 11, you may also need to keep all device drivers up-to-date.
Driver Booster, in this case, can be a professional and efficient driver tool to find out, download, and install all drivers automatically. Even if you can’t find the WIFI in the “available network list”, this top one driver tool will help.
1. Download, install and run Driver Booster.
2. Click the Scan button.

3. In the scanning results, locate Network adapters and then Update the Wi-Fi driver.
4. Wait until the driver is installed automatically.
After that, you can open Device Manager, and then check whether your home’s WIFI is listed under the WIFI list. The compatible Wi-Fi driver will also help you solve network errors like “WIFI keeps dropping”.
Solution 2: Restart the Modem and Router
In case the error happens to your Wi-Fi hardware like the router, you would better troubleshoot the hardware problems. For instance, if the Internet Service Provider (ISP) hit upon errors, the WIFI won’t show up in the WIFI list. You can try to restart the modem and router.
1. Shut down your computer.
2. Unplug the modem and wireless router from the power source.
3. Wait for 30 seconds.
4. Plug the wireless router and modem into the power source.
5. Reconnect to the WIFI network.
Now, you can see that the WIFI is listed in the WIFI list and the network works smoothly.
Solution 3: Change Wlan AutoConfig Service Settings
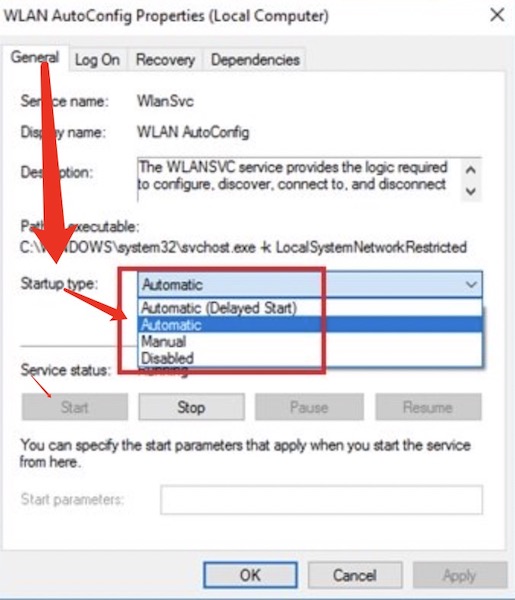
The Wlan AutoConfig service is a wireless connection management utility on Microsoft Windows 11, 10, 8, 7, and XP that dynamically selects a wireless network to connect to based on a user’s preferences. If this service isn’t enabled, a “Wi-Fi not showing up” error in the WIFI list may occur.
1. In the search box, type in “services” and then press Enter to move on.
2. In Services, scroll down to locate and right click Wlan Wlan AutoConfig service to open its Properties.
3. Under the General tab, locate Status, and Start it, and then set Startup type Automatic.
In this way, you can see the WIFI network in the network list and you can connect to the wireless network. “The 5GHz WIFI not showing up” error will also be resolved after you enabled the Wlan service.
Solution 4: Change the Router Channel
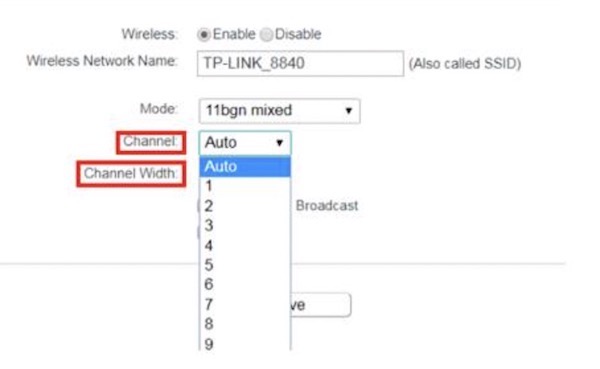
Many users reflected that adjusting the router channel from 13 to any one of the channels 1-11 works. In this case, you will not only see the WIFI network of the neighbors. It is said that some router channels like channels 12 and 13 are only allowed in some countries. Hence, switch the
1. Launch a web browser like Google Chrome, Firefox, and Safari.
2. In the browser’s address bar, input your router’s IP address.
3. In the next webpage, type in the router’s username
4. Hit Wireless settings > Channels.
5 Then change the WIFI channel to 1, 6, or 11 since they are less crowded than others.
6. Hit Save.
Summary:
In this post, you can find some useful solutions to fix the “my WIFI not showing up in the Wi-Fi list” error. For most people, updating the Wi-Fi driver does help you get rid of the WIFI icon not appearing problem.
More Articles:
Download Marvell Avaster Wireless-AC Network Controller Driver for Surface
Fixed: The Default Gateway Is Not Available on Windows 10/11 Keeps Happening