Fixed: The Default Gateway Is Not Available on Windows 10 Keeps Happening
Sometimes, as long as you find there is no network connection or WIFI keeps dropping on Windows 10, the first thing comes across you is to troubleshoot the network error.
After the troubleshooting, it prompted you that the default gateway is not available Ethernet Windows 10. Or according to the complaints of some users, the problem is Windows 10 WIFI: “the default gateway not available”.
Contents:
What is My Default Gateway? How to Find it on Windows 10?
How to Fix Windows 10 Default Gateway Unavailable Keeps Happening?
What is My Default Gateway? How to Find it on Windows 10?
In short, WIFI or Ethernet default gateway is the intermediate device that connects your local network to the internet, thus enabling you to access the internet and to surf online. That is why when the default gateway is unavailable on Windows 10 shows up, your Ethernet or WIFI access denied.
In this part, you can try to find out what your default gateway is on Windows 10. Just open Command Prompt from the search box and then input the command ipconfig | findstr /i “Gateway”.
After hitting Enter, the default gateway will come into your sight.
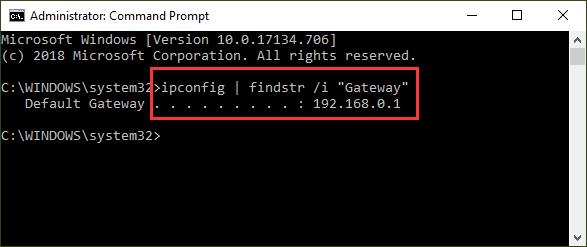
Here you will get network default gateway on Windows 10, but the issue is that the default gateway is not available. Now be ready to fix this internet connection problem.
How to Fix Windows 10: The Default Gateway Not Available Keeps Happening?
As for why the default gateway is not available keeps happening to Windows 10, the main causes are outdated or incompatible network driver, problematic third-party software, and wireless adapter power settings.
Here in this post, you will get the most effective methods toward this default gateway not available after Windows 10 upgrade.
Solutions:
2: Update Windows 10 Network Driver
3: Reinstall Compatible Network Driver for Windows 10
4: Uninstall Third-party Software
5: Change Network Adapter Advanced Power Plan Settings
6: Use Manually Assigned Default Gateway
Solution 1: Check Network Hardware Connection
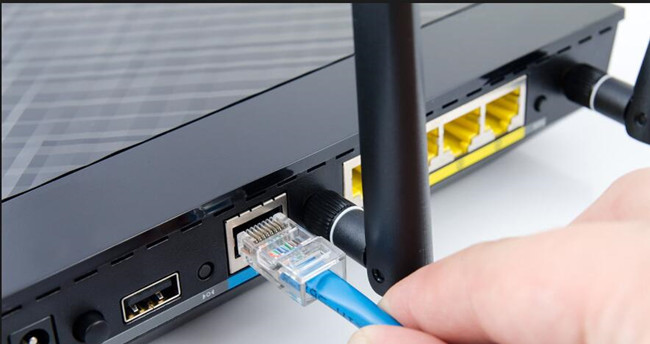
To make things easier, you need to check whether network hardware is connected properly. Try to plug out the router and then re-plug it in again.
For some people, after you reconnect the network router, fortunately, the default gateway not available on Windows 10 disappeared.
You can manage to re-plug the router for several times. And if the default gateway is not available on Windows 10 keeps happening, perhaps the default gateway Ethernet or WIFI connection error is caused by the network driver or setting issue.
Solution 2: Update Windows 10 Network Driver
You would better attempt to download the compatible and latest WIFI driver or Ethernet driver for Windows 10. After that, you can check if the new network driver can make the Windows 10 default gateway blank disappear.
Here since there may be no internet on Windows due to the unavailable default gateway, you may as well turn to Driver Booster and make full use of its Fix Network Failure function.
After that, as the best and professional driver updater, Driver Booster will scan, download and then install the compatible network driver for you automatically. So it can be an efficient tool for you to resolve default gateway blank on Windows 7 or 10.
1. Download, install and run Driver Booster on Windows 10.
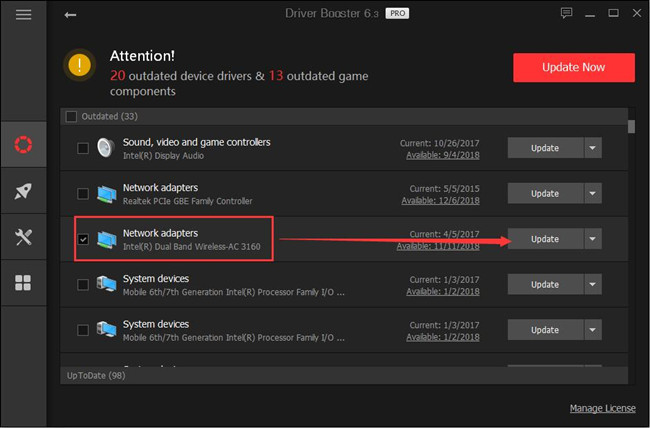
2. Then click Scan to search for missing, outdated, and faulty device drivers.

3. Slide down to locate Network adapters and then choose to Update it or them.
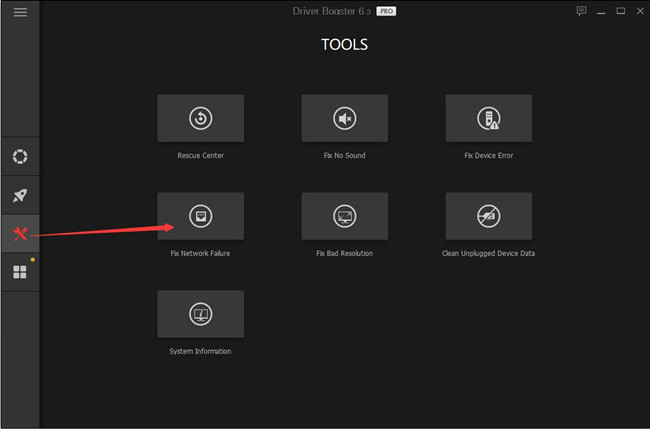
Tips: Use Driver Booster to Fix Network Failure issue
On the left pane of Driver Booster, choose Tools and then on the right side, select Fix Network Failure.
With the most up-to-date WIFI driver on your PC, the default gateway is not available Ethernet connection can be fixed on Windows 10.
Solution 3: Reinstall Compatible Network Driver for Windows 10
Once you met with Windows 10 constantly got a default gateway not available error, the driver issue is to blame. Apart from updating your Wireless or Ethernet driver, you can also try to change a driver for Windows 10 network adapter to see if it can work fine on your computer.
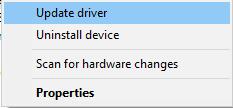
1. In Device Manager, right click your network driver to Update driver.
2. Decide to Browse my computer for driver software.
Here instead of Search automatically for updated driver software, you are to browse your computer for the network driver.
3. Select Let me pick from a list of available drivers on my computer.
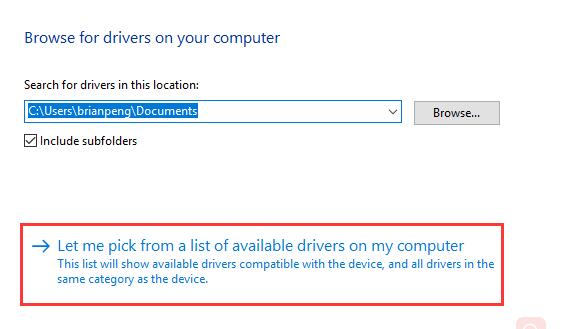
This is to let you choose the WIFI or Ethernet driver you need to fix Windows 10 WIFI default gateway can’t be used.
4. Tick the box of Show compatible hardware and then select a driver from the list.
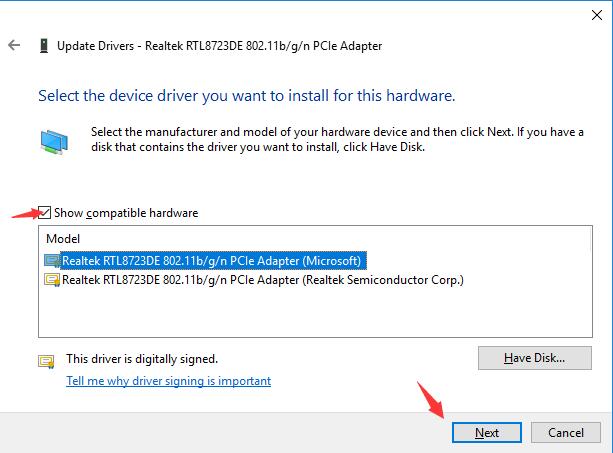
After that, hit Yes to install this driver.
All finished, you can notice that Device Manager is installing the WIFI driver you have chosen on Windows 10.
In that case, it is likely that you will not be troubled by Windows 10 default gateway not available with Ethernet connection.
Solution 4: Uninstall Third-party Software
Some external applications, such as Avast and McAfee, can to some extent make you cannot connect to the default gateway. They can bring you some viruses or unknown threats that can lead to the network errors on your PC.
Hence, there is much need for you to remove these programs if you feel like to fix WIFI default gateway out of work Windows 10.
1. Open Control Panel.
2. In Control Panel, locate Uninstall a program under Programs.
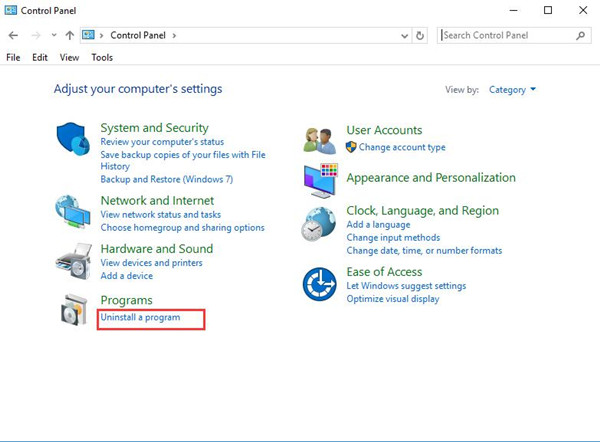
If you are unable to see Programs, choose to View by category.
3. In Programs and Features window, find out and right click the application you would like to uninstall to Uninstall it.

Soon after you removing the third-party software from your computer, like Avast, try to reboot Windows 10 to take effect.
Now the detected error that the default gateway is not unusable will not come to you again in Windows 10 without the threats from the problematic software.
Related: How to Uninstall a Program on Windows 10 (Including Won’t Uninstall Tutorial)
Solution 5: Change Network Adapter Advanced Power Plan Settings
It is natural that when there is something went wrong with your network adapter that Windows 10 default gateway not working would pop up on your PC.
From the reports of many users who have stumbled upon the WIFI default gateway unavailable on Windows 10, modifying the power mode settings related to wireless adapter can in a large sense be helpful. You may as well manage to try this way as the following steps.
You may as well manage to try this way as the following steps.
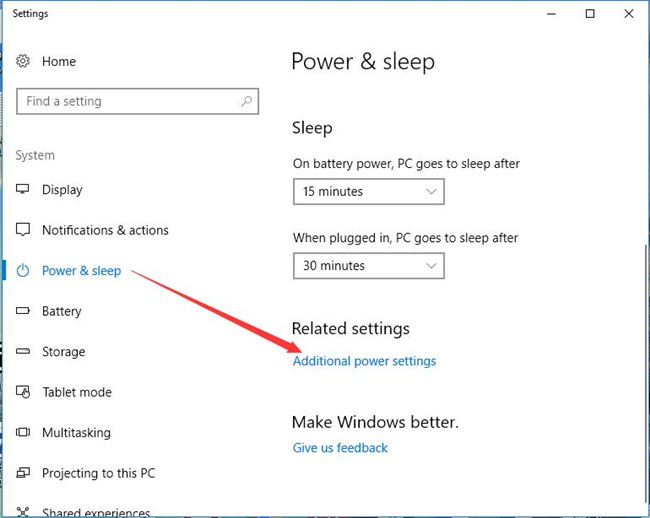
1. Search Power and sleep settings in the search box and then stroke Enter to move on.
2. In the following window, click Additional power settings under Related settings.
3. Then decide to Change plan settings beside the power plan you set for your PC.
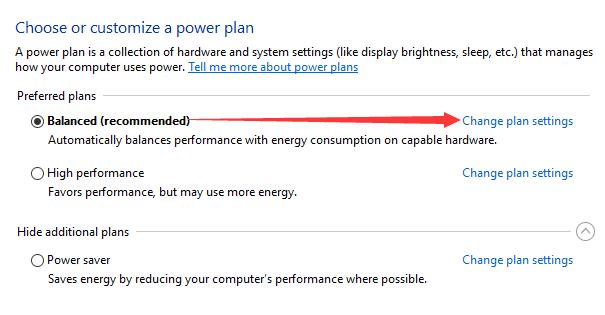
Here the Power plan is Balanced, yours may be High Performance or Power Saver.
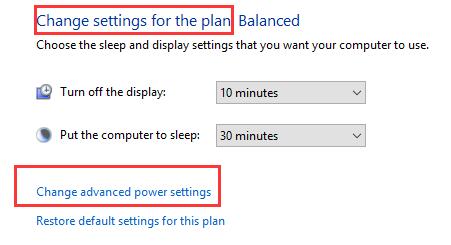
4. Then hit Change advanced power settings in the middle of Edit Plan Settings.
5. In Power Options window, find out Wireless Adapter Settings and then set both the On battery and Plugged in as Maximum Performance.
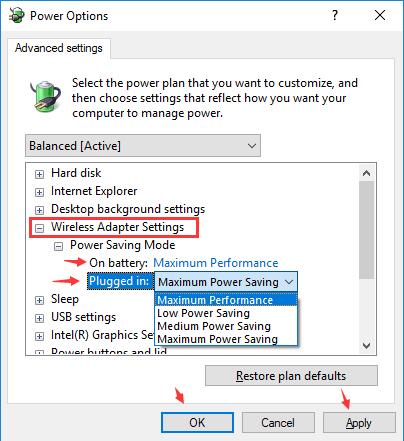
6. Finally, click Apply and OK to save changes.
In this way, Windows 10 power plan settings of the wireless adapter or Ethernet adapter will not cause your default gateway not available. You can detect the network condition again on Windows 10 to check the Wireless network default gateway is not available.
Solution 6: Use Manually Assigned Default Gateway
Now that the default gateway you would like to use is unavailable, here you are able to assign one on your own.
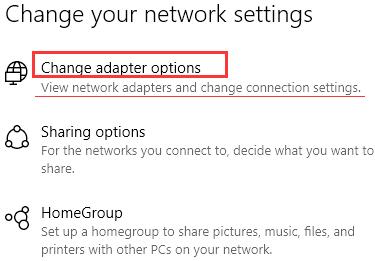
1. Go to Settings > Internet and Network > Ethernet (WIFI) > Change adapter options.
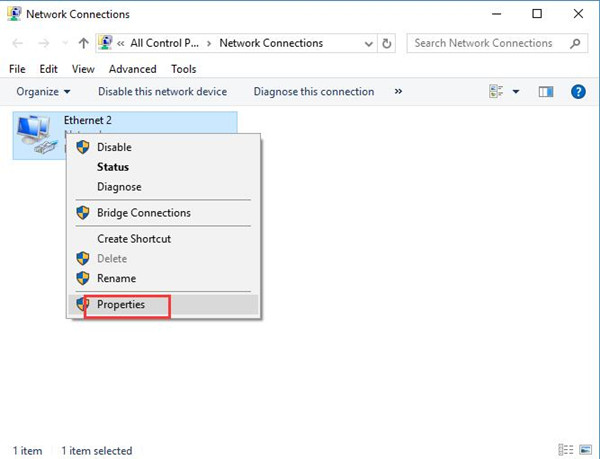
2. Right click the network you are connecting to open its Properties.
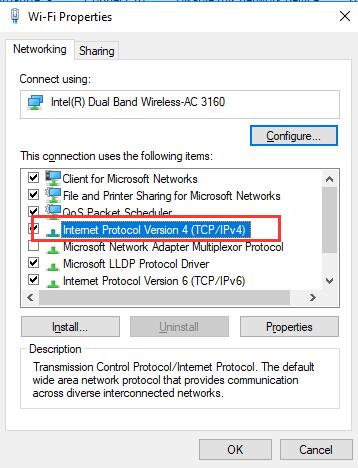
3. In Properties window, scroll down to find out and double click Internet Protocol Version 4 (TCP/IPv4).
4. Then decide to Use the following IP address. Here you need to input the IP address, Subnet mask, and Default gateway.
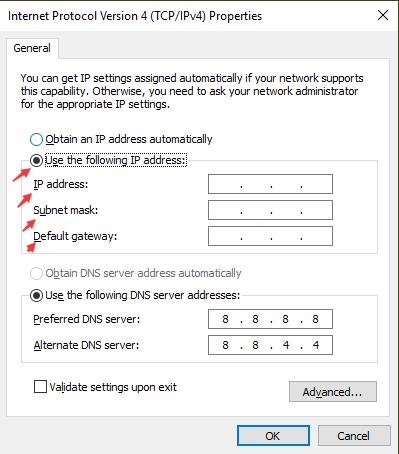
5. The minute you hit OK to save changes, you can browse online and you will notice that the default gateway not available on Windows 10 won’t stop you from accessing the internet.
Solution 7: Reset Network IP Address
It is usual that you tried the ways above, but the default gateway is still out of work on Windows 10. On the basis of this fact, you would be suggested to make some changes to the WIFI IP address and then observe the changes happening to the network error.
1. Type in Command Prompt in the search box and then right click the best-matched result to Run as administrator.
2. In Command Prompt, input netsh int ip reset and then press Enter to reset the network IP address on Windows 10.

3. When the WIFI IP address is reset, you can begin to examine the network issues on your PC.
Possibly, WIFI or Ethernet default gateway is not available disappeared from Windows 10 and you are able to enjoy the smooth network connection as you wish.
In short, this WIFI error default gateway not available on Windows 10 keeps happening can be resolved if you can try these methods above.
More Articles:
One or More Network Protocols Are Missing on This Computer
Ethernet Doesn’t Have a Valid IP Configuration on Windows 10