Do you want to record a streaming video on your Smart TV but wonder whether you can do it or not? Have you ever tried to record your favorite TV show on your PC but don’t know how to get it to work?
In this post, you will learn how to record streaming TV on different devices (including your PC and Smart TV) in a few simple steps, and we will provide you various methods to get things done. You will be able to get efficient ways to record streaming TV on PC and Smart TV with minimal efforts and the least resources.
Can I Record Streaming TV on My PC and My Smart TV?
Recording anything from the big streaming services is, as you could probably guess, strictly against the rules. The best-known video streaming businesses, such as YouTube TV, Hulu TV, Fubo TV, and Netflix, don’t want you recording their stuff. This explains why some users have experienced black screen when attempting to record videos from some streaming services.
Thus, before recording streaming TV content, you should pay attention to the terms of use or terms of service on the corresponding platforms. In addition, copyright laws expressly allows a certain “fair use” of copyrighted works, the scope of which is, however, clearly limited. And you should be aware that copyright law clearly does not allow you to “share” or otherwise distribute any of your recordings.
How do I Record Streaming TV On My PC? [2 Methods]
If you would like to record streaming TV on your computer, there are two different ways provided for you. You can make use of the Windows built-in tool X box Game Bar, or you can turn to the best and easy-to-use screen recorder to record streaming TV with audio and video.
#1: Record Streaming TV with iTop Screen Recorder [Recommended]
A professional screen recorder tool can do a lot of help whenever and wherever you want to screen record Netflix efficiently. Here, I would like to recommend using the iTop Screen Recorder to record streaming TV shows in an easy and efficient way.
iTop Screen Recorder is a trusted tool to perfectly complete the task of streaming TV recording on Windows 10 / 7 / 8 / 11. As a super user-friendly screen recorder, it has a straightforward design and drives you to get started with it in just a minute. iTop Screen Recorder excels in capturing everything on the screen. It provides the easiest way to record streaming TV videos on any streaming services.
Check the following features to know what you will get from iTop Screen Recorder:
- Record Any Part of Screen and Support Screenshot.
- Record HD Videos with No Lagging and No Time Limit.
- 4 Modes to Record Screen: Video, Audio, Webcam and Game Clips.
- Record Videos with Multiple Output Formats and Share in One Click.
Follow the steps to see how iTop Screen Recorder will help you record streaming TV in a few minutes:
Step 1: Download and install iTop Screen Recorder, then run it on your PC.
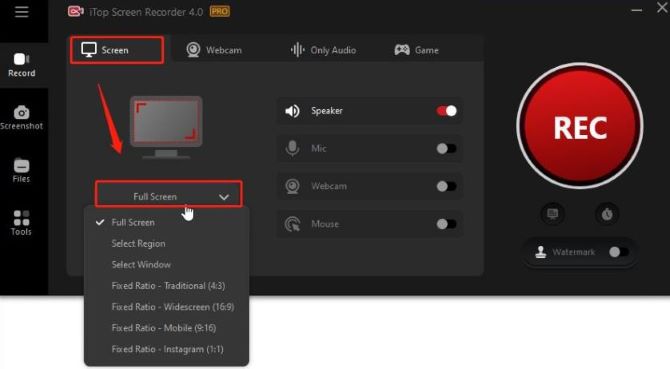
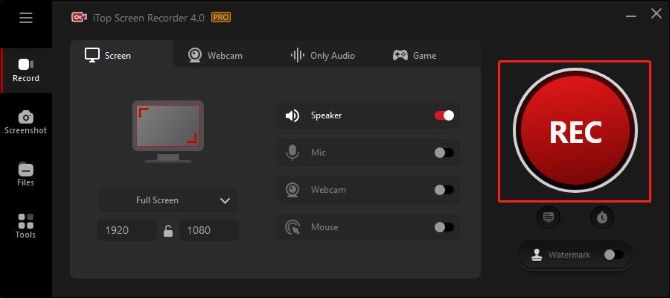
Step 2: Select the Region to record a streaming TV video. You can choose from Full Screen, Select Region, Select Window, Fixed Ratio (4:3) and Fixed Ratio (16:9) by clicking the drop-down arrow behind Full Screen.
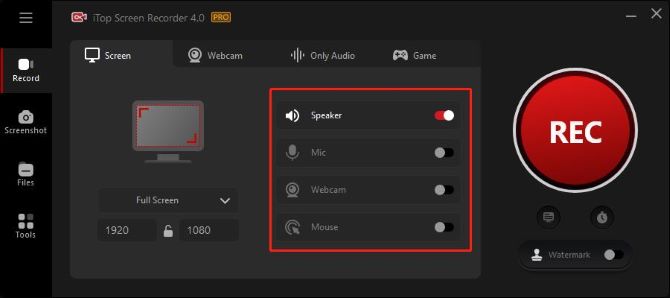
Step 3: Choose to open Speaker, Mic, Mouse or Webcam if you need them.
Tips:
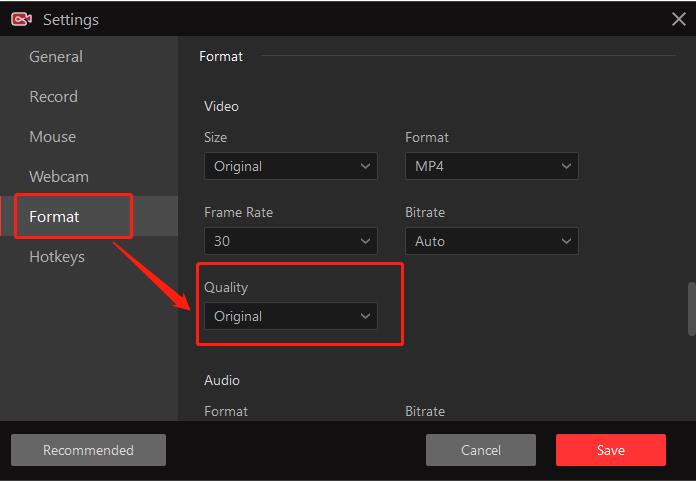
You can also click Settings on the top left corner. Select Format, and choose Original under Quality drop-downs. iTop Screen Recorder will keep the original graphic present since we want to record higher quality TV streaming videos.
Step 4: Play the TV show that you want to do the recording.
Step 5: Click REC to Start the Recording. It will start recording after countdown 3 seconds by default.
Step 6: The Control Bar will appear in the bottom right corner of the screen. You can click Pause to temporarily stop and click Stop (the red square icon) to finish streaming TV recording.

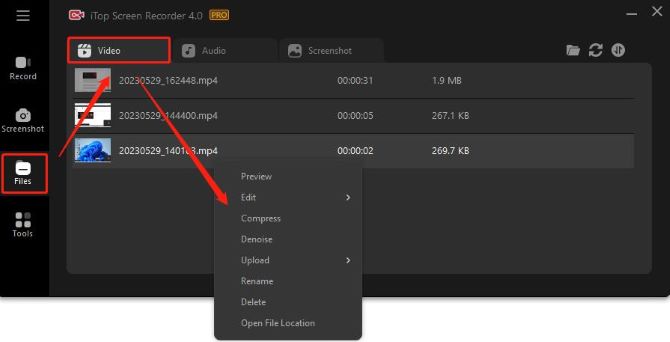
Step 7: Check the Recordings in the Files > Video section. You can right-click the video, select Open File Location to find out where it is stored on your PC.
Once you complete the steps, the streaming TV videos has now been successfully recorded on your PC.
#2: Record Streaming TV with Built-in Game Bar
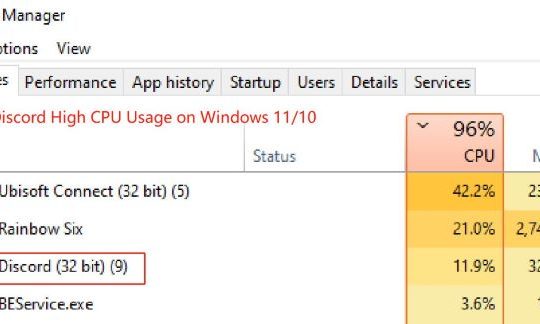
As a new feature added to Windows 10, Xbox Game Bar allows you to screen record streaming TV videos. However, Windows 7 and Windows 8 don’t come with this built-in tool. Even with Windows 10, it still consumes a lot of CPU.
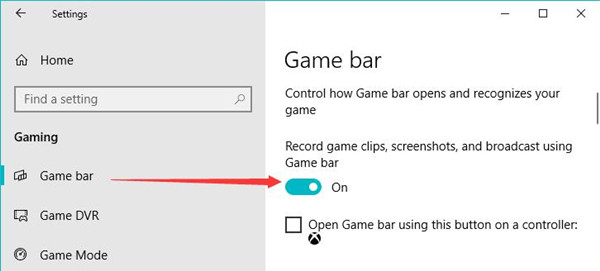
Step 1: Go to Start > Settings > Gaming.
Step 2: Select Game Bar, switch on record game clips, screenshots, and broadcast using Game Bar.
Step 3: Press Windows + G to open Game Bar. Check the box of “Yes, this is a game.”

Step 4: Hit the icon at the center of the Game Bar dialog to start recording streaming videos.
Tips:
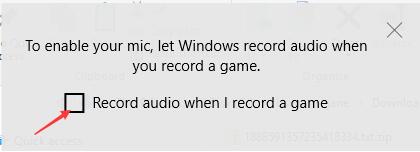
If you want to record it with audio, hit the speaker icon to tick the box of “Record audio when I record a game” to allow the Game Bar to record the screen with sound.
Step 5: Go to Start > Settings > Gaming > Game DVR > Open folder. You will find the folder that stores your recorded TV videos.
How do I Record Streaming Videos On My Smart TV? [3 Methods]
Here we would like to discuss three possible ways to record streaming videos on your smart TV:
- Using the Streaming TV Platform’s Cloud DVR
- Using an External Device (USB Drive)
- Using a Third-Party App
Read on to find the best method for you.
#1: Record Streaming TV on Smart TV Using Cloud DVR
What is Cloud DVR? The Cloud DVR (Digital Video Recorder) stores your library of video recordings in the cloud (a secure server), while physical DVRs require you to delete content to make room for newer recordings. The advantage to a Cloud DVR is you can access your TV recordings from almost anywhere in your country, as long as you have an internet or wireless data connection and a compatible device.
Most smart TVs (LG TV, Samsung TV, TCL TV, Hi-sense TV) have built-in DVR functions that allow you to record your favorite videos, so you can pause and rewind a show in case you miss something.
For Roku TV, however, it does not have built-in storage or a DVR feature, so you can utilize the streaming TV platform’s cloud DVR to record TV shows and movies.
Best 8 TV Streaming Services with Cloud DVR
YouTube TV: If you enjoy using the DVR option, YouTube TV is arguably a great option for you: it gives you unlimited DVR storage on the Cloud (accessible from any of your devices), and it saves each of your recordings for 9 months. It is convenient to check your recorded shows or movies whenever you need within the available time.
Hulu with Live TV: Hulu TV has the service that combines bundles with Disney+ and ESPN+, with Unlimited cloud DVR at no additional cost. You’ll get a Live streaming recording service without much effort.
Fubo TV: With over 100 live TV channels, including ESPN and Be-IN, Fubo TV is first and foremost for sports fans. The family package runs $74.99 a month and gets 250 hours of recording. The elite package gets 1000 hours of recording. You can get to keep the recorded shows as long as you are subscribed, no 30 day time limit here, which is nice.
Sling TV: Sling TV is for all cord-cutters who wish to save money, and it’s especially for sports fans as well as households that watch the Disney Channel. On its cloud DVR, Sling TV just offers 50 hours. If you want more, you can up to 200 hours of storage for an additional $5 per month, which is just not enough for recording movies and shows.
Direc TV: Direc TV is the Live TV streaming platform designed to substitute traditional cable services. The cloud DVR storage capacity with Direc TV service jumps up to 500 hours. But Direct TV is an relatively expensive service. The entry-level package comes with $70 per month and the Premier package costs $150 per month.
Philo TV: Most of Philo’s channel TV shows and movies are available on-demand for 72-hours after their first live airing. Philo TV provide you unlimited cloud DVR for recording. But you can only keep those recorded videos for 30 days. So if you do record it, you’d better watch it quickly.
Frndly TV: Findly TV offers more than 40 live TV channels, including Hallmark, Lifetime, and A&E for a friendly price of only $6.99. The storage is unlimited, the recorded movies are available for 3 months on the Classic plan, but an upgrade to Premium extends the life of your DVR recordings to 9 months.
AT&T TV Now: AT&T TV Now has upgraded its Cloud DVR service from 20 hours of storage up to 500 hours. There’s no upgrade available beyond the standard Cloud DVR, but your recordings won’t expire for 90 days and you can record on up to three streams simultaneously.
How to record streaming TV videos to your Cloud DVR?
To record streaming shows with Cloud DVR, the steps may slightly differ from various smart TVs platforms, however, most of them are quite simple and time-saving.
Here we will take Hulu Live TV and YouTube TV for examples:
For Hulu Live TV, you just need to navigate to the Details Page of a streaming video, and look for the Record Icon. Then you can Click to start recording new live TV shows to your Cloud DVR.

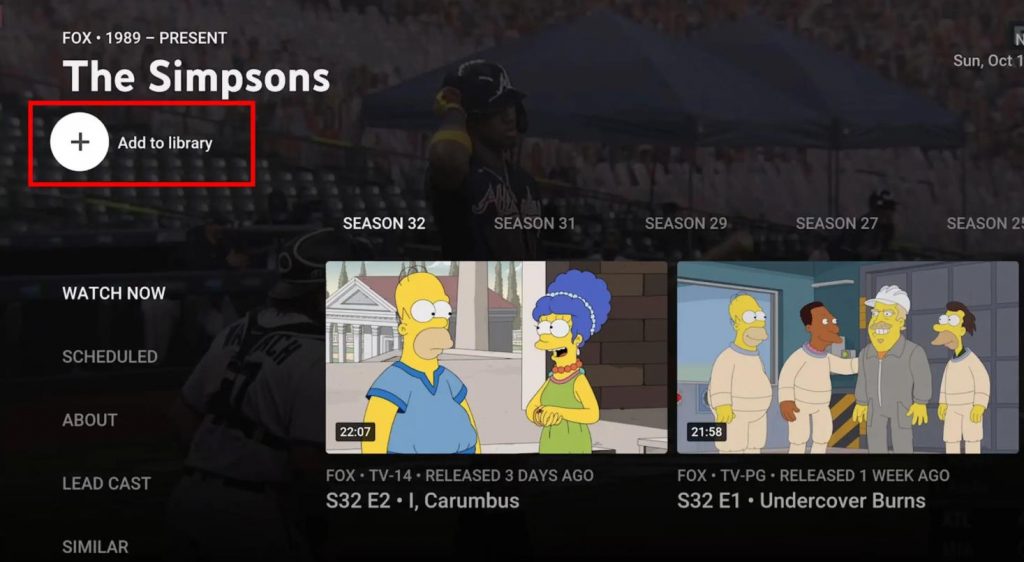
For YouTube TV, you can select the streaming video you want to record, then choose the Plus (+) Icon next to the video’s name. Then it will change to a check-mark, and a notification will pop up, letting you know that the show will be added to your DVR library.
#2: Capture Screens of Streaming TV on Smart TV Using USB Stick
Even though the smart TVs have already provided you with built-in DVR storage, it is relatively a small space and won’t fulfill your needs of recording various movies and TV shows. Besides, there are many restrictions that you will be confronted with when recording videos.
It is advisable to use an external USB drive to store your streamed TV recordings. You will enjoy much more space to store your recorded videos and save them permanently, it is also more convenient to watch them wherever and whenever you needed, and you will be faced with relatively easier steps and fewer problems.
To achieve that, you’ll need a USB hard-drive or memory stick. Similarly, the recording procedure on smart TVs varies with brand, model, and country, but here is a general guide on how to record a TV screen to a USB drive:
1. Find the USB Slot on the back of the TV to know whether you can connect it via a USB. If it has, then you can move to the next step.
2. Plug In your USB (more than 32 GB but less than 2 TB) to the smart TV, go to home page and head over to System Settings, check the Recording Setups.
3. Open the streaming platform you want and play the show you want to record, Press the Record Button on the TV remote and click Proceed.
4. Now, with the built-in PVR function, you can Start the Recording of TV shows.
Another pointer when it comes to recording streaming TV to a USB device is the USB device will have to be formatted. In other words, all the content on the device will need to be removed, so make sure you backup important documents before plugging it into your TV, or at least before you hit the record button.
#3: Record Streaming TV on Smart TV Using a Third-Party App
There are several screen recording apps that will help you record and download shows or videos from streaming platforms like Hulu, HBO, Amazon Video, and more. You are able to watch streaming videos offline on your smart TV, PC, and smartphone. This is a good option if you don’t have a USB drive and need more functions to achieve a better recording experience.
The recording procedure varies from different apps, but this general guide will be a great help:
1. Go to your smart TV’s app store, download, and install the chosen app.
2. Go to your streaming app and Select the show you want to record.
3. Click on the Record Button or record All to save the entire season of a show.
4. The recording is Complete, and you can watch it offline.
So, that’s how you can easily record Steaming TV on PC and Smart TV. Different ways are explained and the ultimate choice is yours. We hope that you find this guide helpful.
FAQs About Record Streaming TV On PC and Smart TV
Most smart TVs have recording functions built into their programming to allow you to watch shows and movies later. This allows you to pause and rewind as you watch. You can’t record from apps like Netflix, but those apps allow you to pause and rewind while watching.
A: It depends on your requirements. If you want to be sure, smart TVs can recognize external hard disks of up to 2 TB, and 32 GB for flash drives. You might not be able to do much if you only use a flash drive.
A: Yes, you can watch other shows while simultaneously recording streaming videos on other channels for later viewing. To do this, simply set up your scheduled recording as normal and then proceed to watch whatever other shows you’d like.
A: It depends. Different smart TV platforms provide different packages of Cloud DVR services, from one or two months to as long as you are subscribed to the services. If your recordings are stored in USB drive, it will remain there with no time limit. However, if you reach your storage limit, it will automatically delete the oldest recording to make room for new ones as you schedule them.
A: Prepare the USB storage device and plug it into the USB slot. To capture the TV show, you should tap the Record button with the remote control. This is the PVR feature, which is a default option on most Smart TV devices.