Contents:
- Svchost.exe High CPU Usage Overview
- What is the Svchost.exe in Windows 10?
- Why there are so many Svchost.exe in Windows 10?
- How to Fix High CPU Usage by Svchost.exe on Windows 10?
Svchost.exe High CPU Usage Overview
When your computer goes into crashing or slow performance, the first thing many people would do is to check the CPU usage in task manager. To your surprise, you find that in task manager, there is a kind of Service Host – Svchose.exe that hogs your much CPU usage on Windows 10.
You feel frustrated about is as you have no idea why this Svchost occupies so much CPU and why there are so many Svchost.exe processes running on Windows 10.
This post would solve your puzzle by telling you what the Svchost.exe is and how to fix Service host local system high CPU.
What is the Svchost.exe in Windows 10?
Just as Microsoft has prompted you, the Svchost.exe is a generic host process name for services that run from dynamic-link libraries. It is not a virus so long as you can find it in C:\Windows\System32 folder.
To put it in simpler words, you can understand it in a way like that. Previously, Microsoft had been using the .exe files, but later it changed the file extension to .dll, which made the programming more reusable on Windows 10.
While the demerit is that you cannot execute the DLL files directly on Windows 10, that is why the Svchost.exe comes up for programs.
But when facing Svchost.exe 100 disk or high CPU on Windows 10, you cannot help thinking why there are so many Svchost.exe files in controlling software.
Why there are so many Svchost.exe in Windows 10?
For most cases, the Svchost.exe is responsible for various system programs running on Windows 10. More importantly, every single process monitors a specific program, such as firmware. Only in this way will service not deteriorate the whole performance for Windows 10. That is why Svchost.exe (netsvcs) high CPU happens to your PC.
7 Ways to Fix High CPU Usage by Svchost.exe on Windows 10
Since you have already known it is the Svchost.exe that occupies much CPU, you would better take some targeted measures to solve Svchost running 100 CPU usage on Windows 10.
Solutions:
- 1: Stop the Svchost.exe Tasks
- 2: Disable Svchost.exe Service
- 3: Update Drivers
- 4: Stop Windows Update
- 5: Delete SoftwareDistribution Folder
- 6: Clear Up Event Viewer Log
- 7: Scan for Viruses or Malware
Solution 1: Stop the Svchost.exe Tasks
Now that the Svchost.exe files are able to hog much of your CPU or memory storage on Windows 10, it is suggested for you to stop or restart the programs or software running under the Svchost.exe process.
1. Right click Start and then choose Task Manager from the menu.
2. In Task Manager, under Details tab, locate all the services with the name of exe and right click them to Go to service(s).

Then you would switch to the Service tab in task manager and know exactly what the software under the Svchost.exe are which can make your computer stuck in high CPU.
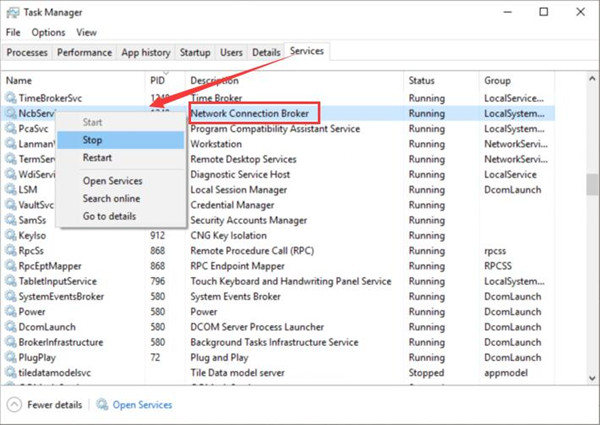
3. Under Services tab, you would know which program is performing with the name of Svchost.exe. Right click it to Stop this task.
Here from the Description, you can get the name of the software or applications (here it is Network Connection Broker) using the Svchost.exe.
When the moment you disabled the services under the process of Svchost.exe, you can check if there is still a high CPU in task manager on Windows 10.
Solution 2: Disable Svchost.exe Service
Under the case when you have gotten the name of the services under the Svchost.exe process occupying high CPU, it is wise for you to disable the service from startup as well on Windows 10 in order to solve the abnormally high CPU usage from the Svchost.exe.
May it can help you tackle the high CPU usage issue.
1. Search Services in the search box and then hit Enter.
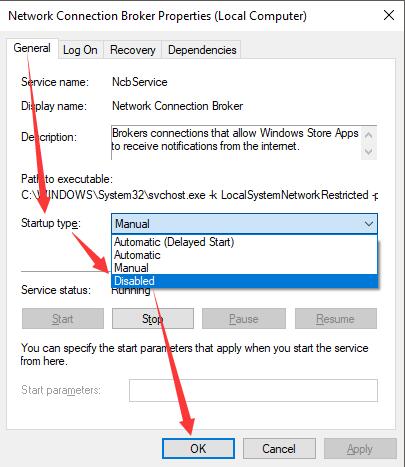
2. In the Services window, right click the Service under the Svchost.exe process to open its Properties. Here take the Network Connection Broker as an example.

3. Under General, navigate to Startup type and set it as Disabled. All finished, tap OK to save changes.
When the moment you disabled the services under the process of Svchost.exe, you can check if there is still high CPU in task manager on Windows 10.
Solution 3: Update All Drivers
After you have disabled or stopped all the related programs or services related to Svchost.exe, to solve the high CPU caused by this Svchost.exe process issue completely, you may as well update all the drivers for Windows 10.
Driver Booster is a reliable and professional tool for drivers updating. It is capable of downloading all the latest drivers for you, such as the graphics or audio card drivers or network drivers for Windows 10. If it is the case, the Svchost.exe high CPU will no longer plague you all the time.
1. Download, install and run Driver Booster on your PC.
2. Click Scan in Driver Booster to allow it to search for the outdated or corrupted drivers for you automatically.

3. Then determine to Update Now to let Driver Booster download all the latest device drivers for you.

For you have just installed the newest drivers for Windows 10 device, you can try to restart the services under the Svchost.exe to see if service host local system still uses up CPU space.
Solution 4: Stop Windows Update
Sometimes, Windows update can bring some features that result in high CPU usage with Svchost.exe on Windows 10. In view of this fact, you can manage to stop Windows Update in Service to see if it works to fix the high CPU problem.
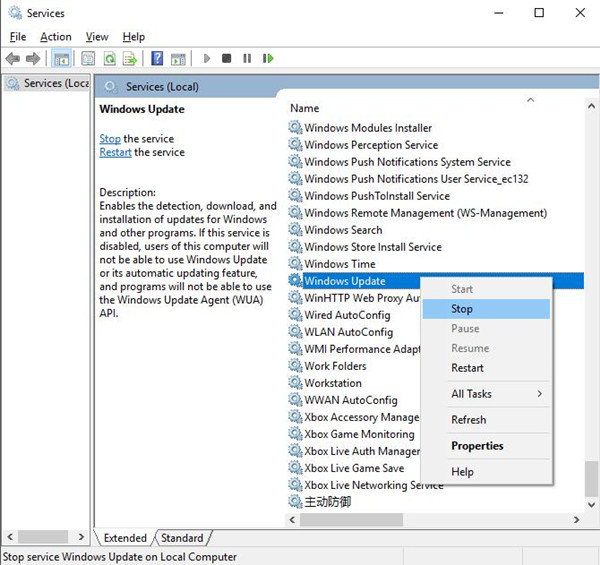
In Service window, scroll down to find out Windows Update or Superfetch or Background Intelligent Transfer Service. Then right click them to Stop the services for them.
Or you may as well disable Windows Update at startup to prevent Svchost high CPU in task manager.
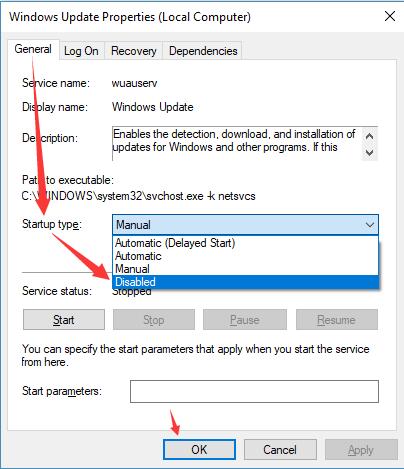
In the Services window, find out Windows update and right click it to open its Properties. In Windows Update Properties, locate the Startup type and then set it Disabled as well.
From many users, Windows Update or Background Intelligent Transfer services are the most to blame for the svchost.exe using all CPU error on Windows 10.
So to some degree, this can help you get rid of the high CPU caused by Svchost.exe problem or sometimes even disk running at 100 due to the Svchost process.
Solution 5: Delete SoftwareDistribution Folder
This SoftwareDistribution folder keeps all the temporary files on Windows 10. Especially it stores the files needed for Windows Update. In this sense, to lower CPU usage use by Svchost.exe (netsvcs), it is necessary to erase the folder from Windows 10.
1. Search File Explorer in the search box and then hit Enter.
2. In File Explorer, navigate to This PC > Local Disk (C:) > Windows > SoftwareDistribution.

3. Then right click the SoftwareDistribution folder to Delete it.

After emptying Windows Update folder, you would better check in task manager whether there are still many Svchost.exe processes working and using 100% CPU usage.
Solution 6: Clear Up Event Viewer Log
Undoubtedly, for computers used for a long time, there will be a lot of browser logs on Windows 10 which occupies high CPU usage by the Svchost.exe.
Consequently, to remove the high CPU or even memory issue, try the way below to empty your event viewer log.
1. Press Windows + R to open the Run box.
2. Type in eventvwr.msc in the box and then click OK.
3. In Event Viewer window, expand Windows Log and then right click Applications to Clear Log.

Here you are supposed to right click Security, Setup, System, and Forwarded Events to Clear Log in the same way.
4. Restart your PC.
When you login to Windows 10 again, the Svchost.exe high CPU issue would disappear.
Solution 7: Scan for Viruses or Malware
For most Windows users, installing a third-party antivirus software to detect viruses is a common sense.
Accordingly, when you find out the Svchost.exe causes your computer to high CPU all of a sudden, you can decide to make full use of the software to scan for the malware or computer viruses.
While apart from these third-party programs, Windows Defender is also a good choice for you to detect the viruses or threats on Windows 10.
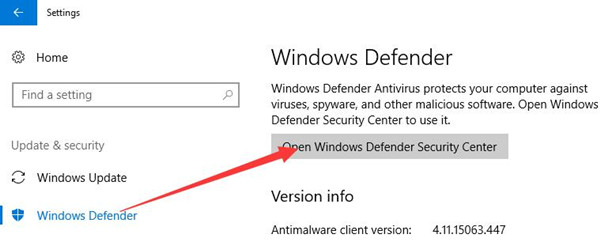
1. Go to Start > Settings > Update and Security.
2. Under Windows Defender, choose to Open Windows Defender Security Center.
3. Select Virus & threat protection to let Windows Defender scan for the viruses or threats on Windows 10.
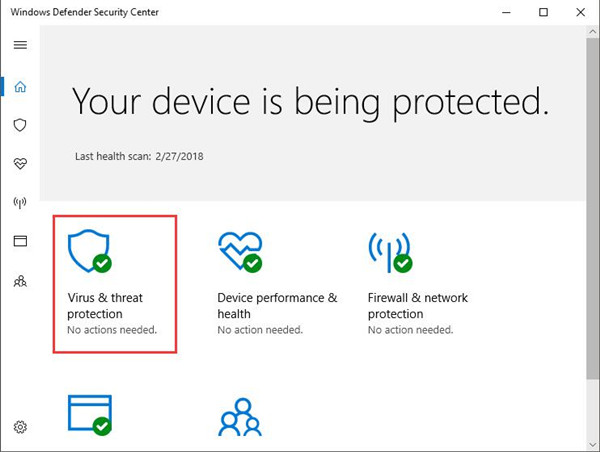
If possible, Windows Defender would tell you if there are viruses on your PC that can increase the CPU usage On Windows 10. If not, you may need to fix the Windows Defender scan issues.
In this thread, you can learn to fix the Svchost.exe high CPU errors from the perspective of stopping various services regarding this .exe file and troubleshoot problems with Windows updates or drivers.
If you have check CPU usage but to find that the high CPU caused by Ntoskrnl.exe on your PC, don’t worry, there is always way out.
More Articles:
Fixed: Csrss.exe High CPU Usage on Windows 11, 10, 8, 7
1 Comment
Leave a Response


Quick comment: for me my c:\Windows\System32\sru\ folder had over 32k logs i manually deleted the first 31.700 .log files, after that the SRUDB.dat went down from several gigs to few megas. Freed around 10+GB space. CPU usage and disk space OK since then.