If you would like to make the internet, WIFI (wireless network) or Ethernet, on PC discoverable or visible to other devices, you are to open the network discovery on Windows 10/11.
Otherwise, it is supposed to disable this option if you do not work your network discovered by other computers. This post would let you know how to enable the network discovery in various ways, and you are able to turn it off accordingly.
Methods:
- 1: Enable Network Discovery Via Network Settings
- 2: Turn on Network Discovery Via Control Panel
- 3: Enable Network Discovery Via Command Prompt
Way 1: Enable Network Discovery Via Network Settings
Now that you are to make changes to network on your computer, the network center is available for you to complete this task.
Therefore, try your best to turn on the make this PC discoverable option on Windows 10/11.
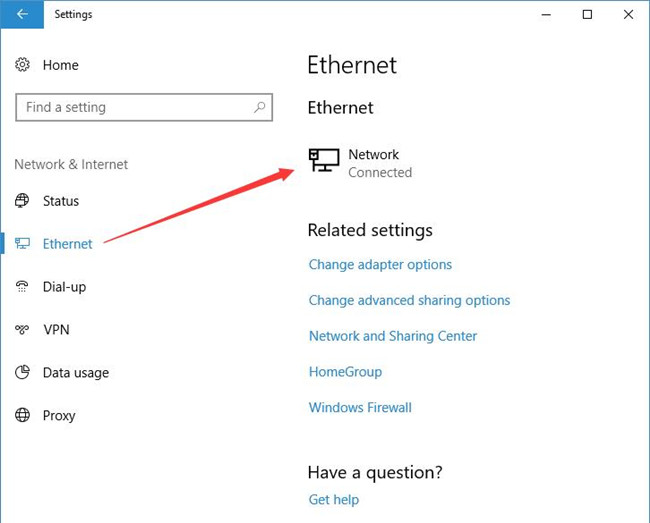
1. Go to Start > Settings > Network & Internet.
2. Under WI-FI or Ethernet (according to your case), click the network connected(here it is Ethernet).
3. Slide the option to the right to Make this PC discoverable.
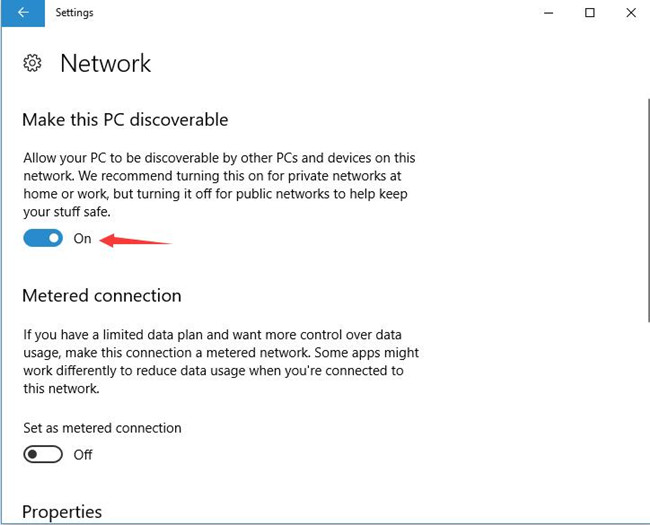
After that, you will have allowed your PC to be discoverable by other PCs and devices on this network.
Just as you are recommended, it is better for you to set the network private rather than public.
Way 2: Turn on Network Discovery Via Control Panel
No matter you are using wireless network profile or Ethernet, the feasible thing is that you are qualified to choose to let your network discoverable on Windows 10/11, which is to turn on the network discovery in network sharing settings.
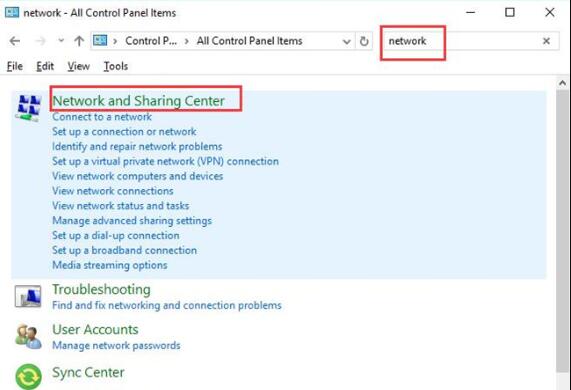
1. Open Control Panel.
2. In the search box of Control Panel, type in Network and then select Network and sharing center.
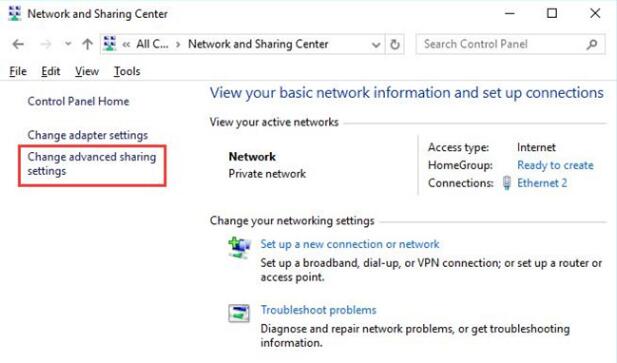
3. In Network and sharing center, choose Advanced network sharing settings.
4. In Advanced sharing settings, under Private (it will show as Current profile since the PC is using the private network not public), tick the box of Turn on network discovery and then click Save changes.
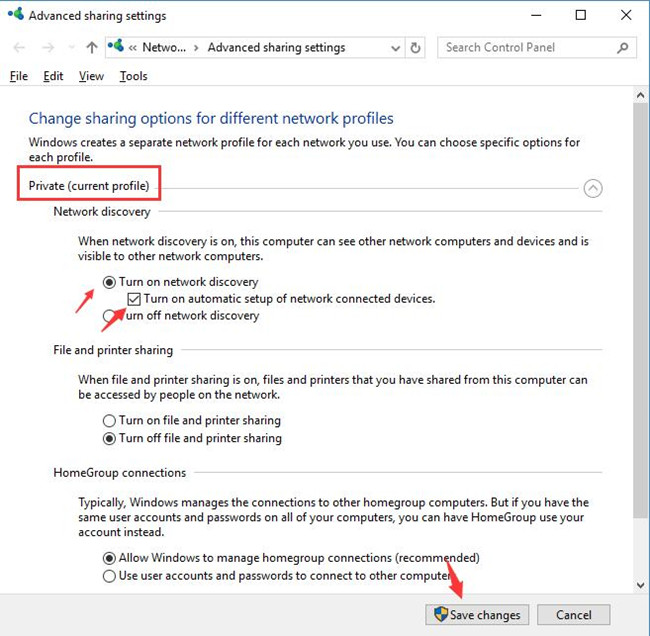
Then check the box for Turn on automatic setup of network connected device (It means that you would choose the network profile the first time you connect to the network).
Now you are able to make your network visible for other computers on Windows 10.
Way 3: Enable Network Discovery via Command Prompt
In order to turn on or off the network files on Windows 10/11, you can make full use of the command prompt.
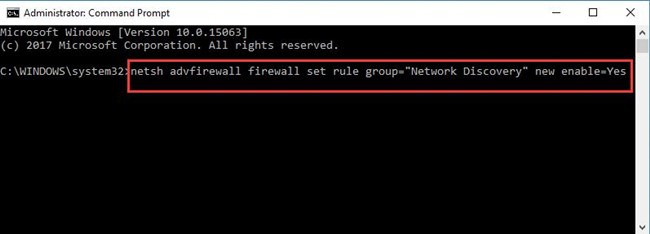
1. Search Command Prompt in the search box and right click the result to Run as administrator.
2. In Command Prompt, copy the command below and hit Enter to perform it.
netsh advfirewall firewall set rule group=”Network Discovery” new enable=Yes
Your network can be seen by other devices now since you have enabled the network discovery on Windows 10.
These are the ways to turn on or enable the Network Discovery on Windows 10. If you would better turn it off or disable it, just do the opposite, which in other words, you can change network type from public to private if you like.
More Articles:
Npcap Loopback Adapter No Internet on Windows 11, 10, 8, 7
4 Ways to Fix Teredo Tunneling Pseudo-Interface Driver Not Working on Windows 11/10