Some Windows users may be faced with some terrible Blue Screen of Death (BSOD) problems. These problems are very annoying. PAGE FAULT IN NONPAGED AREA error is one of them that appears in both desktop and laptop. If you have this problem, your computer’s screen would appear like this picture.
It can be caused by various reasons, such as outdated or faulty drivers, damaged system files, disk problems, antivirus hardware and so on. There are some solutions with detailed steps and you can try them to solve your problem.
Solutions:
- 1: Enter Safe Mode if Necessary
- 2: Disable Automatic Paging File Size Manager
- 3: Run Windows Memory Diagnostic and Check Disk
- 4: Check System Files
- 5: Update Faulty Drivers
- 6: Modify Memory Settings
- 7: Remove and Reinsert RAM
Solution 1: Enter Safe Mode if Necessary
The Blue Screen of Death may occur after login in Windows 10/11. But sometimes, it may happen when you reboot your computer, you can do nothing to fix it. So if the “Windows 10 Page Fault In Nonpaged Area BSOD” happens before login, you should go to safe mode at first.
Solution 2: Disable Automatic Paging File Size Manager
Some users have found it useful to customize a virtual memory size range. You can follow these steps to do it.
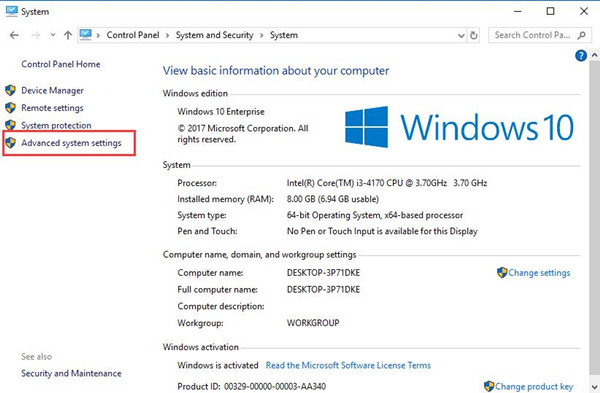
1. Open This PC and right click on it in the left pane. Choose Properties.
2. Select Advance system settings.
3. Click Settings in Performance box.
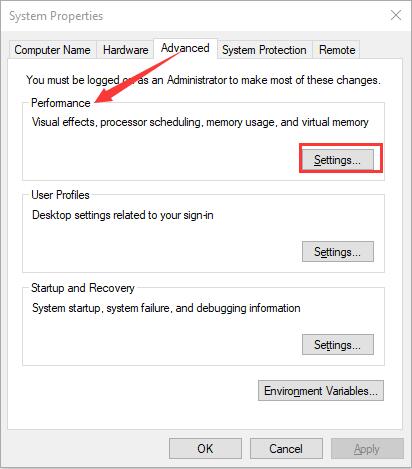
4. Choose Advanced tab, and then choose Change.
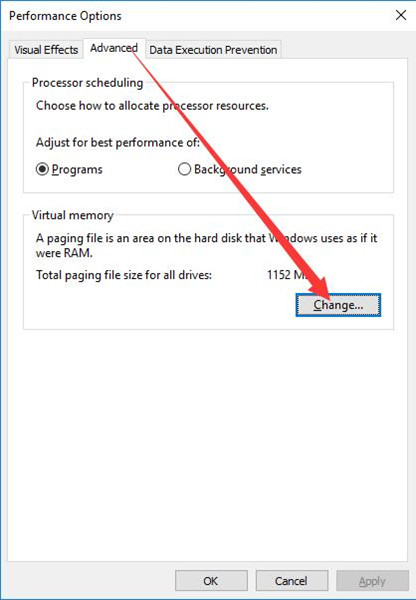
5. Uncheck Automatically manage paging file size for all drives. Then select Custom size and input Initial size and Maximum size according to the physical memory of your computer. Then click Set and OK.
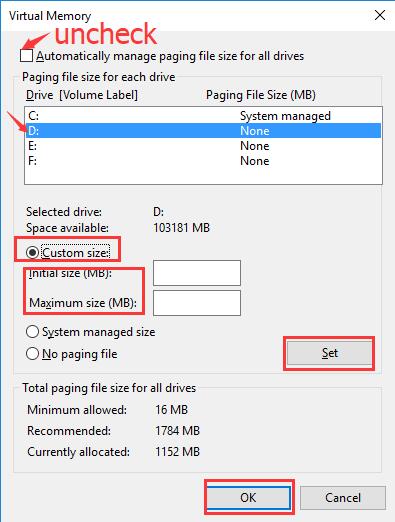
Tips: There is a formula you can refer to. Initial size is one and a half (1.5)x the amount of total system memory. Maximum size is three (3)x the initial size.
After you set a custom size range successfully, restart your computer and see if this way helped you with your problem.
Solution 3: Run Windows Memory Diagnostic and Check Disk
This method can not only test memory problem but also check and repair disk errors, so it may fix your problem.
1 Type cmd in the search box. Right click Command Prompt and choose Run as administrator.
2. Type chkdsk /f /r and hit Enter.
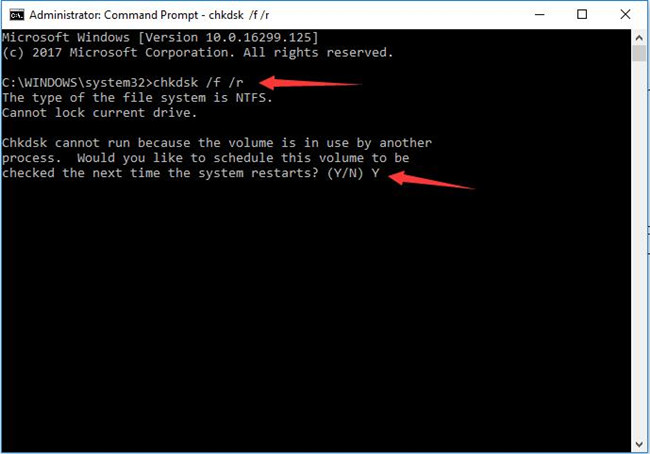
3. Input Y to check the next time your computer restart.
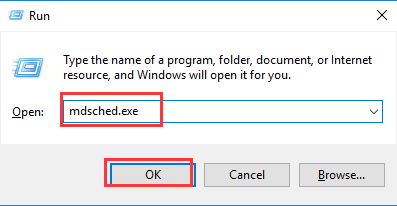
4. Press Windows key and R Type mdsched.exe in the dialog box and click OK.
5. Select Restart now and check for problems (recommended).
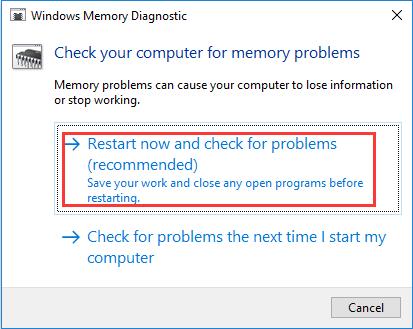
This process may take some time, and after it is completed, your computer will restart. Then the disk problem should be repaired and the result of memory diagnostic will be displayed. If any error is found, it will be reported. Then you may need to replace the problematic memory module.
Solution 4: Check System Files
Corrupted system files can cause this problem, so you can run the System File Checker, and replace corrupted files with a cached copy.
1. Type cmd in the search box. Right click Command Prompt and choose Run as administrator.
2. Type sfc /scannow in Command Prompt.
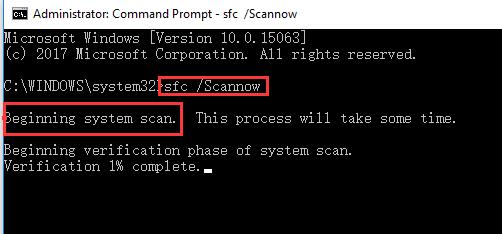
Then waiting for the process is finished completely. After that, check if your problem disappeared.
Solution 5: Update Faulty Drivers
Outdated and corrupted drivers are another reason for PAGE FAULT IN NONPAGED AREA error. You can update these drivers to fix this problem. Here are two ways to do it.
Option 1: Update Faulty Driver by Device Manager
1. Right click the Start Menu and choose Device Manager.
2. Expand all options in the list to find out which of them is marked with a yellow sign.
3. Right click one of the faulty drivers and choose Update driver.
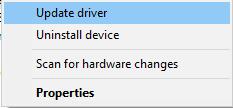
4. Select Search automatically for updated driver software.
Then it will update the driver for you automatically. Repeat step 3 and step 4 to update all faulty drivers.
Option 2: Download and Update Drivers by Driver Booster
Update these driver one by one may be troublesome, so you can use a tool to help you. Driver Booster is a professional tool that can help you to download and install updated drivers and missing drivers. You can update your drivers simply by using this application.
1. Download, install and run Driver Booster on Windows 10 or 11.
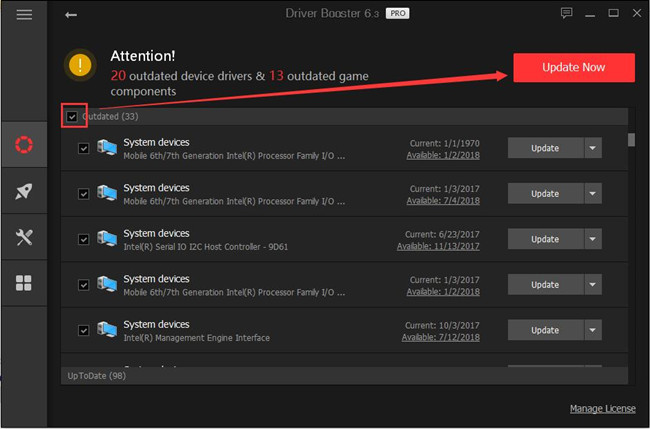
2. Click Scan.

3. Click Update Now. After that, Driver Booster will download and update all the missing, faulty and outdated drivers one time.
Solution 6: Modify Memory Settings
A complete memory dump is the largest type of possible memory dump. This contains a copy of all the data used by Windows in physical memory. Try to change your memory dump setting as complete memory dump to fix your problem.
1. Right-click This PC and choose Properties > Advanced system settings.
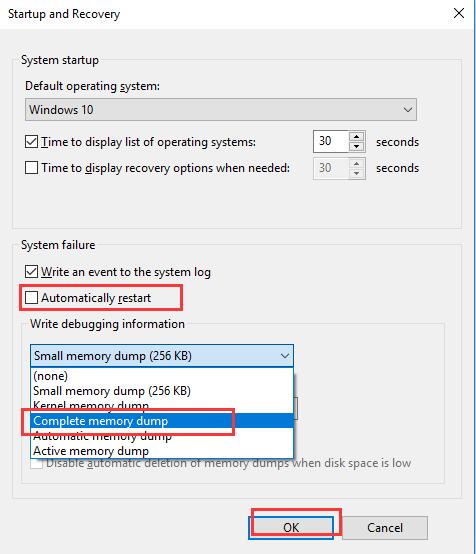
2. Select Settings in Startup and Recovery box.
3. Uncheck “Automatically restart“. Select “Complete memory dump” in the drop-down menu of Write debugging information. Then click OK.
Restart your computer and see if this way works.
Solution 7: Remove and Reinsert RAM
One possible cause is that there could be a problem in your RAM due to power failure.
1. Turn off your computer, unplug all the power cords, and remove the battery.
2. Remove the RAM from your PC and reinsert it properly.
Restart your computer and see if your blue screen error solved.
In conclusion, this article mainly tells you some possible reasons why your computer has PAGE FAULT IN NONPAGED AREA blue screen error and what should you do to solve this issue. Hope your problem can be repaired after trying these solutions.
More Articles:
Fix Machine Check Exception BSOD on Windows 10/11