Windows 11 snipping tool doesn’t work anymore is reported on upgraded as well as clean installations of Windows 11. For many users, the issue is only limited to multi-display setup. Sometimes, a message like the below is shown:

Please don’t worry when your Snipping Tool does not work in Windows 11. I will tell you the reasons for not working and several effective ways to help you out when your Snipping Tool won’t work.
The Possible Reasons for Snipping Tool Out of Work
Graphics Driver Issue: The system’s graphics driver is outdated or missing, which will cause its incompatibility with the snipping tool from working.
Interrupt with other apps: Some apps and process maybe hinder the snipping tool from working, so that causing snipping tool wrong.
Snipping Tool itself problems: There might have some process glitches, because of the wrong installation in Windows 11.
Expired Certificate Bug of the Snipping Tool: This bug occurred on October 31st when the certificate expired. When it happened, Windows 11 users couldn’t open Apps like the Snipping Tool, touch keyboard.
Solutions for Windows 11 Snipping Tool
#1 Restart PC
Rebooting your PC and program could solve a lot of problems, which is because When a computer is running, all programs and background processes leave behind some trash that needs to be cleaned. When you reboot your PC, the programs and process will be paused and reset.
#2 Update Windows 11 System
Installing the latest Windows update is known to fix bugs and glitches, which could fix the compatibility issues and give security patches. Follow the steps below to do so:
Step 1: Press Windows+I keyboard shortcut to open the settings.
Step 2: Click Windows update.
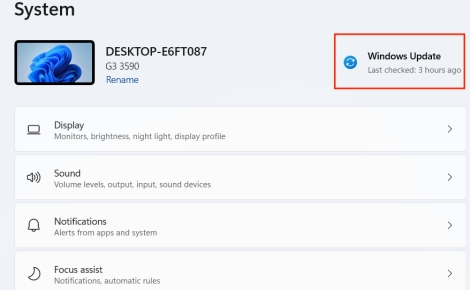
Step 3: Click Check for updates.
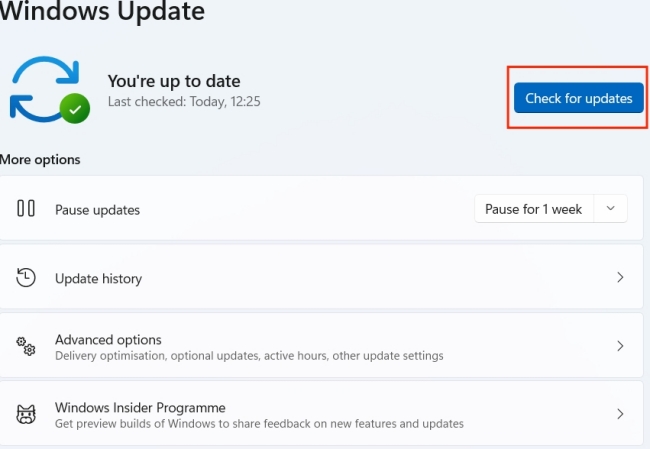
Step 4: If it has checked out that you could update your system, just following installing steps to install it. Or else, there is no system problem causing snipping tool not working.
#3 Uninstall and Reinstall the Snipping Tool
Reinstalling the Snipping Tool could repair the corrupted installation and fix the outdated application hidden bugs.
Step 1: Press Windows + I keyboard shortcut to open settings.
Step 2: Click Apps and then expand Apps & features.
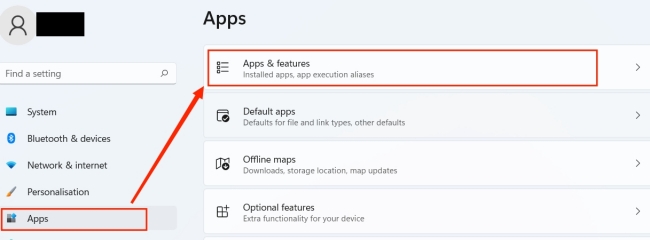
Step 3: Find Snipping Tool and uninstall it.

Step 4: Install the snipping tool in Microsoft store.
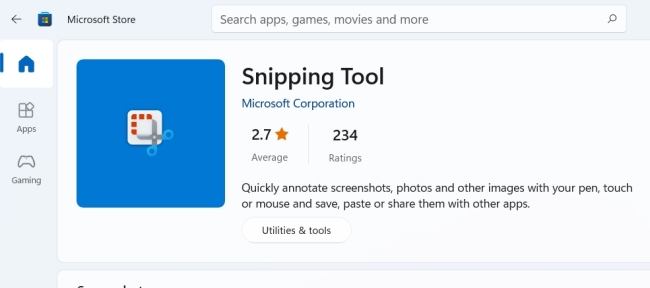
#4 Install another Snipping Tool
Replacing Snipping Tool with other similar Apps is a direct way which keep off the issues. You could replace Snipping Tool by Snipaste which is better.
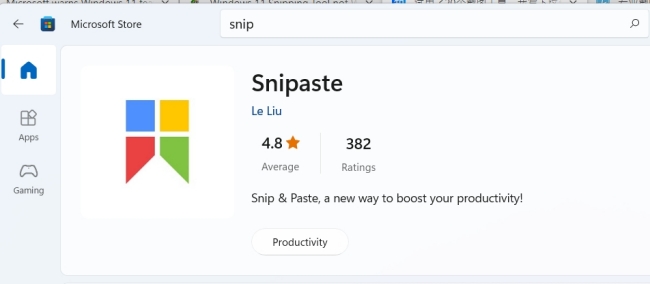
#5 Update the graphics driver
Your outdated graphics driver may lead to incompatibility with the Windows 11 PC. The incompatibility may cause Snipping Tool issues. It could be solved by updating your graphics driver. Before updating your graphics driver, I want to recommend you a driver update software ‘driver booster’ which could help you update or find graphics driver.
Driver Booster is a globally recognized driver updater that automatically detects your system and find the most suitable drivers for your device. Not only that, but using this software, you can even update all outdated or faulty drivers with a single click.
How to update the graphics driver by using Driver Booster
Step 1: Download, install and run Driver Booster on your PC.
Step 2: Click the Scan button to check your hardware version.

Step 3:Find Display adapters, Update the graphics driver. If you want to update all, just hook all and click ‘Update Now’.
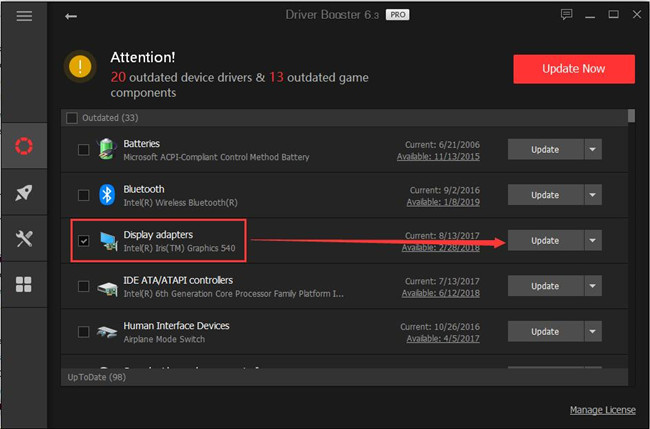
If your graphics driver is the latest, it will remind you ‘up-to-date’.
Of course, there are severe ways to update your graphics driver. But this method is the most effective and faster in my opinion. You could also update your graphics driver by using device manger.
#6 Windows update troubleshooter
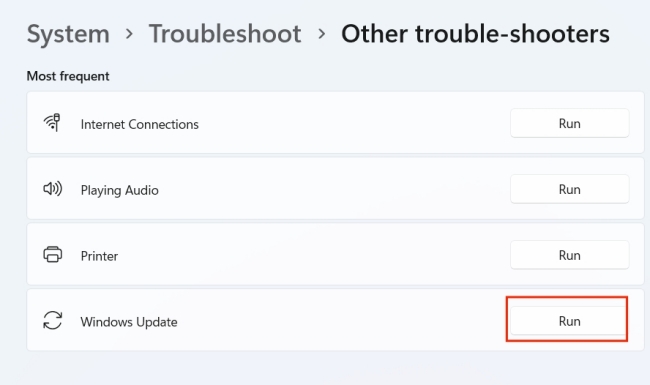
You could fix the problem by using troubleshooter, using troubleshooter to figure out snipping not working problem, following the steps below:
Step 1: Press Windows +I keyboard shortcut to open settings.
Step 2: Click System and find Troubleshoot.
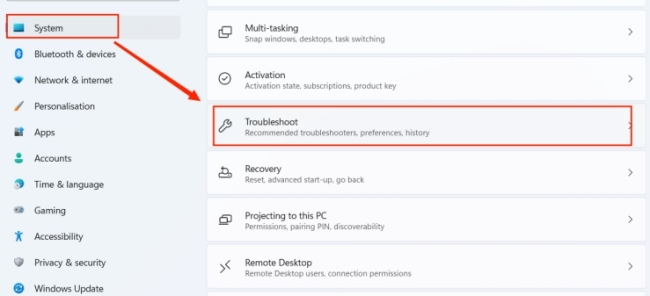
Step 3: Select Other Troubleshooters, and run the Windows Update.
#7 Background apps permissions
If you didn’t turn on the snipping tool permissions in the background, It also affects the App normal running. I will teach you to check whether is this factor causing the problem and how to solve it.
Step 1: Press Windows + I shortcut directly to open settings.
Step 2: on the left panel, select Apps.
Step 3: Enter Apps & features and find Snipping Tool by App list searching.
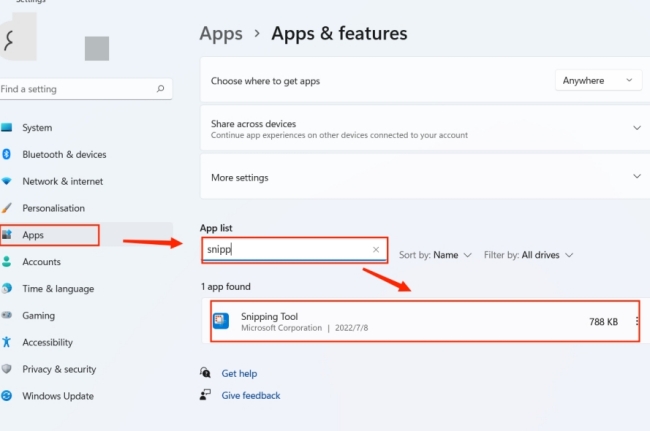
Step 4: Check whether App permission button is turn on. If the button is off, which is mean that the permission to avoid App normal running, just turn on.
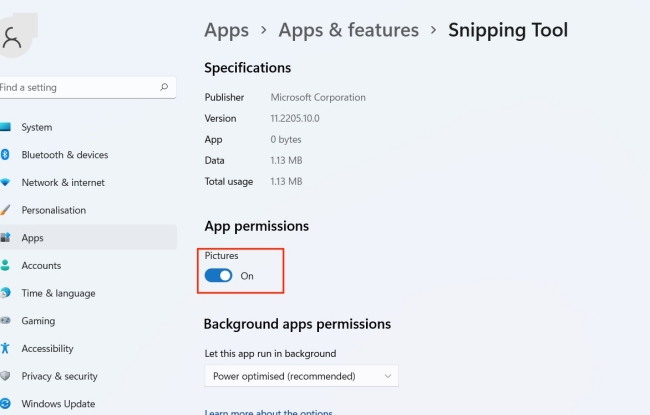
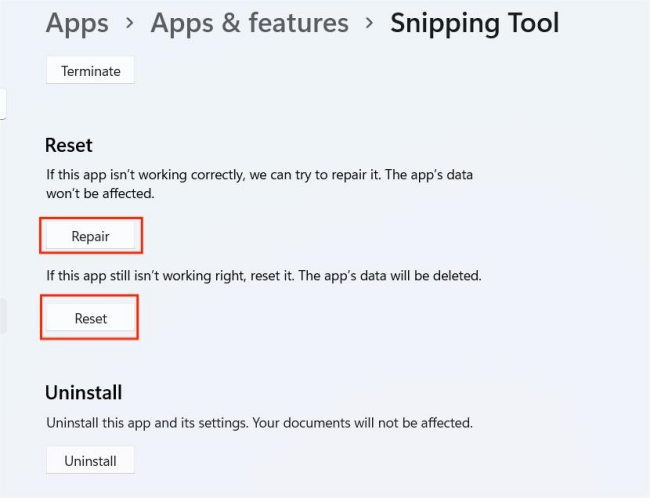
By the way, you could repair the App by 1-click at this page below. If it couldn’t be check out any problem, you could also reset Snipping Tool to fix it.
#8 Download the patch
If your Snipping Tool not working is caused by the Expired Certificate Bug. The patch KB4006746 could fix Spinning Tool. This patch could also be downloaded by checking for updates in your Windows 11 settings. But If there are some trouble in your checking for updates, you could download the patch directly.
Summary
In the simplest terms, when your Snipping Tool is out of work, try to update Windows 11 or check the settings of Snipping Tool itself to see if there are any problems, or you can use another drawing tool to replace it temporarily.
More Articles:
Top 6 Ways to Open Snipping Tool on Windows 10/11


