Some of you often find the service host Windows Image Acquisition high CPU is taking up too much CPU on Windows 10, just like WMI Provider Host high CPU Usage, if the WIA occupies high CPU, disk usage or RAM, you may run into black screen or death screen later.
But in the first place, you might as well try to know something about the Windows Image Acquisition on Windows 10.
Contents:
What is Windows Image Acquisition?
5 Ways to Fix WIA High CPU Usage on Windows 10
What is Windows Image Acquisition?
Windows Image Acquisition, whose abbreviation is WIA, is designed to allow the graphics card on your PC to communicate with some hardware, like camera and scanner. Therefore, when there are something wrong with the process WIA, your PC can stumble upon high CPU usage on Windows 10.
In this case, you can come here for ways to fix Windows 10 Image acquisition high CPU.
How to Fix WIA High CPU Usage on Windows 10?
To begin with, you would better struggle to examine the CPU usage on your PC and then focus on fixing the process of Windows Image Acquisition hogging high CPU on Surface Pro 3 or other devices on Windows 10.
Solutions:
2: Check WIA CPU Automatically
3: Disable Background Intelligent Transfer Service
Solution 1: Check Task Manager
In the first place, to ascertain whether the process Windows Image Acquisition on Windows 10 causes high CPU or not, you would better check the CPU usage in the task manager.
In case that you cannot open task manager from Start menu, it is foolproof that you press Alt + Ctrl + Delete to go to the Task Manager.
In Task Manager, you can see the Windows Image Acquisition taking up heavy CPU, such as WIA using 99% or even 100% CPU usage on Windows 10.

Once you meet with this Service host WIA high CPU error, go ahead for more solutions.
Solution 2: Check WIA CPU Automatically
Apart from trying to disable this service, if you happen to Windows Image Acquisition high CPU usage, it is reasonable and necessary to monitor how much CPU used by WIA in real time.
Here, Advanced SystemCare can afford you to supervise the CPU, disk, RAM usage at any time for every program running on Windows 10. Upon meeting with any applications activating WIA, thus causing high CPU, you can stop the program to free up more CPU.
1. Download, install and run Advanced SystemCare. Immediately after you launched ASC, you can find its icon on the right bottom of your Desktop.
2. Right click the program icon of ASC to Open Performance Monitor.

3. Then on the Desktop, click the right arrow icon to Maximize Performance Monitor.

4. In Performance Monitor, locate CPU and then hit the Speed up icon.
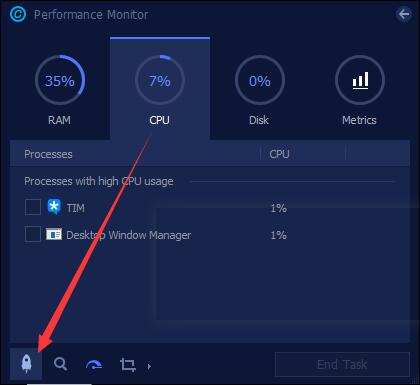
That will spare up more CPU usage by turning off related programs or services, like Windows Image Acquisition.
Solution 3: Disable Background Intelligent Transfer Service
It is said some services on your computer would lead to Service host Windows Image Acquisition high CPU in Windows 10, in this way, you might as well manage to end these processes for a while, such as Superfetch and Background Intelligent Transfer Service and then enable it to see if it works.
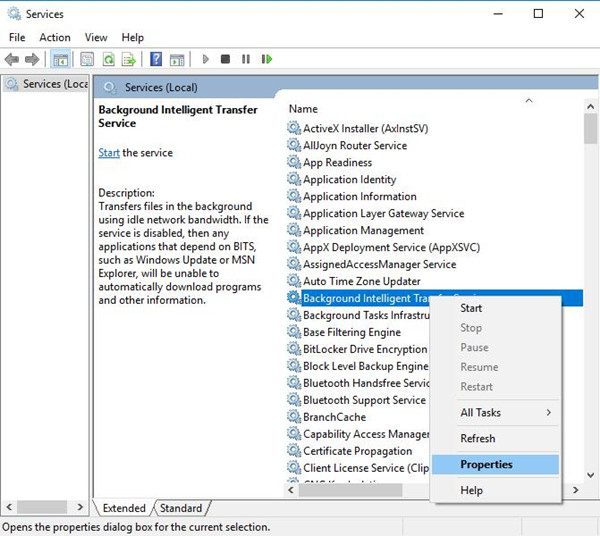
1. Press Windows + R to evoke the Run box and then type in services.msc in the box. At last, click OK to navigate to Services window.
2. In the Services window, scroll down to find out the Background Intelligent Transfer Service and right click it to Properties it.
3. Then under General tab in Startup type, select Disabled.
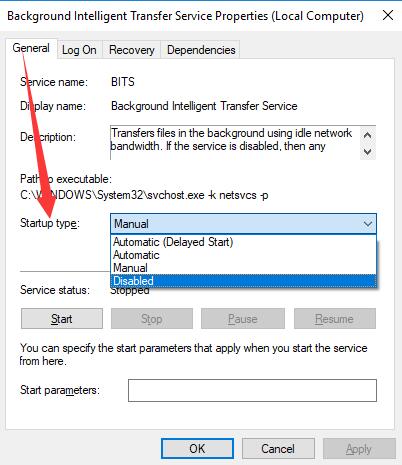
Then you can decide to right-click it to Enable the disabled service again and check if it can solve Windows Image Acquisition high CPU Windows 10.
Sometimes, Windows updates will generate high CPU issue by Windows WIA service. In this way, you are able to disable Windows update as what shows you about the Background Intelligent Transfer Service.
Solution 4: Stop SuperFetch
It is likely that the process Superfetch can also make WIA get into high CPU on Windows 10. Therefore, it is advisable that you manage to disable Superfetch.
1. Type in cmd in the search box and right click it to Run as administrator.
2. In Command Prompt, input the following command and hit Enter to run it.
net.exe stop superfetch
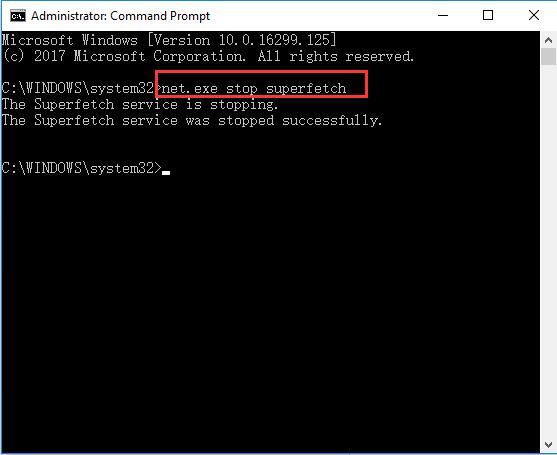
You can notice the Superfetch service is stopping on Windows 10 and you can also check in task manager that high CPU will not come up caused by Service host Windows Image Acquisition on Windows 10.
Solution 5: Update Graphics Drivers To Fix High CPU with Windows Image Acquisition Windows 10
The display card driver is another potential reason why your PC goes into high CPU or disk usage on Windows 10.
Since your video card drivers is incompatible or outdated, it may in some way give rise to high CPU by WIA.
To make things easier, you would be suggested to take advantage of Driver Booster to get the latest graphics card drivers for Windows 10.
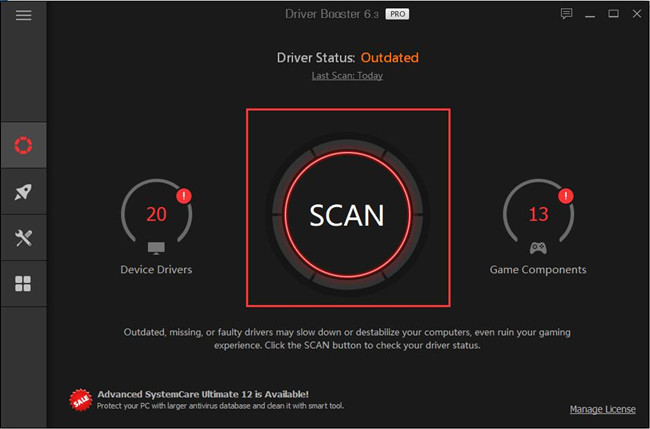
1. Download, install and run Driver Booster on your PC.
2. Click Scan by following the on-screen instructions.
3. Update Graphic driver.
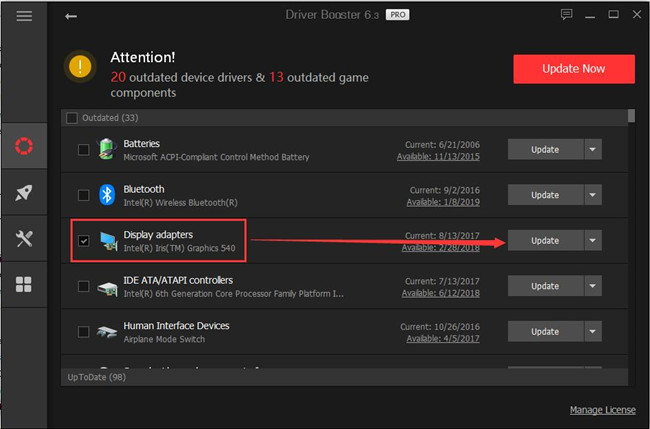
With the new display drivers, you are capable of removing high CPU resulted by Windows 10 process.
To summarize, you can fix Service host Windows Image Acquisition high CPU Windows 10 in line with the solutions provided in this article.
More Articles:
Fix Unsecapp.exe High CPU Usage on Windows 10