For Windows users, you can never ignore the significance of the CPU. If your computer CPU stumbles on errors, most normally, high CPU caused by ntoskrnl.exe or high CPU caused by WMI Provider Host.
While for many people, you may have no idea what the CPU is used for on your PC, let alone why you are supposed to track the CPU utilization or usage on Windows 10.
Contents:
Why need to check the CPU Usage on Windows 10?
How to Check CPU Usage in Windows 10?
What is the CPU?
CPU, short for Central Processing Unit, or you can simply recognize it as a processor, is used to perform all the tasks on Windows 10.
In view of the instructions offered by the programs or software on your PC, CPU is responsible for informing Windows 10 what to do and how to do in order or carry out various tasks in the task manager.
Why need to check the CPU Usage on Windows 10?
In some cases, it is recommended that you check the CPU in the task manager, for the CPU errors are responsible for different system problems on Windows 10.
According to the reports and surveys from users, CPU usage is often accompanied by:
1. Overheating.
2. BSOD issues.
3. Computer freezes or slow on Windows 10.
4. System crash.
5. …….
No matter what is the real case for you, an unavoidable choice for you is to check if there are any issues with your CPU.
As only if you are familiar with which program or application, Google Chrome or some antivirus software on Windows 10 can you solve various high CPU problems with powerful and right ways.
How to Check CPU Usage in Windows 10?
Now when it comes to monitoring the CPU usages on Windows 10, you can choose either the system tool – Task Manager or the third-party tools.
Methods:
1: Check CPU Usage in Task Manager
2: View CPU Usage with Advanced SystemCare
3: Monitor CPU Usage with CPU-Z
Method 1: Check CPU Usage in Task Manager
In Windows 10, you can always make use of a CPU monitoring tool—Task Manager to keep an eye on the CPU or memory usage of different programs.
In this way, as for the situation where you meet with some system issues on Windows 10, you are to make sure your CPU goes well by way of checking it in the task manager.
1. Right Click the Start and then select Task Manager from the list.
2. Under Performance, choose CPU.
Then you can see the CPU Utilization, Processes and Up time.
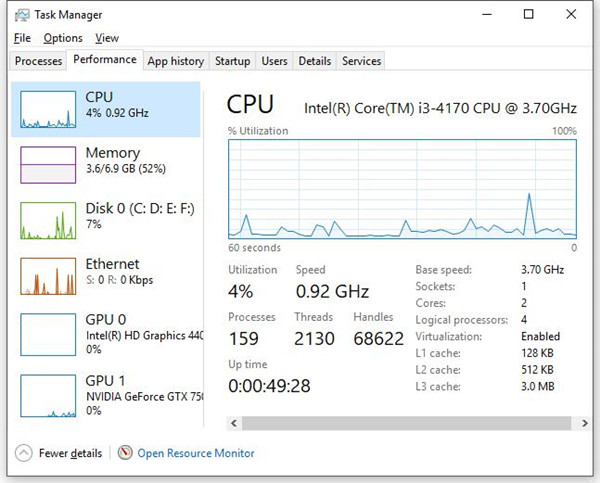
Or for checking specific software or program usage on Windows 10, you can tap to Processes, here you are enabled to see the concert CPU usage for all tasks.
3. Choose Open Resource Monitor to see the CPU usage or Overview or Memory or Disk usage on Windows 10.
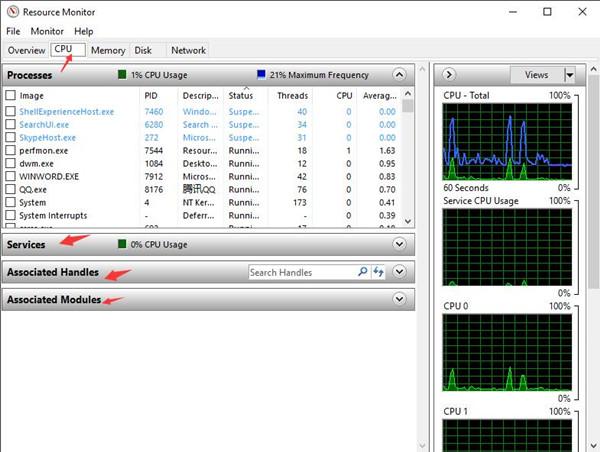
Here for CPU part, it is available for you to monitor the CPU processes, Services, and Associated Handles.
After checking the CPU usage for Windows 10, you can find out the exact CPU errors on your computer that lead to system issues, such as the ntoskrnl.exe blue screen of death or Svchost.exe high CPU usage issue.
Method 2: View CPU Usage with Advanced SystemCare
If you feel like a real-time CPU monitor, Advanced System Care can be a perfect tool available for you. No restricted to cleaning, optimization, and speedup, Advanced SystemCare offers to you a Performance Monitor, which shows you the CPU, RAM, disk usage, etc. on the Desktop if you needed.
Now open the Performance Monitor in Advanced SystemCare to inspect your CPU usage from time to time.
1. Download, install and run Advanced SystemCare on Windows 10.
2. Then hit Options (a settings icon) at the top left corner of Advanced SystemCare.
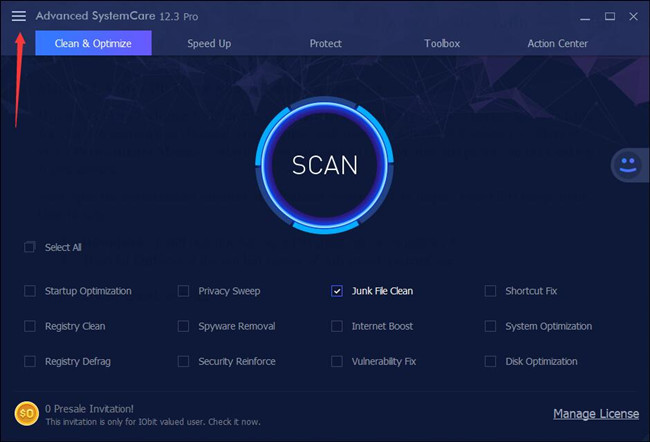
3. Locate Quick Settings.
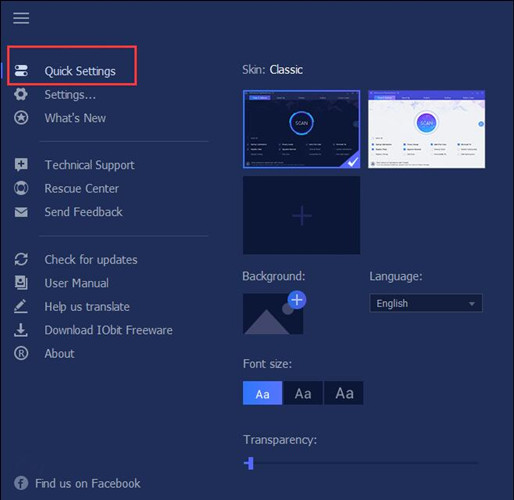
4. Then under Performance, switch on Performance Monitor.
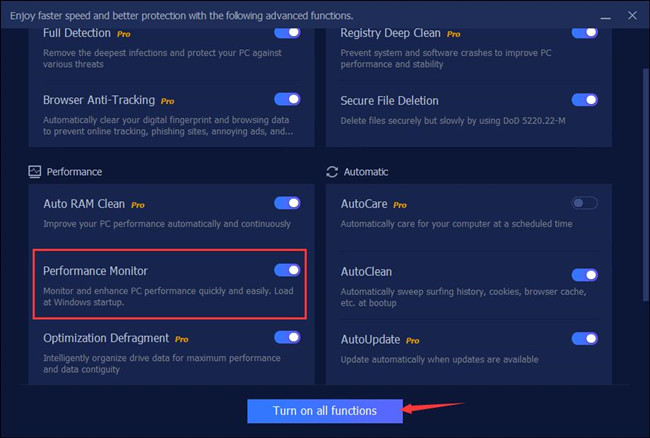
Or you can also Turn on all functions, such as Optimization Defragment, Auto RAM Clean, AutoCare, AutoUpdate, etc.
Upon turning on Performance Monitor, you can observe its presence on the Desktop.
5. Click the right-arrow icon to Maximize Performance Monitor.

6. Then locate CPU, and you can see Processes with high CPU usage, if needed, tick the box the one using high CPU to End Task.
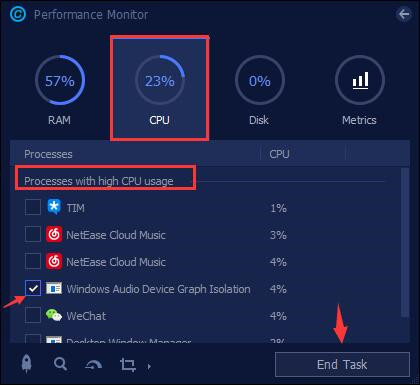
Obviously, besides checking CPU usage, with Performance Monitor, you can also monitor the usage of Disk and RAM. If necessary, you can keep Advanced SystemCare Performance monitor on to supervise the CPU usage on Windows 10.
Method 3: Use CPU-Z to View CPU Usage
Or for some users for whom computers are new for you, it is feasible that you make use of a CPU monitoring tool CPU-Z to check your Intel or AMD CPU usage on Windows 10.
On the CPU-Z site interface, you can clearly see the downloading choices available for you. There are usually five options open for you to download the CPU-Z on your PC, you can choose the exe or zip version.
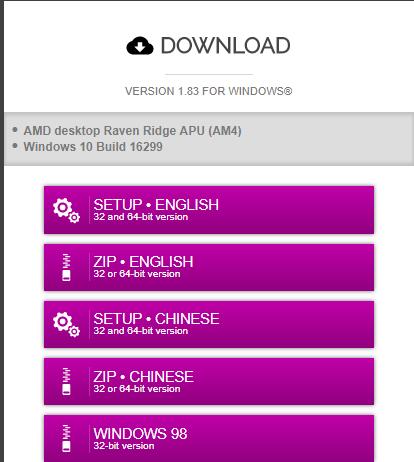
After downloading and installing the CPU-Z on your PC, you can use it to check the CPU usage, just go on with the instructions.
You can know about the use of CPU on Windows 10 from CPU-Z as the screenshot below shows you.
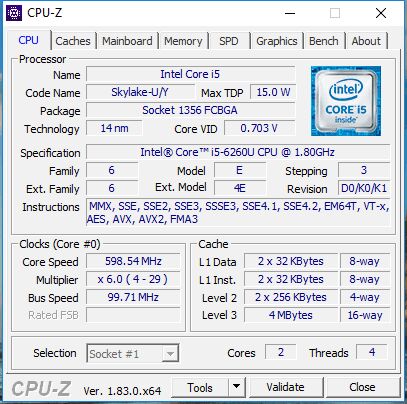
Once you are familiar with the situation of the CPU on your computer, you can know exactly what the CPU troubles are and figure out the solutions to fix them.
You must be aware of the importance to learn how to check and then manage CPU usage on Windows 10 when these windows problems come up.
If you have any troubles once finding the CPU issues on Windows 10, no matter it is the high CPU by some third-party software or the BSOD errors suddenly happened, make sure you have well mastered the CPU usage for all applications in task manager.
More Articles:
Solved: Unsecapp.exe High CPU Usage on Windows 10
Solved: Windows Image Acquisition High CPU Usage on Windows 10

