When you are to take a photo or video chat with others via Mac FaceTime, you may see the error message “no camera available” or “no connected camera”. Some users even consider whether the Mac camera is broken. What happened? How to fix the MacBook camera not working error?
Contents:
Why isn’t My Mac Camera Working?
Tutorials to Fix Camera Not Working on Mac
Fix for External Webcam Not Working on Mac
Why isn’t My Mac Camera Working?
There is an embedded camera for Mac computers like MacBook, MacBook Air, MacBook Pro, iMacs, and iMac Pro. However, for users of Mac Mini and Mac Pro, an external camera is needed if you want to take a photo or video.
Many factors may cause the Mac camera not to function. For instance, if multiple programs are using the camera at the same time, the screen time to use the camera will be limited. Or when you have not enabled the option to use the camera, the applications to use the camera run into errors.
How to Turn on Camera on Mac?
On Windows systems, you only need to enable the camera in Camera settings. But things go different on Mac.
On macOS, when you launched the in-built apps like FaceTime and Photo Booth, the camera will be activated immediately. Therefore, there is no need for you to enable the camera.
However, when you need to use the Camera on third-party applications, the authority reminder will pop up. The Camera will start working after being authorized to work in the application.
Tutorials to Fix Camera Not Working on Mac
Above are reasons why the Mac camera stops working. If you want to get the camera back to work, just follow the steps below.
If your camera can’t show a video or is in the black when you try to launch a program to use the camera, it may imply that the camera is covered by something. Sometimes, some users try to use a camera cover to protect the camera, which can also prevent hackers from accessing user privacy.
Solutions:
1: Exit Some Conflicting Programs
2: Enable Programs’ Permission to Use Mac Camera
5: Remove Screen Time Limitation for Camera
Solution 1: Exit Some Conflicting Programs
It is known that the Mac camera is automatically enabled by some Mac programs. Normally, you can run one or more programs to use the camera.
However, it is worth mentioning that macOS will allow the program that uses the camera most recently to save power, while other programs will be in the black in the Power Save mode.
Therefore, you would better not launch multiple programs that use the camera. Especially, when the Mac camera disconnects or isn’t working, you can turn off programs that use the camera.
1. In Dock, open LaunchPad > Other, and then open it.
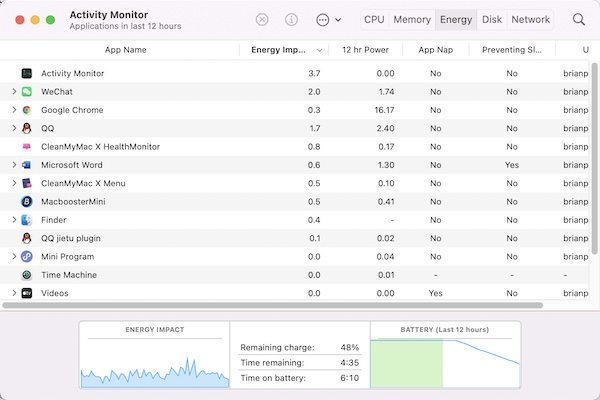
2. In the Other folder, find out Activity Monitor and hit to open it.
3. Exit all programs that use the Mac Camera like Skype, FaceTime, Photo Booth, Facebook, WebEx Teams, WeChat, and Zoom.
If you are not sure what applications are using the camera, you can save all documents and then close all apps. You can learn how to turn off Mac programs by following the steps below: how to quit all programs one-time on Mac.
4. Re-open Skype or any other programs to see whether Mac Camera can work normally.
Solution 2: Enable Programs’ Permission to Use Mac Camera
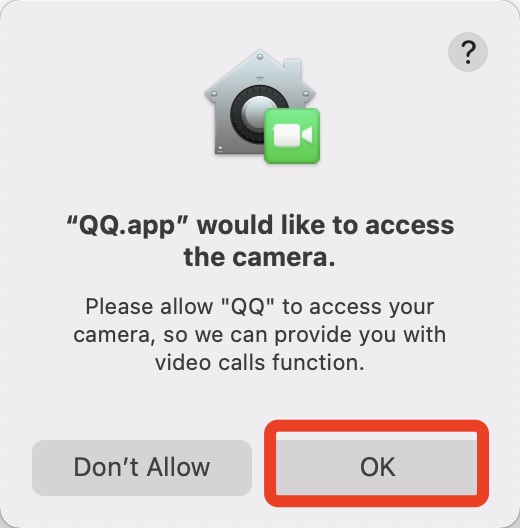
When you downloaded an app and wish to use it to take a video or make a video chat, user permissions to use the camera by the app are required.
Normally, when you first use an app’s video-related functions, macOS will automatically activate the camera permission. You just need to hit OK to gain permission.
Besides, you can also check what applications can access your Mac camera in Privacy settings.
1. Go to System Preferences > Security & Privacy.
2. On the left pane, hit Camera.
3. On the right pane, you can find how many applications are accessing the Camera. Hence, if you want to allow some apps to use the Camera, please tick the checkbox in front of the apps.
You can see that macOS in-built programs like FaceTime and Photo Boot have the right to access the camera, so they will not be listed here.
Solution 3: Restart Mac
If you noticed that MacBook Built-in Camera isn’t working even after you exit the applications, it may imply that some programs are still using the camera. Restarting the Mac may help resolve the Mac camera not working issue.
To reboot Mac, at the top of the Mac desktop, hit the Apple icon > Restart.
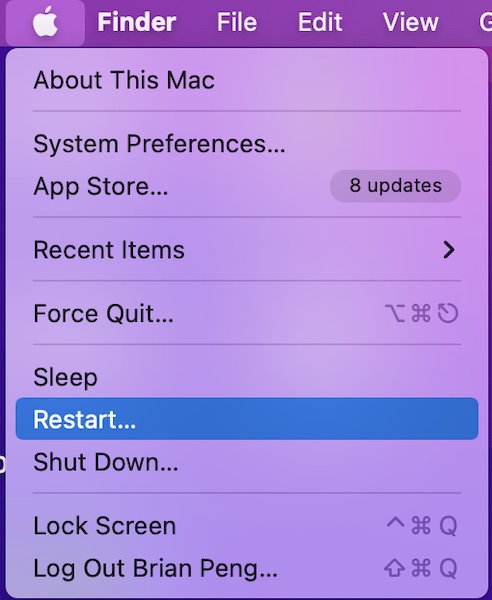
After the Mac reboot, you can turn on an application like Skype or FaceTime to test whether the MacBook camera is working well.
Solution 4: Reinstall the Application
Sometimes, when a Mac camera isn’t available, the problematic applications that use the camera are to blame. In this way, you can try to update some programs.
If the program is updated to the latest version, you need to uninstall the current version and then re-download the latest version from the Apple Store or the official website of the program. And here is the tutorial about how to uninstall programs completely on Mac.
Solution 5: Remove Screen Time Limitation for Camera
On Mac, Screen Time stipulates the permission of users to access different programs, including the camera. If your MacBook Air or Pro camera does not work on Mac, you can remove this setting.
1. Go to System Preferences > Screen Time > Content and Privacy.
2. Under Apps, find out the Camera and then uncheck the box of it.
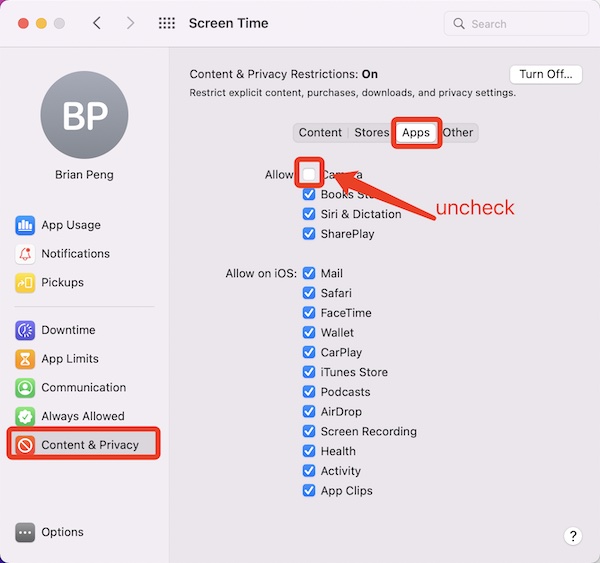
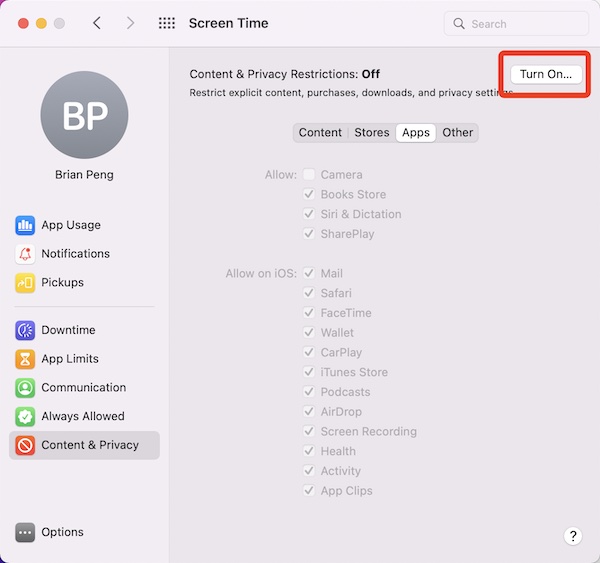
If the interface of Apps displays in grey and the settings are unavailable, you can hit Turn on on the top right corner to activate this interface.
Solution 6: Reset SMC
If you still find that your Mac Camera isn’t working as normal after you tried all the solutions above, you can try to reset SMC. SMC (System Management Controller) controls many settings for Mac, so resetting it may help in fixing the Mac camera not available.
You can check more details to Reset SMC.
Fix for External Webcam for Mac
If you are using Mac Mini or Mac Pro, you may be using an external Webcam. While if USB Webcam cannot see the video on Mac, you can follow the steps below to fix these problems step by step.
If you are connecting the camera to Mac via a USB port, you can unplug the Camera cable and then re-plug it into the USB port. Besides, you can try to plug the Camera cable into different USB ports to see whether the Mac external camera can go back to work.
If you are connecting the external webcam to the Mac using a USB hub, make sure the USB hub is working well. You can try to unplug all external devices connected to the USB hub except the Webcam to make sure the Mac Webcam not working issue is not caused by the conflicts between the external devices.
In addition, a Webcam driver needs to be installed to get the Webcam recognized by the Mac. Therefore, you can go to the official website to download the Mac Webcam driver and install it. In this way, you may see that MacBook Mini and Mac Pro camera is working now.
Summary:
In most cases, the Mac camera can run smoothly due to the stability and safety of macOS. However, if your MacBook Camera doesn’t work or isn’t available, you can try the above solutions to solve the MacBook camera problem. If necessary, you may have to resort to Apple Store to repair the Mac camera if you suspect that it may be physically broken.