In the task manager, you can always find high CPU caused by System interrupts on Windows 10. It means that something went wrong with your hardware or software, both the external and internal devices and drivers. Now get started to know what the System interrupts is and how to resolve the Windows 10 System interrupts.
What is System Interrupts Windows 10?
It is one of the processes of Windows operating systems, such as Windows 7, Windows 8, and Windows 10.
To be more specific, this Windows System interrupts process controls the communication between the hardware and the software. It is used to show you the System interrupts when there are any interrupts on Windows 10.
For instance, if you are using the mouse, this System interrupts would be sent to the relevant hardware and software, thus occupying little CPU in task manager.
But sometimes, when the hardware or driver error happens to your PC, high CPU caused by System interrupts may also pop up on Windows 10.
How to Fix Windows 10 System Interrupts High CPU?
From hardware issue fixing to software problem, you can attempt to deal with System interrupts causing high CPU Windows 10.
First and foremost, you might as well restart your PC to see if it helps with your task manager System interrupts error. If it failed to rescue Windows from high CPU, you should move on.
Solution 1: Remove USB Root Hubs
Now you are to firstly fix the hardware issues that lead to high CPU by System interrupts, which is the USB device hub. It is suggestible that you manage to disable the USB root hubs in Windows 10 Device Manager.
As it has been proved that the external USB device can to some extent give rise to System interrupts problem, you would better try this method.
1. Go to Device Manager.
2. Expand Universal Serial Bus controllers and then right click USB Roots Hubs to Disable device.
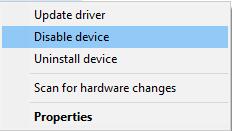
Here except all the necessary USB hubs, such as the mouse, keyboard, you can try to disable all these devices.
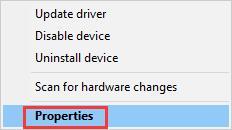
3. As for the mouse or keyboard USB Root hubs, under the Universal Serial Bus controllers, right click the USB hubs to open their Properties.
4. Then in USB Root Hubs Properties window, under the Power tab, locate Attached devices to make sure all the USB devices you are using are listed.
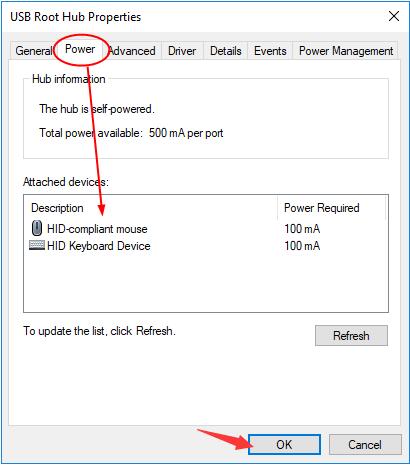
Normally, the mouse, keyboard or external USB device will display in Attached devices.
In this situation, you will have disabled all the USB Root hubs except those for mouse, keyboard. It is advisable that you navigate to task manager to check whether System interrupts uses high CPU on Windows 7 or Windows 8, 10.
Here besides disabling the USB Root Hubs, you are able to disable Network adapter as well in order to resolve the System interrupts Windows 10.
Solution 2: Disable Sound Effects
Apart from the USB device, when it comes to Windows 10 System interrupts hardware error, there is also a kind of audio enhancement. If you have enabled this feature, it seems high CPU can appear with System interrupts.
Therefore, you are supposed to disable all the audio effects on Windows 10. Prior to that, you need to set your audio device as default.
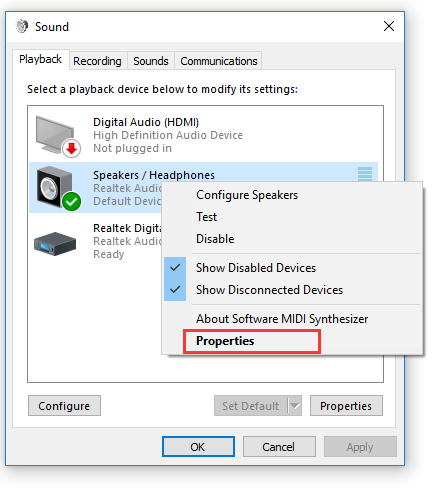
1. Right click the Sound icon in the right corner in Windows 10 taskbar and then choose to Playback devices.

2. Then select the audio device to Set default.
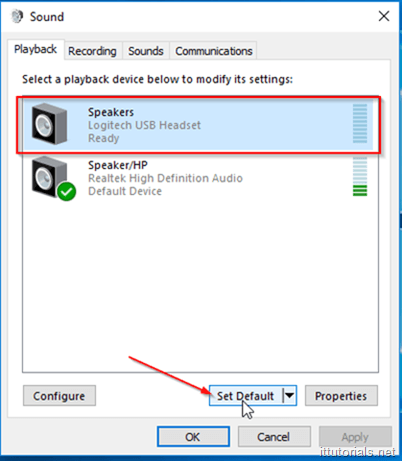
Here set the Microphone as default.
3. After that, right click the Default device to open its Properties.
4. Under the Enhancements tab, check the box of Disable all sound effects.
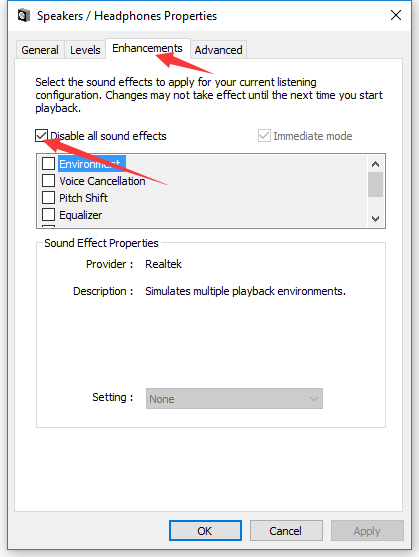
Finally, hit Apply and OK to save changes.
Without the audio enhancements on Windows 10, your System interrupts will not interrupt and cause 100% CPU usage.
Solution 3: Update Network Drivers and USB Drivers
In fact, it is not limited to USB or network drivers for Windows 10, you may also need to update other device drivers, like the AMD or Intel graphics card driver or Bluetooth driver. It is said the up-to-date device drivers can remove your Surface Pro 3 System interrupts high CPU Windows 10.
To make the best of the convenience from Windows systems, you would rather choose to get the updated drivers via Device Manager.
1. Open Device Manager.
2. Expand the Network adapters and then right click the Network driver to Update driver.
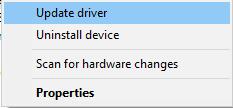
3. Then let Device Manager Search automatically for updated driver software.
Device Manager will install the latest drivers for Windows 10.
Or you are qualified to navigate to the official site of your device to gain the driver you need. Of course, it is also available for you to make use of a third-party tool to help you download all device drivers for Windows 10.
As long as the most up-to-date drivers are downloaded, there will be no more software error on your PC that can make System interrupts high CPU usage Windows 10 happen.
Solution 4: Disable Windows 10 Fast Startup
Last but not least, fast startup on your PC is also to blame. Since once you have enabled this choice, your computer will log off with some programs on so as to make sure you can boot up Windows 10 quickly. In this sense, the fast startup can be compared with the sleep or hibernate mode.
It is feasible you attempt to turn off the fast startup option to fix System interrupts Windows 7.
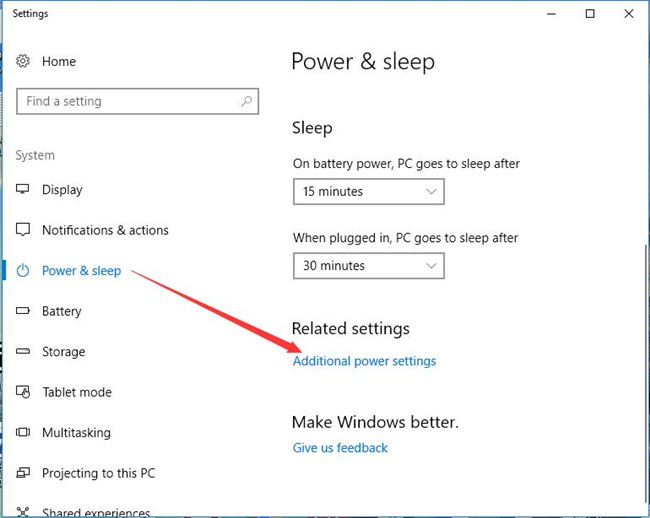
1. Go to Start > Settings > System.
2. Then under Power & sleep, hit Additional power settings.
3. Then Choose what the power buttons do.
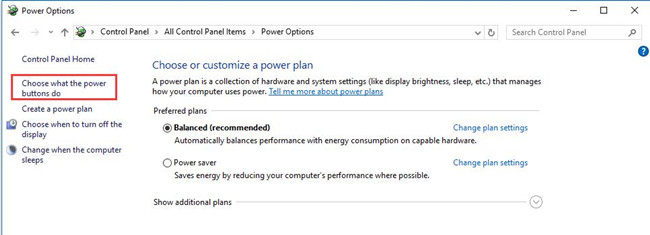
4. Then in the middle of the following window, hit Change settings that are currently unavailable.
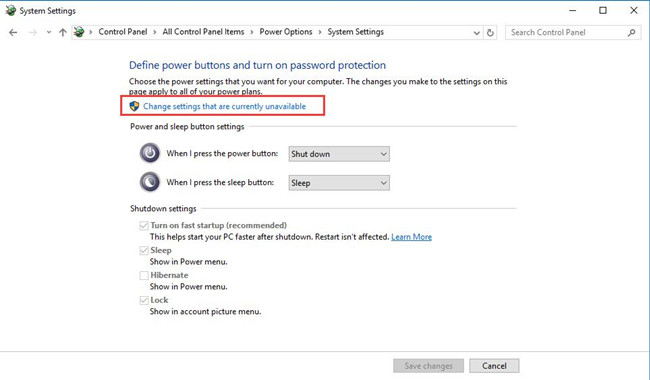
5. Now you can see Fast startup option. Try to uncheck the box of Turn on fast startup and then click Apply and OK to save changes.
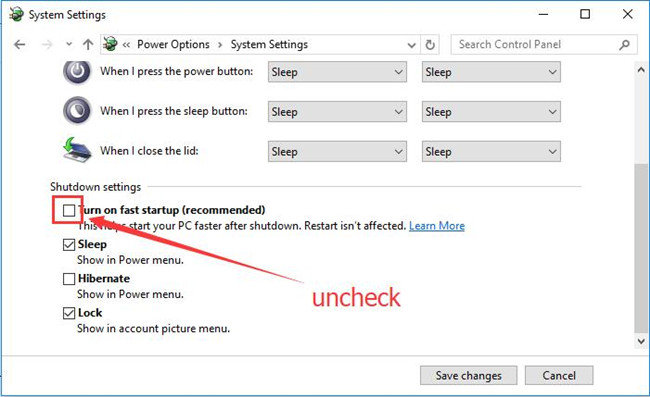
As you have disabled Windows 10 fast startup, you are unable to start your PC after shutdown. While it is likely high CPU usage by task manager System interrupts disappeared.
All in all, you need to make sure there are not so many external hardware devices and software errors have also been solved if you would like to fix System interrupts high CPU usage on Windows 10 successfully.
More Articles:
Fix WMI Provider Host Caused High CPU Usage on Windows 10
5 Ways to Fix Desktop Window High CPU Error
Solved: Windows Image Acquisition High CPU Usage on Windows 10, 8, 7


