Are you wondering how to record screens on a Windows 10/11 computer? If you’ve been trying to record your screen on Windows 10/11 to make a tutorial video, or you want to share a wonderful moment with friends, this article is perfect for you.
To capture screens on a Windows 10/11 laptop like Dell, Lenovo, HP, and more, there are different options open to you. You can make the best use of the built-in screen recorder, and you can also turn to a professional screen recorder for help.
In this post, we will discuss 5 different methods to record your screen on Windows 10 and Windows 11. We’ll take a look at the Windows-based system screen recorder and other reliable and efficient third-party screen recorders for screen capturing with ease.
Let’s jump right in.
Way 1: Screen Record on Windows 10/11 Using Game Bar (Built-in)
Game Bar is a built-in recording tool in Windows 10/11. As initially designed for recording gameplay, it also offers you excellent screen capturing and sharing tools to capture other activities on Windows 10/11.
When the Game Bar is enabled, you can easily record a clip or take a screenshot when something awesome happens. It is a solid video capture option for app and gameplay recording, and it offers convenient shortcuts for quick start or stop.
Note: You can only screen record a single app at a time using Game Bar, and it doesn’t support capturing Windows desktop or File Explorer.
How to screen record on Windows10/11 with Game Bar
First and foremost, you need to find and turn on Xbox Game Bar on your Windows 10/11.
1. Click the Start button to open the Settings.
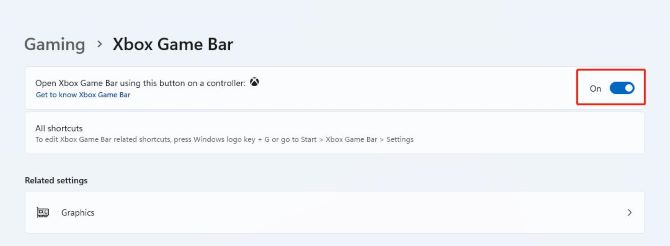
2. Select Gaming > Xbox Game Bar. There is a toggle on the right. If it is Off, click the toggle and turn On the Game Bar.
Now you can follow the steps to start the screen recording with Game Bar.
3. Launch the Game Bar on your Windows 10/11 by pressing the Windows+G keys. You’ll see a widget bar at the top of the screen.
4. Click the Settings icon to set up your recording preferences.

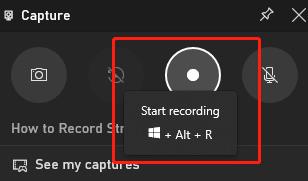
5. Click the Start Recording button from the Capture widget or press the Windows + Alt + R keys together to start recording.
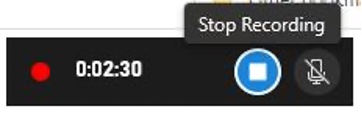
6. Click the Stop Recording button on the recording toolbar or press Windows + Alt + R again to stop recording.
However, if you find the Game Bar failed to take a video of the screen on Windows 10/11 or it slows down your PC, you can disable Game Bar.
Way 2: Screen Record on Windows 10/11 Using A Screen Recorder (Recommended)
While you can choose the built-in Game Bar for recording what’s happening on your Windows 10/11, there are many excellent third-party applications available to capture screens on your computer with higher quality and unlimited length.
Among them, iTop Screen Recorder is on our top list because of its rich functions of recording and flexible controls. iTop Screen Recorder is an easy, expert, and powerful screen recorder for Windows 10 and the latest 11.
iTop Screen Recorder captures multiple screens, voice-over, video with webcam overlay, and more on your Windows screen. It also builds an additional video editor and video compressor to further enhance your recording for later watching or sharing.
Key features of iTop Screen Recorder
- Record any area on your Windows 10/11 screen
- Record screen in Windows 10/11 with audio and webcam
- Record Windows 10/11 screen in HD/4K without lagging
- Take screenshots while recording on Windows 10/11
- Multiple output formats and advanced editor provided
How to screen record on Windows 10/11 with iTop Screen Recorder
1. Download, install, and run iTop Screen Recorder on your PC.
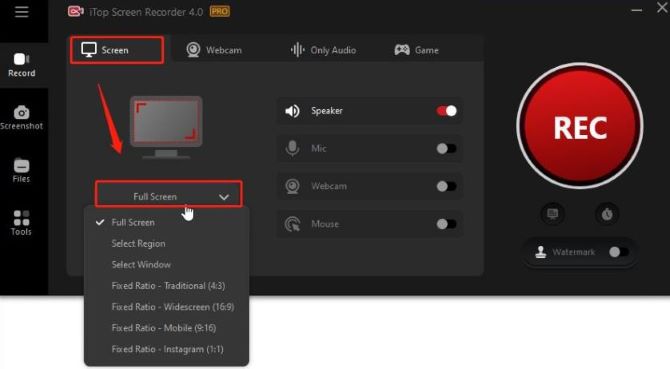
2. Click the drop-down arrow beside Full Screen to select the region to record.
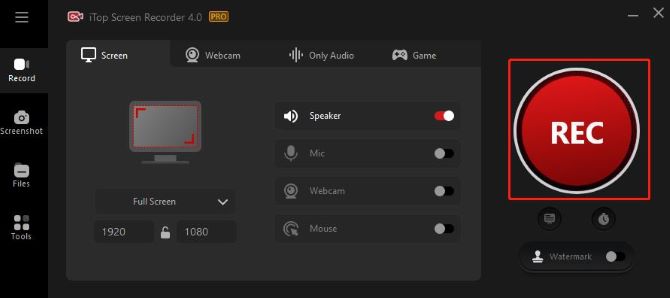
3. Turn on your Speaker, and keep your Microphone, Webcam, and Mouse off.

Tips: If you see a red “x” for some features, it means you don’t have the related devices installed or connected to your computer.
4. Click the red REC to start screen recording on Windows 10/11.
5. Click the Stop button or press F9 (default hotkey) to end the recording.

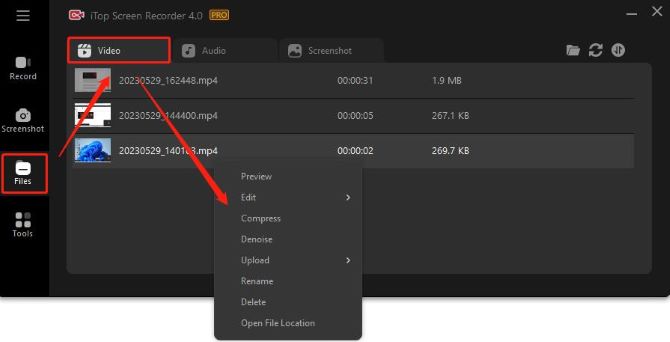
6. Click Files > Video on the left panel to find the recorded video files. Right-click the video name and select the corresponding tab to upload, delete, preview, edit, etc.
You can also click Tools on the main screen and select Quick Editor, Advanced Editor, Compressor, and Denoiser to manage your recordings.
Advanced Settings:
In addition to the basic recording functions, you can also enjoy customized features to screen record on Windows 10/11 according to your specific needs.
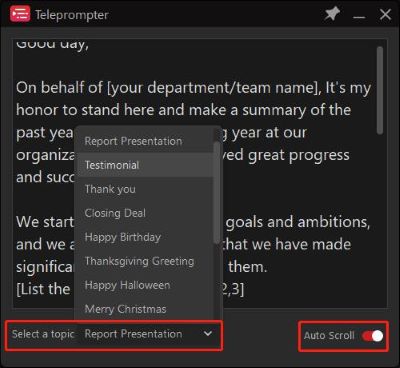
Teleprompter: you can pre-written the scripts to make your explainer videos more efficient.
1. Click Teleprompter icon under REC.
2. Select a prewritten script for your recording or edit your personal script.
Recording schedule: you can automatically start recording at a specific time on a daily/weekly schedule or run an Auto-ending Recording as you like.
1. Click Recording Schedule icon under REC.
2. Click Add to create your recording schedule with its name, start and end time, and more, then click Add to apply the settings.
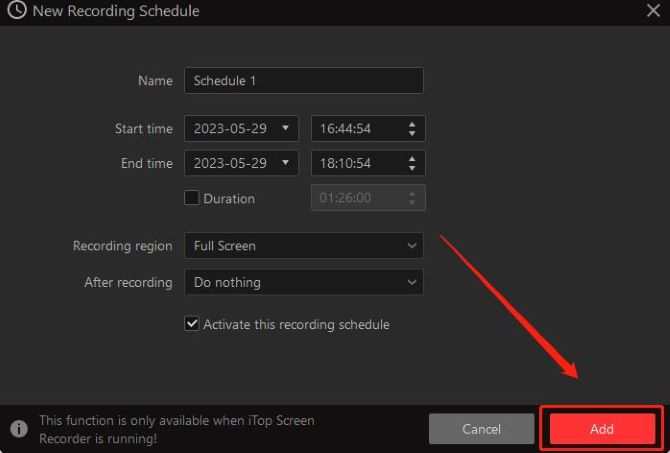
Note: This function is only available when iTop Screen Recorder is running.
Way 3: Screen Record on Windows 10/11 with OBS Studio
OBS is one of the most popular open-source, cross-platform streaming and screen recording tool available for Windows 10/11.
It allows you to create stunning videos by providing you with some professional recording tools. For example, you can choose from many different and customizable transitions and add them to your scenes to make your work more impressive.
However, OBS is more designed for professional gamers and does a lot more than just record screens. Many people may find the extra features confusing and unnecessary.
How to screen record on Windows10/11 using OBS
1. Download and install OBS Studio, then run it on your Windows 10/11.
2. Go to Sources tab, click on “+” icon, then select Display Capture. In the new open window, click OK.

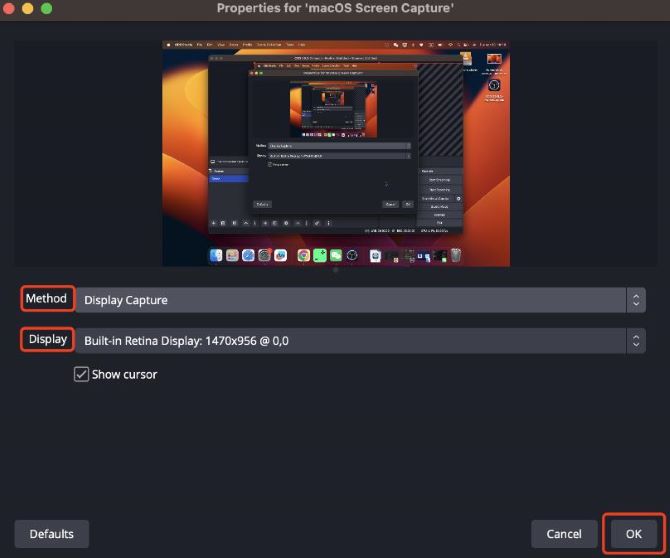
3. Select the Capture Method and Display from the drop-down menu, then click OK.
4. When you are all set, simply click on Start Recording, and your Windows 10/11 screen recording will begin.
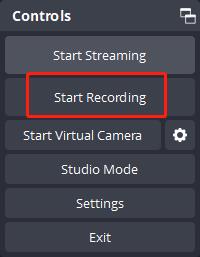
5. Click on Stop Recording when you are finished.
Way 4: Record Your Screen on Windows 10/11 with PowerPoint
Microsoft PowerPoint comes with a feature that lets you record your screen with audio. It lets you export the video from the slideshow to any folder on your Windows 10/11, so you can use the recording much like any video file.
The main drawback of using PowerPoint to record your screen is that you’re stuck only recording in PowerPoint. This is fine for some people, but if you want to record a meeting or a game, you’ll need to use a different software.
How to record your screen on Windows10/11 using Powerpoint
1. Click Insert > Media > Screen Recording to create a new slide.
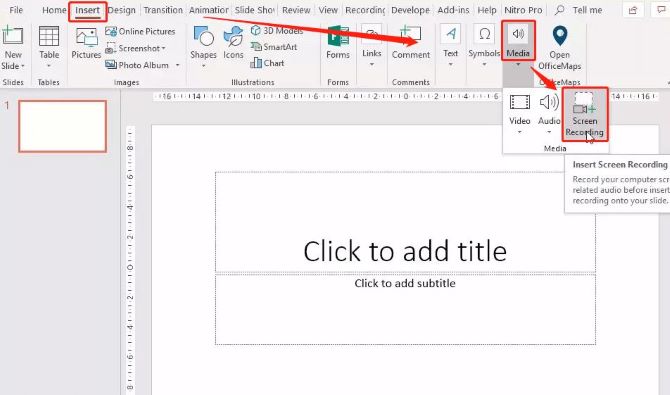
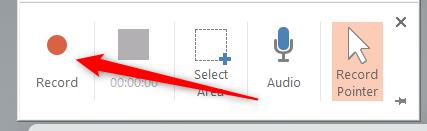
2. Drag the cursor and select the area of the screen you want to record. You can also use this menu to enable/disable audio recording and toggle the cursor’s visibility.

3. Click Record or press Windows+Shift+R together to start recording.
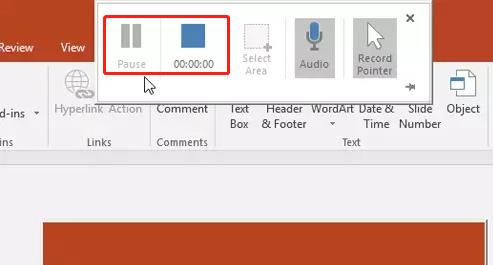
Tips: Use the pause button any time you need to, and then select Record again to resume the screen capture.
4. Click the Stop button, or press the Windows+Shift+Q keys to end the recording.
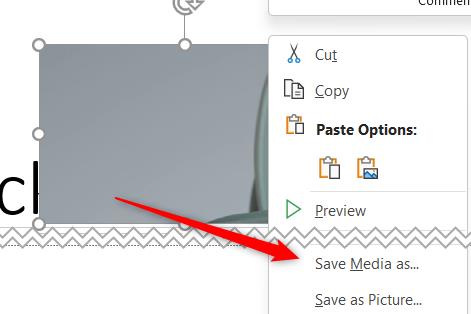
5. The recording is automatically inserted into the slideshow. To save it as a separate file, right-click the video and select Save Media As.
Way 5: Record Your Screen on Windows 11 with Snipping Tool
Snipping Tool is not a new feature of the Windows operating system and most users have been using this tool to take screenshots of their screen for a while now. However, most users are unaware that you can now record videos using this tool.
If you have Windows 11 (build 22621.1344) or later, the Snipping Tool has a screen recording option that lets you record the entire desktop or draw a box around just that portion of the desktop you want to capture.
Note: You cannot crop or edit the footage using Snipping Tool. And it doesn’t support audio recording.
How to record your screen on Windows10/11 using Snipping Tool
1. Search for and open Snipping Tool from the Start menu.
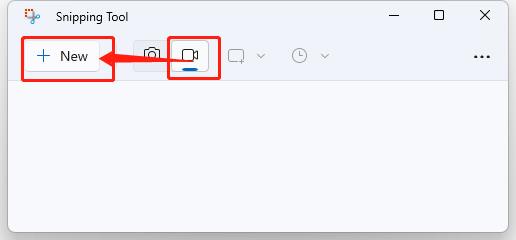
2. Select Record (the camera button), then press New.
3. Click to drag and drop a rectangle indicating the portion of the screen you would like to record.
4. Click Start to begin recording. You will see a 3-second countdown begin for your recording.

5. Select the Pause icon to temporarily stop the recording, or click the Stop icon to end the whole recording.
In conclusion, this article has covered 5 easy ways to record your screen on a Windows 10 or Windows 11 PC. Whether you’re a gamer, an educator, or just want to record your screen for sharing, there’s a screen recording solution to fit your needs.
FAQs About Screen Record On Windows 10/11
A: Yes, both Windows 10 and Windows 11 come with a screen recorder named Xbox Game Bar. Besides, in Windows 11, the Snipping Tool is integrated with an in-built video recorder, which comes in handy in many ways.
A: You can record your screen with audio on Windows 10/11 using Xbox Game Bar.
It allows you to record your screen with system sound and audio from an external mic. You can also use a third-party recorder to enjoy advanced audio recording features.
A: After reviewing several screen-recording software, we recommend iTop Screen Recorder for both beginners and professionals to record on Windows PC. This powerful tool offers customized options with an easy-to-use interface.
A: You need to install a screen recorder that supports choosing the recording region freely. Then, launch the recording software on your computer and select the part of screen that you want to record.
More Articles:
Fixed: OBS Game Capture Black Screen on Windows 10, 8, 7